
Install Windows 11 on unsupported hardware from USB. With the software in the following article and a few basic steps, you can create a Windows 11 installation USB on all computer models, regardless of whether it meets the minimum hardware requirements of Windows 11 or not. In addition, this will also eliminate questions about privacy.
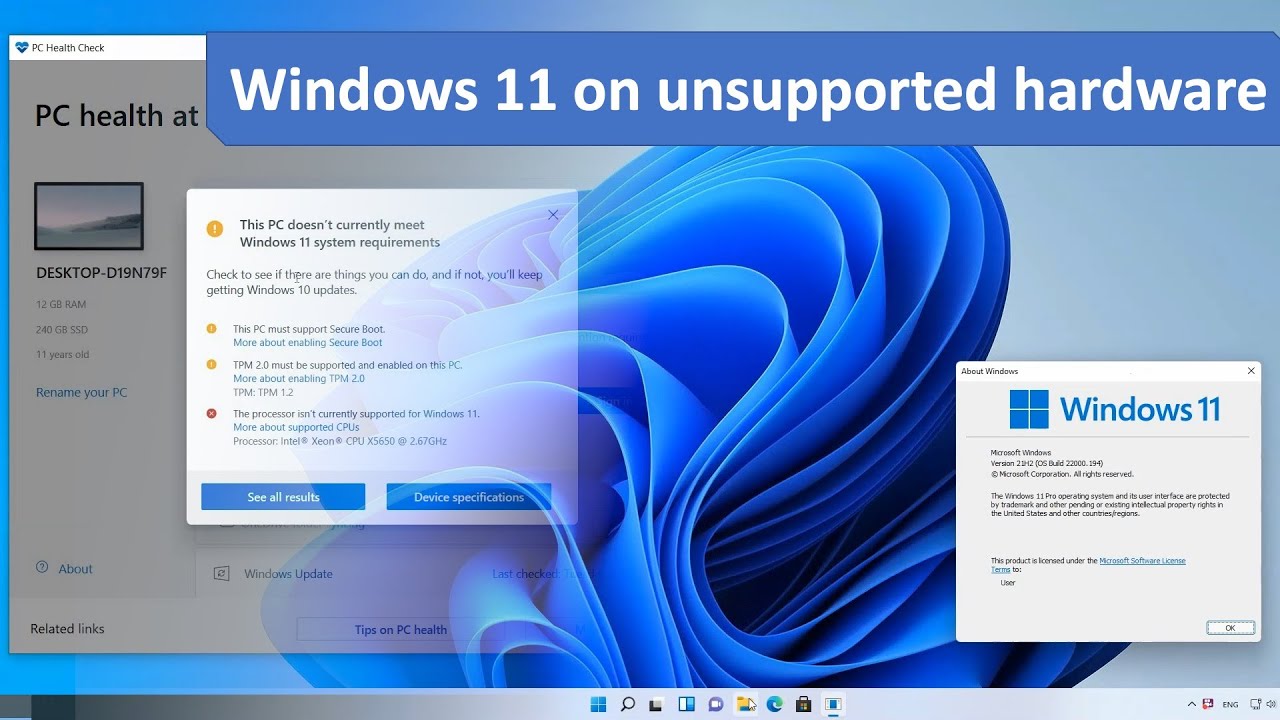
Table of Contents
Conditions to update Windows 11 official version
For new models after October 5, 2021, Windows 11 will be built-in. As for laptop devices sold before this time, what conditions are needed to be able to upgrade to Windows? 11.
To be upgraded to Win 11, laptop devices using the Windows 10 operating system must be running the Windows 10 version 2004 update and have installed the update on September 14, 2021. For some features there will be specific configuration requirements as follows:
- CPU : 2 GHz or higher on a 64-bit System on a Chip (SoC) compatible processor.
- RAM : Minimum 4GB.
- Storage capacity : from 64GB or more.
- DirectX : Version 12 or later.
- TPM: Trusted Platform Module (TPM) from TMP 2.0 or later.
- Display: 9 inches or more with HD resolution (720p) or higher.
- Internet Connection and Microsoft Account : Windows 11 Home requires an Internet connection and a Microsoft account to complete device setup upon first use.
- Secure Boot: Windows 11 requires firmware that supports UEFI v2.3.1 Errata B has the authority to certify Microsoft’s Windows in the UEFI signature database.
- Windows version: Your device must be running Windows 10, version 2004 or later, to upgrade through Windows Update.
Install Windows 11 on unsupported hardware from USB
It can be seen that in order to be able to install Windows 11, your computer must meet quite strict conditions. However, there is still a way to install Win 11 on a machine that does not support these two factors.
Clean install Win 11 from a custom version on GitHub
On GitHub, download a script to find and load Windows 11 from Microsoft’s servers. It allows you to cleanly install Windows 11 from scratch on computers that do not support Windows 11 even if you have limited compatible hardware (including TMP 2.0).
Here’s a quick guide on how to do it
- First, download the unofficial Windows 11 tool from Github.
- Then extract and run MediaCreationTool.bat.
- Select 11 as the MCT instance.
- You can choose to create ISO or USB.
- Select Yes in PowerShell.
- Select 1 of 2 USB flash drive tools or ISO file > Choose file location.
- Select Next. Now you can download Windows 11 without having to meet the requirements from the system anymore.
For easy understanding, here we will go into detailed step-by-step instructions on how to create a USB to install Windows 11 for unsupported computers.
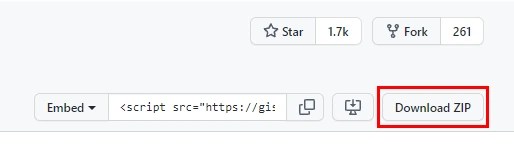
Step 1 : Visit the address here and download the zip file as shown.
Step 2 : Extract the downloaded file. Then run MediaCreationTool.bat . If there is a danger warning window, don’t worry. Click Run anyway to continue the running process.
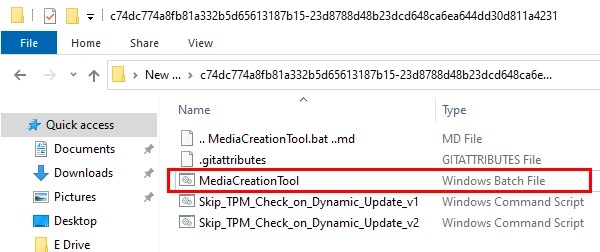
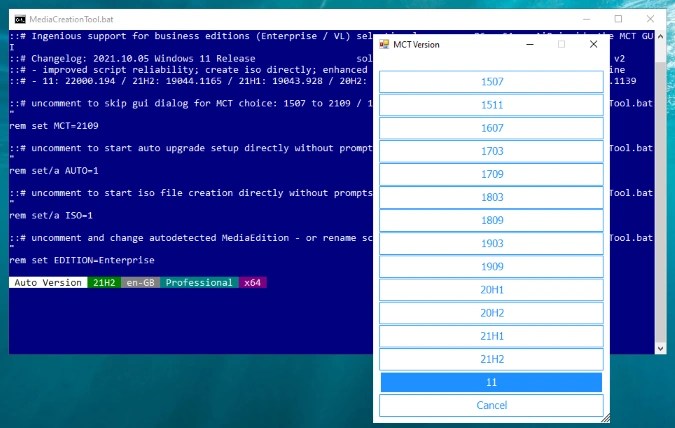
Step 3: After running, the program will be opened. Select 11 (at the bottom) for the MCT version.
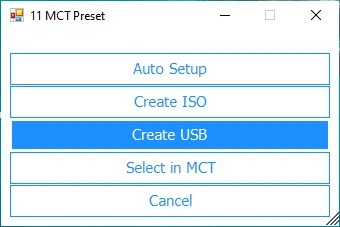
Step 4 : The screen displays Create ISO and Create USB options. Select Create USB when you want to create a Windows 11 launch USB to install on another PC. Curve if choose Create ISO when you want to install it on a virtual machine.
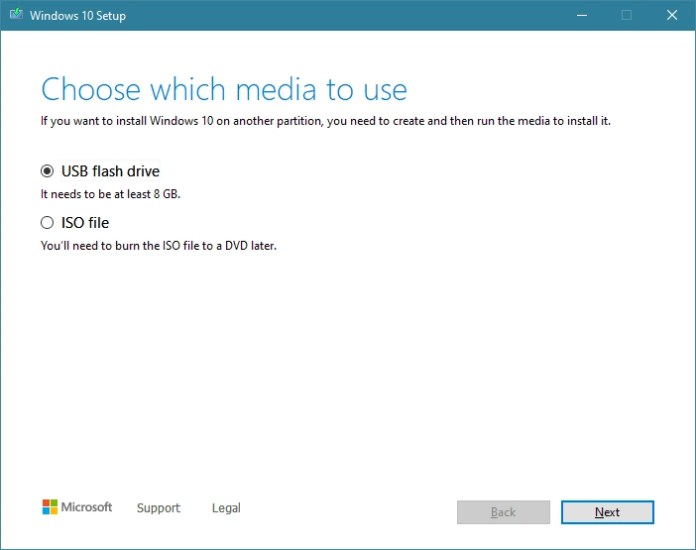
Step 5 : Select Yes to allow Windows PowerShell to launch the media creation utility. The screen will show Windows 10 Setup. Please ignore because you are installing Windows 11.
Step 6 : In the window select USB flash drive or ISO file , select the media you want to use.
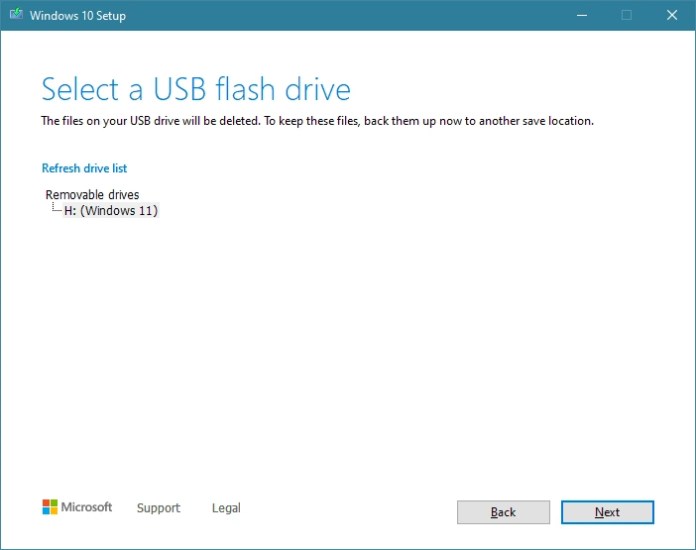
Step 7: Select the drive for the USB flash drive and the file address for the ISO file. Click Next.
Step 8: The process of downloading Windows 11 from the server to your computer will begin. During the download process, you may see a request to Download Windows 10. However, you do not need to worry, the Windows 11 download process is still happening normally.
Step 9 : Once it has been successfully installed, you just need to start it up as usual. Wish you success with how to create a completely new Windows 11 USB installation on your computer.
Installing Windows 11 bypasses TPM 2.0 and Secure Boot checks
Your computer does not support installing Win 11 because it does not meet TPM 2.0 or only has TPM 1.2 standard? Don’t worry, GhienCongListen will show you how to install Windows 11 on a machine that doesn’t support TPM 2.0 or secure boot.
Computer with TPM 1.2 or CPU that doesn’t meet Windows 11 requirements
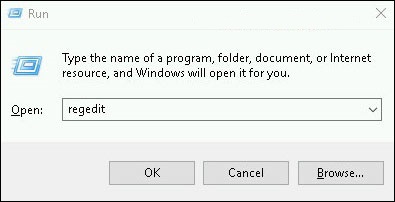
Step 1: Open Windows Registry Editor. Use Windows + R key combination > Type in “regedit” > Press Enter .
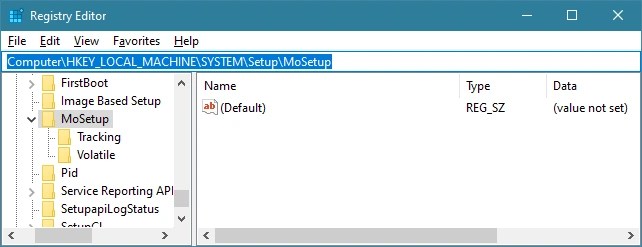
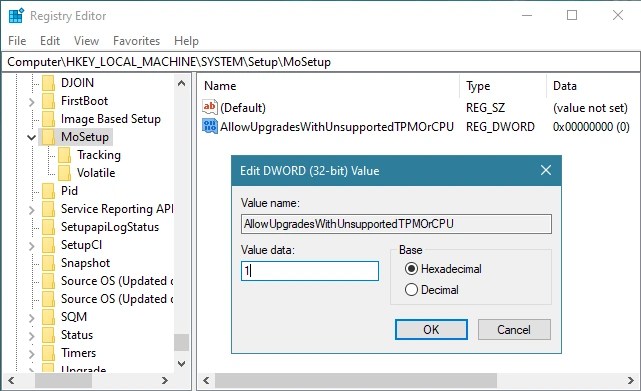
Step 2: Go to Computer > HKEY_LOCAL_MACHINE > SYSTEM > Setup > MoSetup or paste the following address line Computer / HKEY_LOCAL_MACHINE / SYSTEM/Setup/MoSetup (as shown).
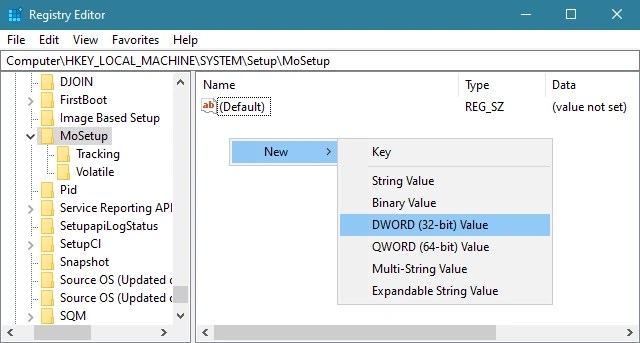
Step 3: Right-click > Select New > DWORD (32-bit) Value.
Step 4: Name it “AllowUpgradesWithUnsupportedTPMOrCPU”.
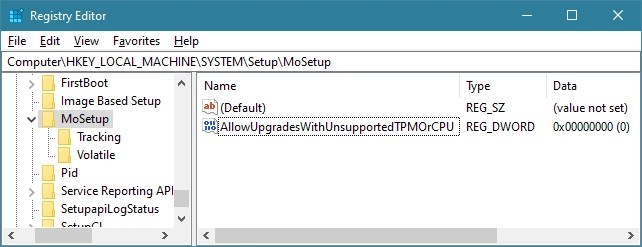
Step 5: In the Value data section (as shown), enter “1” > In the Base section, select Hexadecimal > Select OK.
Now, if you find this too technical or feel uncomfortable editing the registry, you can do this with a few clicks. Simply download our custom registry files and double-click the required file to get the job done. If prompted, confirm the action by clicking Yes.
Download the automatic executable of the steps above here.
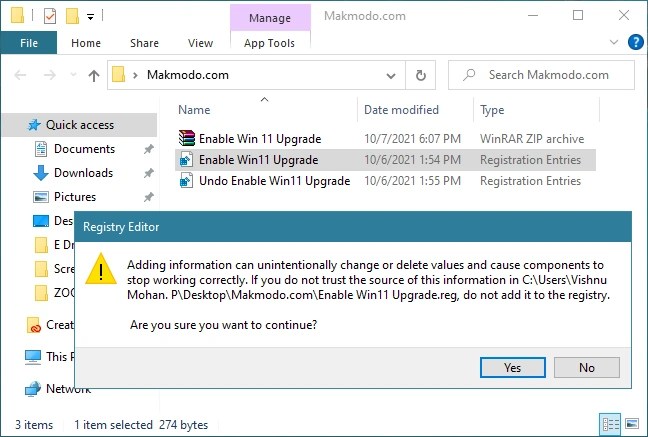
The above zip file contains a few registry files where Enable Win11 Upgrade.reg will do the registry hack and Undo Enable Win11 Upgrade.reg will revert the registry tweaks and return them to their normal state.
Download the official Windows 11 Installation Assistant here and launch it to start upgrading your PC to Windows 11. If prompted, simply agree to the warnings.
Computer without TPM
Step 1 : Download Windows 11 ISO file here
Step 2: Create a Windows bootable USB drive using Rufus free software here
Step 3: Modify the Windows Registry
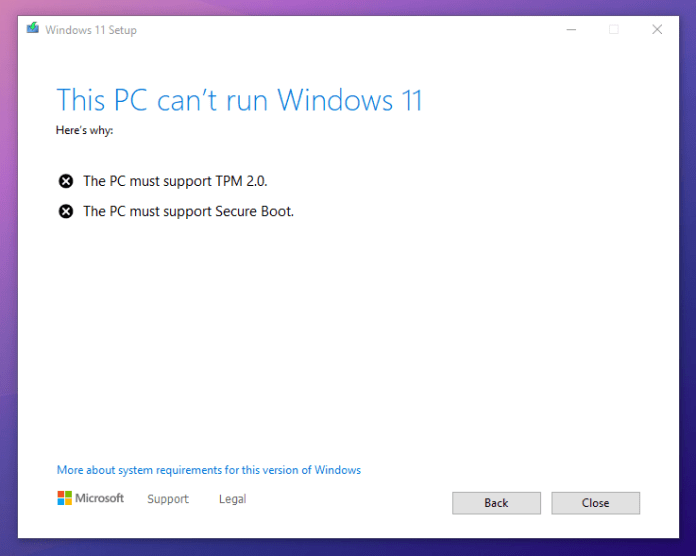
- When booting from the USB, the computer will appear the words “This PC can’t run Windows 11”.
- At this screen, click the back button in the top right corner. Open the Command Prompt Window (CPW) with the Shift + F10 key combination .
- Here , type in the word “regedit” > Enter .
- Select HKEY_LOCAL_MACHINE > SYSTEM > Setup .
- Right click > Settings > New > Key and name it “LabConfig”.
- Right-click LabConfig > Select New > DWORD (32-bit) Value .
- Name it BypassTPMCheck .
- Right-click on the newly created BypassTPMChec item > Select Modify… > Edit at Value data to 00000001 > OK .
- Do the same, you need to create another DWORD value . This time you name it BypassSecureBootCheck > Edit the value to 00000001 > Select OK .
- So you’ve got 2 DWORDs.
- Return to the settings screen. Click Install now again and the installation will begin. This time you won’t need to meet the TPM nor Secure Boot requirements anymore. Then you just need to proceed with the normal installation.
- In the next window, the computer will prompt you to enter the activation key, which you can skip by selecting: “I don’t have a product key.” .
- With the next window, multiple versions of Windows 11 will appear. Choose one of them.
- At the next screen, tick the line I accept the Microsoft license terms > Next.
- The installation process begins. Wait a moment and the Windows 11 operating system is on your computer.
How to see if your computer does not lack any conditions to upgrade Windows 11
You can check if Windows 11 supports PCs by downloading and running Microsoft’s PC Health Check application.
- Download PC Health Check software at the bottom of the website here.
If your PC is supported, upgrading to Windows 11 is easy. You can do it in just a few clicks.
If Windows 11 doesn’t officially support your PC, PC Health Check will say it “doesn’t currently meet the Windows 11 system requirements” and tell you why. If your PC reporting tool is not supported, the process you need to follow will depend on the problem it reports. You can simply change the setting in your PC’s UEFI firmware (setup in the BIOS) to make your PC supported, or the process could be more involved.
Should you install Win 11 now?
We recommend that you do not upgrade your unsupported PC to Windows 11. With an announcement from Microsoft, you can safely use Windows 10 with support with security updates until at least October next year. 2025.
Windows 11 doesn’t have any of the major features that make it a must-have upgrade, and Microsoft warns that unsupported PCs can experience serious buggy issues. In fact, Microsoft warns that it may eventually stop providing security updates to unsupported PCs running Windows 11.
Whatever you do, we recommend backing up your important data first. It is important to have backups, especially when upgrading to a new operating system, and especially when that new operating system is not officially supported on your hardware.
So really, if you don’t have any special needs that are only available in Win 11, it’s temporarily not necessary to rush to update the version soon. With the Win 10 version, we have used it very well. You can wait until the official version is released and then install it.
However, if you are interested in running Windows 11 on unsupported hardware, we will help you with how to install Win 11 on a machine that does not support TPM 2.0 or Secure Boot.
Above is all the information you need to know about Install Windows 11 on unsupported hardware from USB.


