How to remove Crop Marks in Word . Microsoft Word – Removing Crop Marks. “Crop Marks have appeared in all my documents, but there doesn’t seem to be an apparent way to remove them. Help!” If you want to remove crop marks, cross hairs or those light brackets found on a document you have open in word follow the directions as Ngolongtech introduce below.
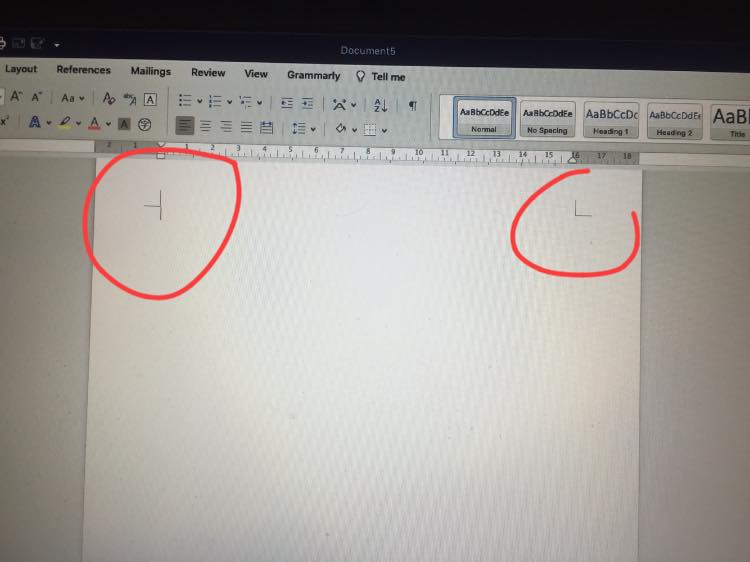
Table of Contents
Symptoms
Any Word document you open, you will see 4 square corners appear on each document page.
Many of you who use Word will feel this square corner as a utility, helping to align and define text margins. In contrast, most users feel uncomfortable or redundant of this feature.
The real use of the four right angles (or the Show crop mark / Show text boundaries tool) is to help the printer know where to cut before printing your text to paper.
How to remove crop marks in Word 2022
To remove the square mark on Word documents, first we need to know which version of Microsoft Office we are using?
For Microsoft Office 2003 and 2007, you choose File -> Options -> Advanced -> Uncheck the Show text boundaries line.
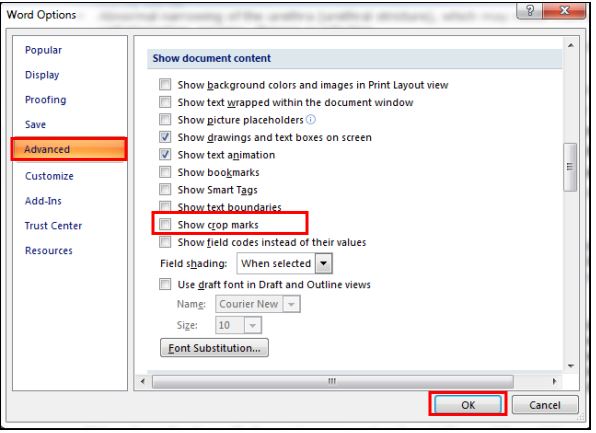
From Microsoft Office 2010 and above, you choose File -> Options -> Advanced -> Uncheck the Show crop mark line.
For Windows
In Microsoft Word, click the File tab, then go into Options.
Select Advanced and use the scroll bar at the right side of the window to scroll down to the
Show document content section. Uncheck the Show crop marks checkbox. Click OK.
For Mac
Go to Word > Preferences > View
Uncheck the box for Crop Marks.
Ngolongtech hopes this article would help you!
Visit Macwintips.com to update the most practical and useful tips for Mac and Windows!


