How to get rid of artifacts on screen. How to fix the display problem with AMD display. The display issue may be caused by conflicts between the AMD graphics driver and the Realtek sound card driver. Those AMD display card users can also try a clean install of AMD video drivers and uninstall the Realtek Audio drivers to fix the display problem.
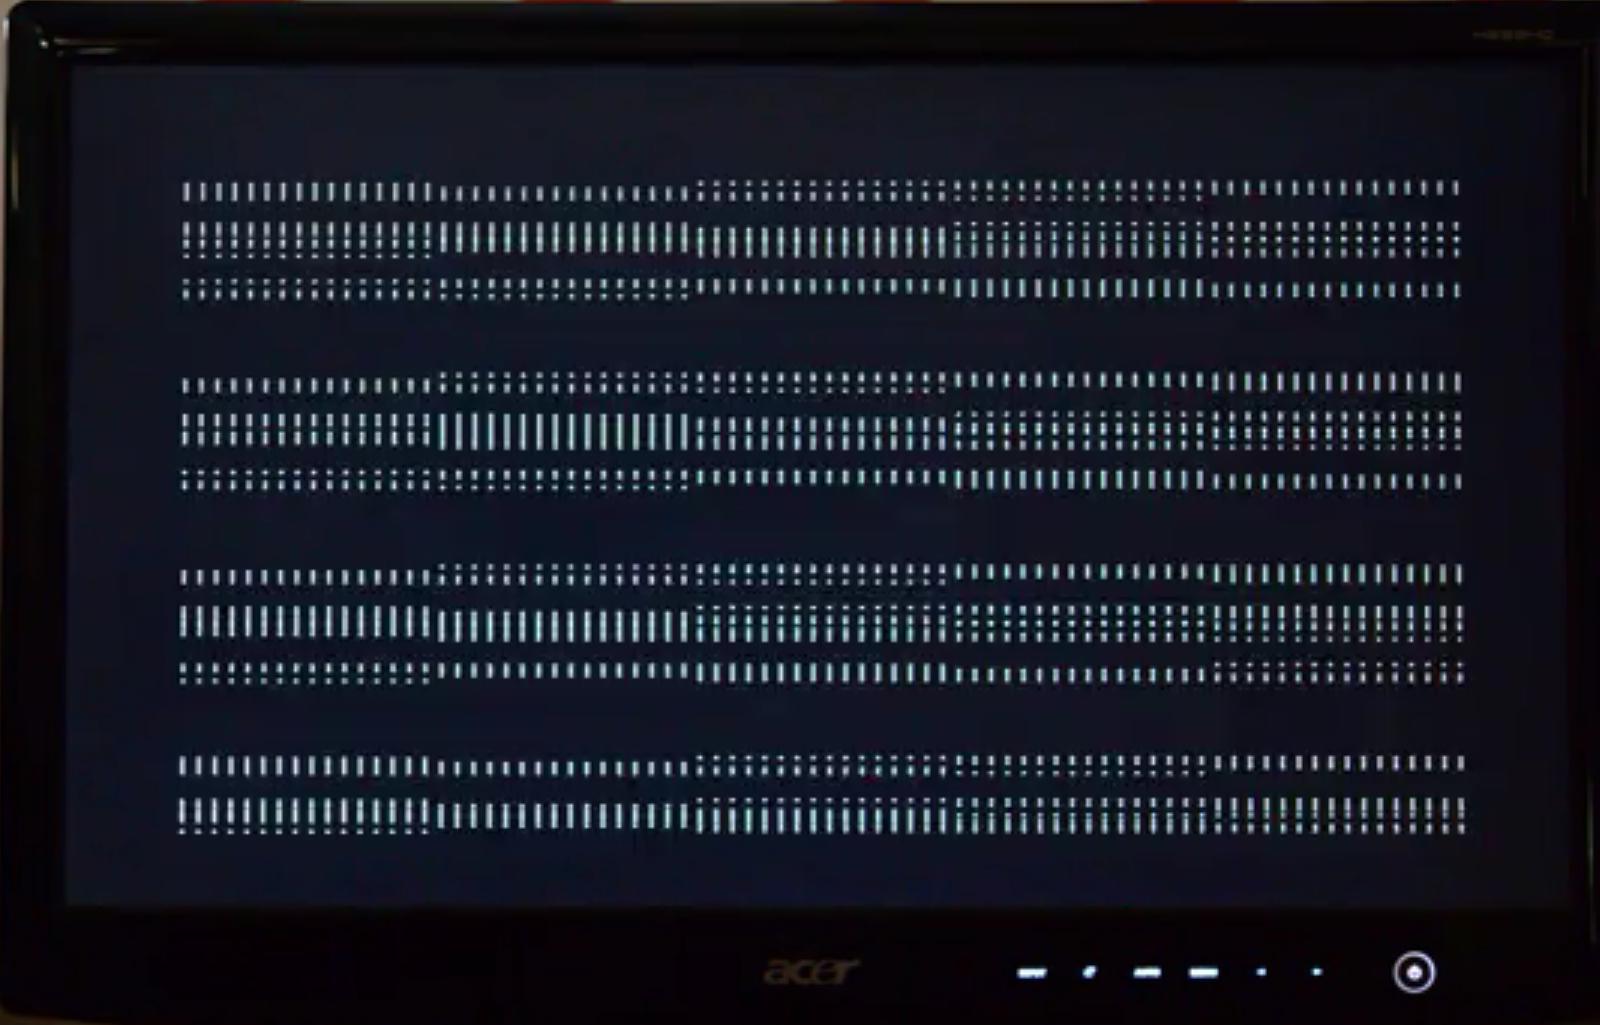
Table of Contents
Symptoms
1. Computer Crashes
2. Screen Glitches: tearing or weird colors occurring on the screen
3. Strange Artifacts: Similar to screen glitches and shuttering, a bad graphics card can result in bizarre artifacts on the entire screen. This can also be caused due to excessive overlocking, heat issues and even dust build-up.
4. Blue/Black Screen
5. Driver Crashes: There can also be times when your screen goes entirely black for a moment and when it returns, you’ll be informed with message, “video drivers have crashed & has to be restarted”.
How to fix the display problem with AMD display
You can also adjust the screen resolution in the display/graphics card properties:
Step 1. Use shortcut keys Win + I to open Settings.
Step 2. Go to the System menu.
Step 3. Select the Display tab on the left pane and on the right side, scroll down and click Display adapter properties under the Detect button.

Step 4. Click the List All Modes button.
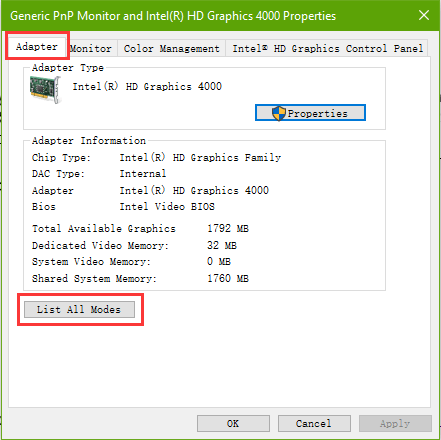
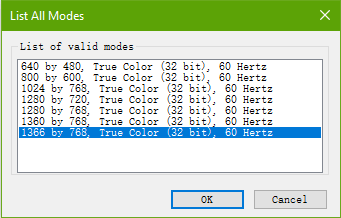
Step 5. A list of valid modes pops up. Select the mode that matches with your computer display resolution and click the OK button.
How to get rid of artifacts on screen
Step 1: Fix the system
- Uninstall recently installed programs and applications (before problems occur, of course) to eliminate the possibility of software conflicts.
- Uninstall the current video card driver and reinstall a more suitable version
- Reinstall the new Windows version for the laptop
Step 2: Fix the hardware
- Loose display cable
- Broken VGA chip
- Broken circuit printed vertically or horizontally on the screen
- Broken screen
We hope this article help you solve the problem!

