How to zip files and extract files on Windows 11. Similar to older versions of Windows, in Windows 11, the ZIP format helps to compress data and reduce file size, helping to speed up file transfers as well as save system storage space. You can also use ZIP compression to combine multiple files into a compact compressed file. Let’s learn how to compress and decompress files very simply on Windows 11.
Table of Contents
How to zip files and extract files on Windows 11
Create a Zip file in Windows 11
First, open File Explorer and navigate to the location of the file (or files), as well as the folder that you want to compress into a standard ZIP file. (You can also compress files and folders directly on the desktop.) Note that if you compress folders, their internal folder structure will remain the same when you extract them later.
In case you want to compress a group of files or folders, select them by dragging the mouse pointer over them, or hold down the “ Ctrl ” key and select each file, then right-click. If it’s a single file, just right-click it directly. In the context menu that appears, click on “ Compress to ZIP file ”.
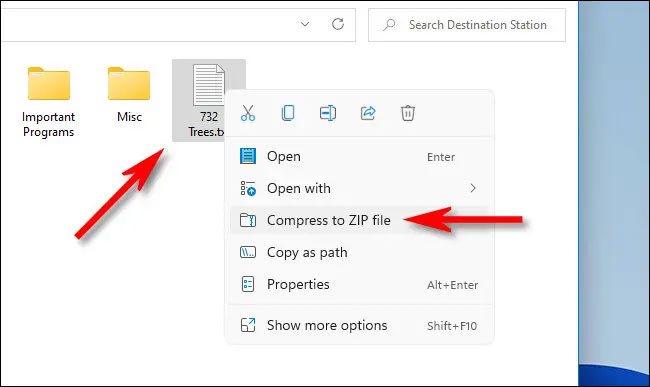
After a while, the corresponding ZIP file will appear in the same folder as the source file you just compressed. The ZIP file name will be highlighted, allowing you to rename the file if you wish. Enter a new filename or keep the default one. When you’re done soldering, press Enter.

That’s all there is to do! Now that the ZIP file has been created, you can copy or share it just like any other file type.
Extract Zip files in Windows 11
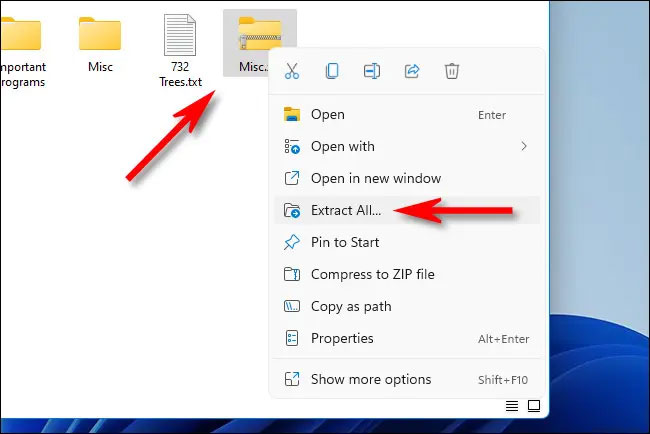
Extracting (decompressing) ZIP files in Windows 11 is as simple as how you compress them. First, find the ZIP file that you want to extract. Next, right-click on the file and select “ Extract All ” in the menu that appears.
In the “Extract Compressed (Zipped) Folders” window that appears, you will see the current file path as the default location for the extracted files. If you want to change the location where the file will be extracted, click “Browse“, then navigate to the desired drive or folder.
If you want to see the extracted files in File Explorer when the process is finished, check the box next to the option “Show extracted files when complete”. Finally, click “Extract”.
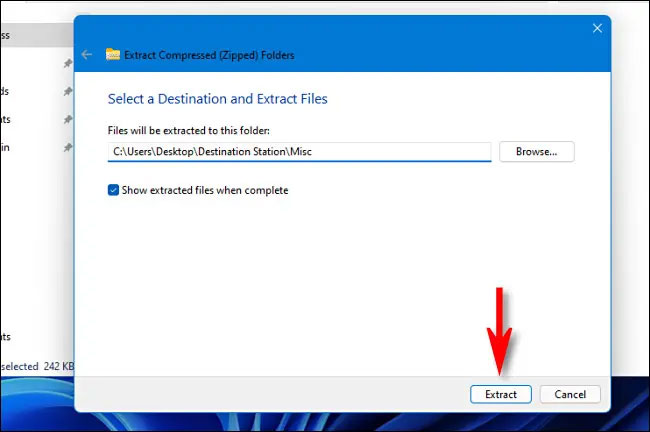
The compressed data in the ZIP file will now be decompressed to the location you selected. If you have “ Show extracted files when complete” set up, that location will open as a new window in File Explorer.
Ngolongtech hopes you find this article useful! Wishing you success!


