How to Enable SNMP Windows 10 PowerShell. Simple Network Management Protocol (SNMP) is an application layer protocol that allows network devices to share information, regardless of hardware or software differences. Without SNMP, network management tools cannot identify devices, record network changes, monitor network performance, or determine the status of network devices in real-time.
Starting with Windows 1803 and later, Microsoft has discontinued this feature because of the security risks involved and recommends using the Common Information Model (CIM) instead. If you want to install and enable SNMP on your PC, read the below guild to do it.
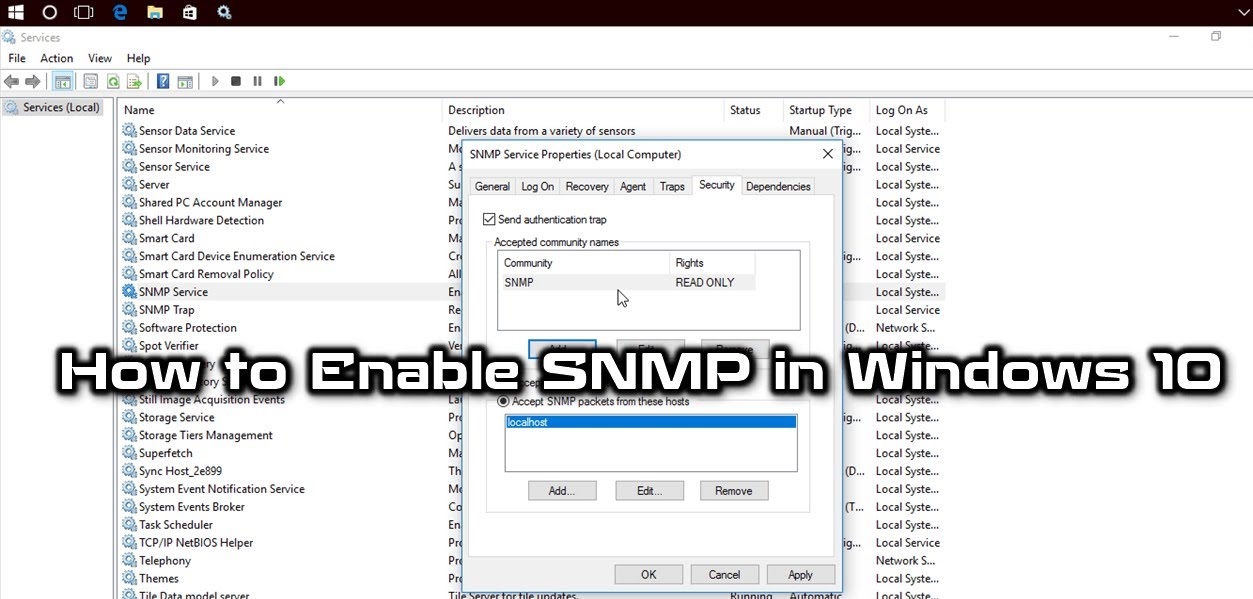
Table of Contents
Enable SNMP
How to enable SNMP from Settings
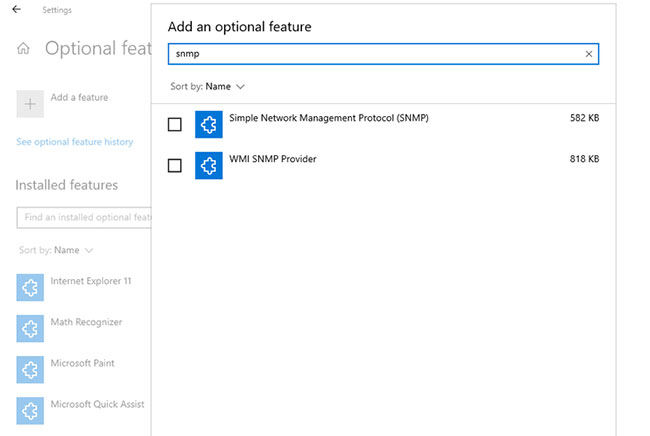
SNMP is available as an optional feature on Windows 10. You can enable optional features by navigating to Settings > Apps > Apps & features > Optional features . Click Add a feature and search for snmp. Select Simple Network Management Protocol (SNMP) and WMI SNMP Provider , and then click Install.
When we’re done, verify if SNMP appears in the Services console .
How to Enable SNMP Windows 10 PowerShell
To enable SNMP via PowerShell , first make sure that your computer can access the Internet. Then, run PowerShell as admin by pressing Win + X and selecting Windows PowerShell (Admin) . Execute the following command to install SNMP server from Microsoft server:
Add-WindowsCapability -Online -Name "SNMP.Client----0.0.1.0"Alternatively, you can also install SNMP using the DISM tool with the following command:
DISM /online /add-capability /capabilityname:SNMP.Client----0.0.1.0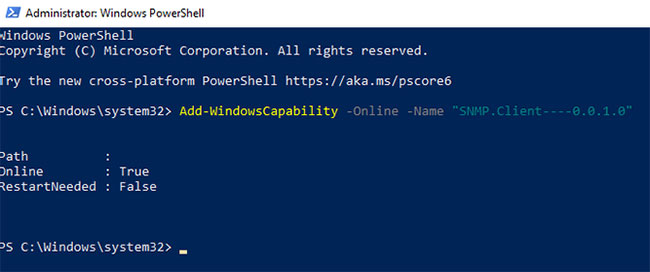
Once you have executed either command ( Add-WindowsCapability or DISM ) successfully, verify that the SNMP service is installed with the following command:
Get-WindowsCapability -Online -Name "SNMP*"Configure SNMP
How to configure SNMP from the Services console
Now that you have the SNMP service installed on your PC, let’s configure it.
To get started, verify that the SNMP services ( SNMP Service and SNMP Trap ) are running. Press Win + R , type services.msc and press Enter to launch the Services console . Find both SNMP services and check if they appear in the list.
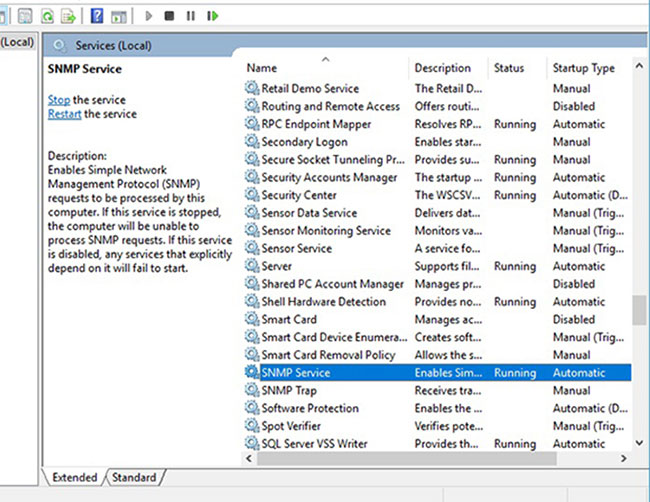
Also, check if the SNMP Service is running. If not, double-click the service and press Start. Change the Startup type to Automatic to automatically run the service from the next boot.
Next, switch to the Agent tab and fill in your name and location in the Contact and Location fields respectively. In the Service section , check the box that corresponds to the services that you want to collect data to forward that data to the monitoring device.
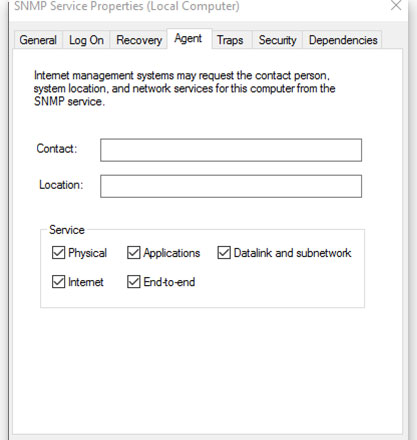
Now, switch to the Security tab.
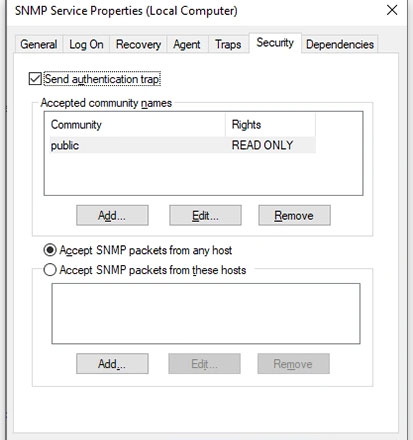
Add the name of the SNMP server you want to authenticate to in the Accepted community names list . You have the option of providing None, Notify, READ ONLY, READ WRITE or READ CREATE authentication to the communities .
Next, add the host that you want to accept SNMP packets for in the next box and make sure Accept SNMP packets from these hosts is checked . The Accept SNMP packets from any host option will remove any IP restrictions and allow all hosts to send SNMP packets. Beware, though, this is not a safe option to allow, especially on public computers.
When you’re done, press Apply , return to the General tab to restart the service (click Stop and then Start ) and press OK to exit. The final step is to open the SNMP ports: UDP 161 (SNMP) and UDP 162 (SNMPTRAP) . To do this, execute the following commands:
netsh advfirewall firewall add rule name="SNMP UDP Port 161 In" dir=in action=allow protocol=UDP localport=161
netsh advfirewall firewall add rule name="SNMPTRAP UDP Port 162 In" dir=in action=allow protocol=UDP localport=162
netsh advfirewall firewall add rule name="SNMP UDP Port 161 Out" dir=out action=allow protocol=UDP localport=161
netsh advfirewall firewall add rule name=" SNMPTRAP UDP Port 162 Out" dir=out action=allow protocol=UDP localport=162
How to configure SNMP from Group Policy Editor
You can change the Group Policy Object (GPO) parameters to centrally configure the SNMP parameters. Launch the Local Group Policy Editor and navigate to Computer Configuration > Administrative Templates > Network > SNMP to configure the parameters.
On the right pane, you’ll see the following:
1. Specify communities : Enables the addition and validation of communities that can submit SNMP requests.
2. Specify permitted managers : Allows additional servers that can send SNMP packets to the computer.
3. Specify traps for public community : This option allows you to configure the name of the server that receives the trap message sent by the SNMP service.
Ngolongtech hopes you find this article useful! Wishing you success!


