How to Setup and Use an External SSD as your Startup Disk on a Desktop Mac.how to make external ssd main drive,
can i use an external ssd as a boot drive,
can i run my imac from an external ssd,
how to use ssd as external storage,
use external ssd as boot drive windows 10,
Select the system you want to use to startup your computer,
how to make ssd boot drive mac,
how to install external ssd If you have a Mac desktop with a slower hard drive, you can easily use a snappy external SSD as your startup disk to improve performance. It will always stay connected to your Mac and you will not be able to use this SSD with any other Mac while it is your startup disk.
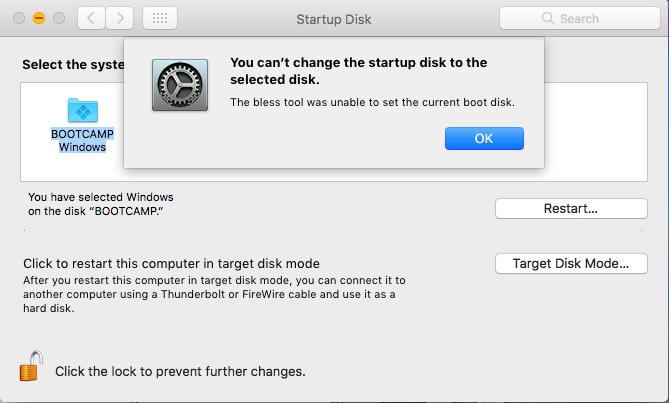
Table of Contents
How to Setup and Use an External SSD as your Startup Disk on a Desktop Mac
External drives have long been used for adding more storage space to Macs. They provide a cost-effective means to increase storage for media libraries and documents, as well as backup space.
External storage devices are seeing more and more use as primary startup drives, when there’s a need to expand space on the startup, or increase its relative performance over the internal drive that originally came with a Mac. The reason for this is a simple one: Apple has continued to make replacing an internal drive a difficult, if not impossible, task for most users.
Of course, there are Mac models, such as the new Mac Pro, where adding or replacing a drive is designed to be easy. There are other models, such as the iMac and Mac mini, where upgrading a drive is possible, but not recommended for the end user by Apple. And when it comes to recent MacBook models, you can pretty much forget about repairing or replacing a drive. Even the new 16-inch MacBook Pro has its SSD soldered directly to the motherboard, making replacing or upgrading the drive a no-go for most of us.
External Drives as Startup Devices
Because of the difficulty in replacing or upgrading an internal drive, using an external device may be a good choice. Using an external storage device as your startup may not only increase performance and storage space, but also benefit your wallet. It can prevent or delay the need to replace a Mac that, aside from issues with the internal startup drive, works well for you.
It can also reduce the cost when you purchase a new Mac. Instead of purchasing a custom configured Mac with a large startup drive at Apple’s premium prices, you can pick a stock configuration and use a larger external startup device while using the stock internal for other storage needs. Depending on the configuration, you could find yourself with nice savings.
Rocket Yard Guide to External Startup Devices
This will be a two-part Rocket Yard guide that explores how to use an external storage device as your primary startup device. You may find the need to do this because of a failure of your Mac’s current internal drive, because you have a need for additional storage space on the startup drive, a need for better performance from the startup drive, to save money on configuring a new Mac, or any combination of the above.
In Part One, we will look at:
- Examples of external devices you can use
- Connecting an external drive to your Mac
- How to boot from an external drive
In Part Two, we will cover:
- How to configure an external with a copy of the macOS
- What to do if the original internal startup drive is non-functional
- How to enable booting from an external device if your Mac is equipped with a T2 security chip
- What to do with the internal drive now that you’re booting from an external
- More about interface types
Example External Drives
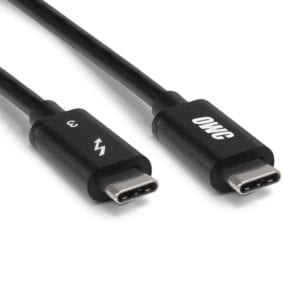
External storage solutions come in a multitude of configurations; single, dual, and multi-bay, as well as non-RAID, RAID, and even RAID arrays that can be used in non-RAID configurations. There are also various types of interfaces to connect the drive to your Mac: USB 3, USB 3.1, USB 3.2, USB-C, Thunderbolt 2, and Thunderbolt 3. We’ll explore the type of configurations and interfaces later, in Part Two of this Rocket Yard guide. For now, let’s look at a few examples that would be good candidates for use as external startup drives:
OWC Envoy Pro EX:
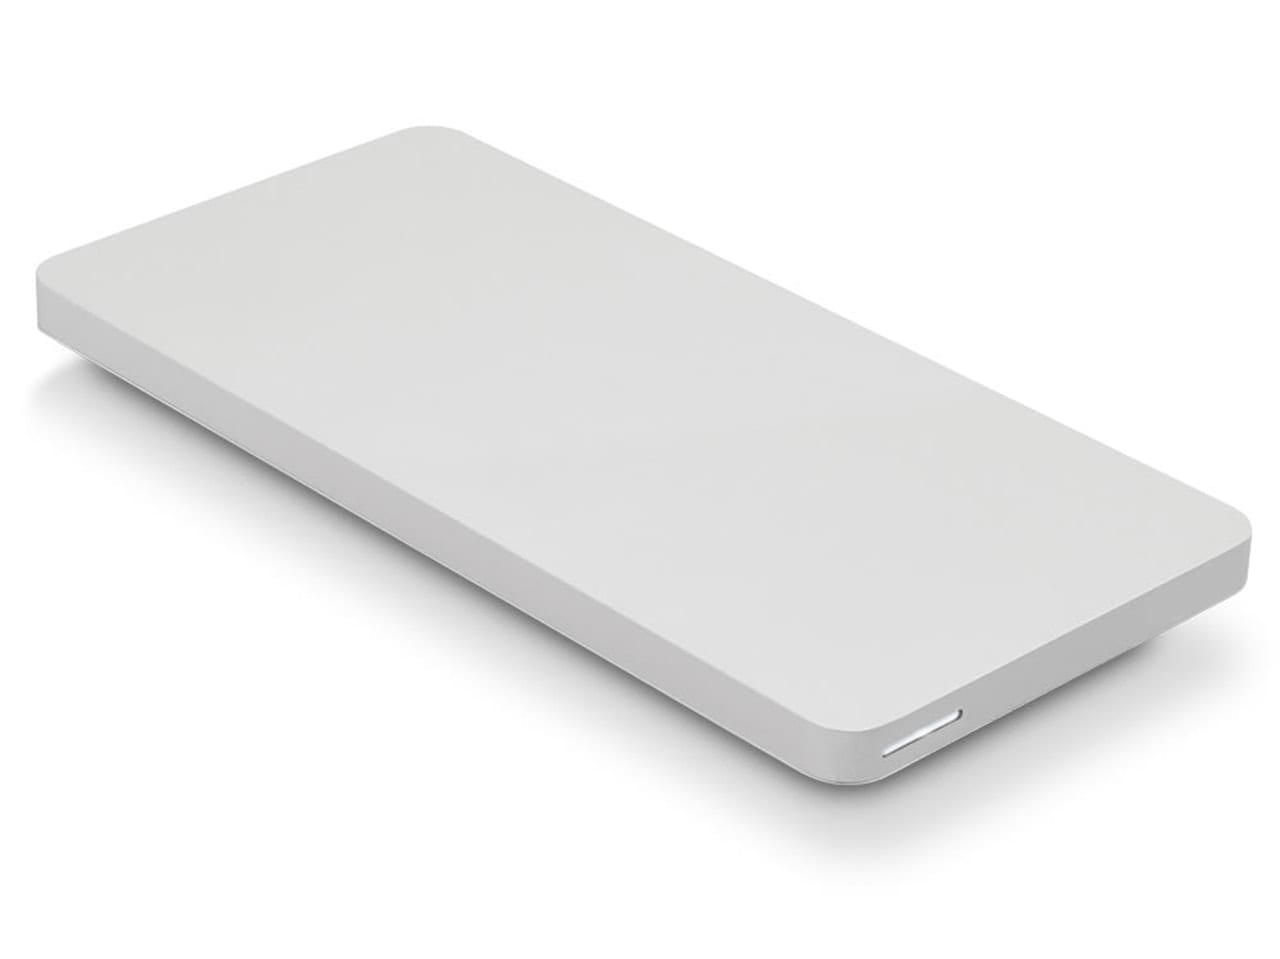
Available in USB 3.1 and USB 3.2 Gen 2 configurations that can house a single M.2 NVMe SSD. Available in sizes from 240 GB up to 2 TB, as well as a DIY enclosure where you can bring your own M.2 NVMe SSD. Performance can range from 400 MB/s up to 980 MB/s, depending on the type of USB interface you choose.
OWC Envoy Pro EX: The Thunderbolt Edition:
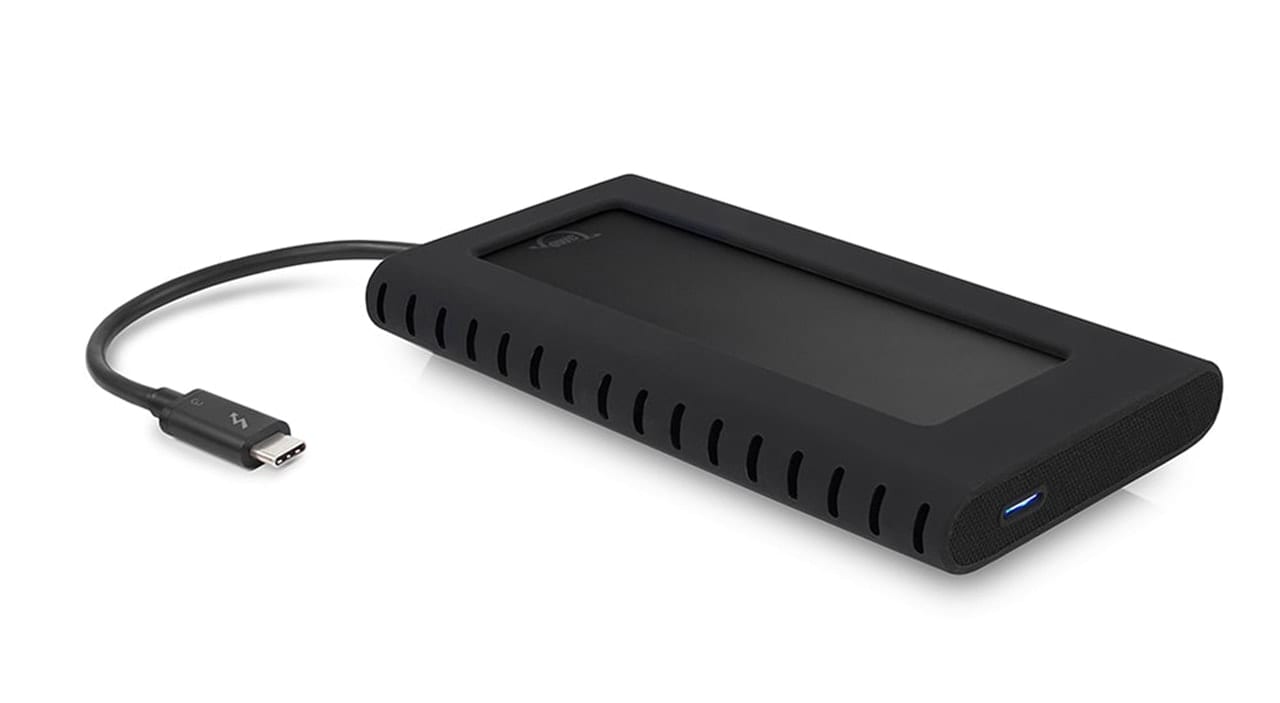
When your primary concern is performance, this configuration can produce blazing-fast 2500MB/s thanks to the NVMe SSD and Thunderbolt 3 interface. It’s available in sizes from 500 GB to 2 TB.
The OWC Envoy Pro EX series of external drives impress with their performance at a very reasonable cost. Even the USB 3 version, at 400 MB/s, can outperform rotational startup drives, as well as many Fusion drives that lack sufficient free space. If you need performance, the Thunderbolt version is like having a rocket booster attached to your Mac.
OWC Thunderblade:
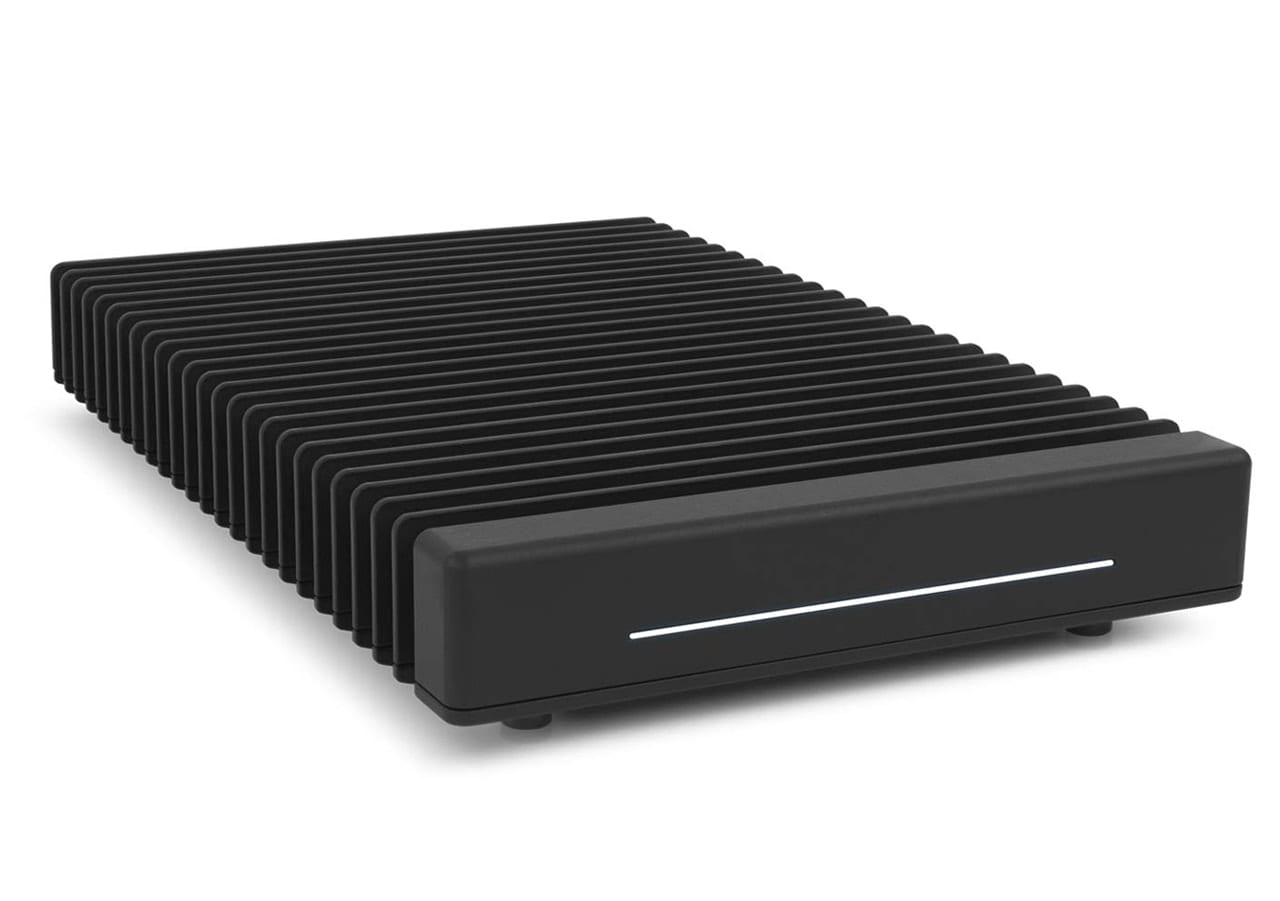
This is the choice for those looking for a rugged and portable external drive that can hold up to 8 TB of storage and deliver the data at up to 2800 MB/s using the Thunderbolt 3 interface. Available in configurations from 1 TB to 8 TB, and includes a custom-fitted ballistic hard-shell case for taking the drive on the road, wherever it is needed.
Connecting the External Drive to the Mac
Aside from the connection type, there’s nothing really mysterious about hooking up an external to your Mac. Never the less, a couple of tips to note:
If the external can be both bus-powered (taking power from the connection to your Mac) as well as directly powered, opt for the direct power connection, at least in a desktop setup. Directly powering the external helps ensure a stable drive that is ready to go to work as soon as your Mac powers on.
Use good quality cabling and make sure there’s no strain on the cable or the plugs.
Do not use excessively long cables; keep the cable length appropriate for the setup.
Keep the setup neat; not just for visual aesthetics, but to ensure cables are secure and not prone to becoming disconnected if something should be moved or pushed around.
Shut down the Mac and make sure the external is powered off when making the initial connections.
Turn on the external before powering up your Mac.
How to Start Up From an External Drive
There are two ways to select the device your Mac will start up from.
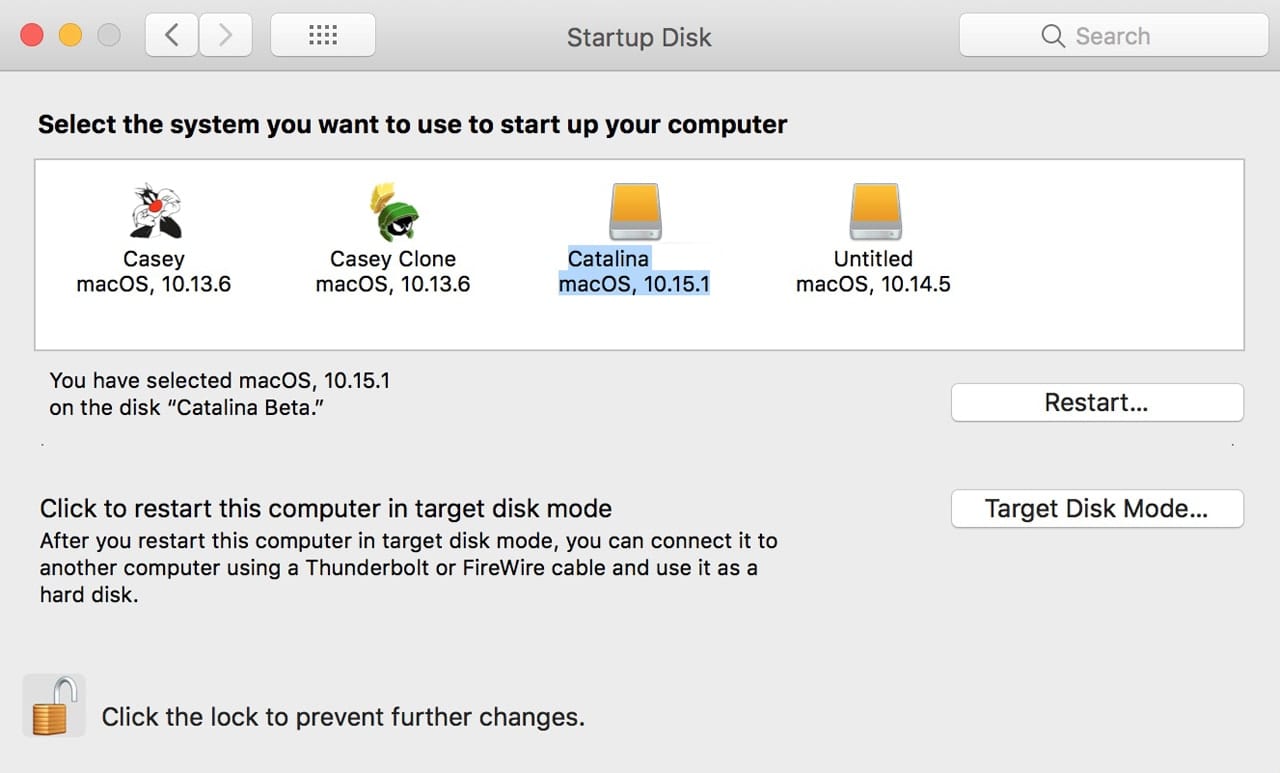
You can use the System Preferences to select which device to start up from. When using this method, the device you select to start up from remains the active choice, even after restarting or shutting down.
You can also use the Mac’s startup manager to make a temporary selection of a device to start up from. When using this method, the startup device choice doesn’t stick; the next time you restart your Mac it will revert to the startup device choice set in the system preferences.
To set the startup device with System Preferences:
Launch System Preferences by selecting the System Preferences menu item from the Apple menu, or clicking its Dock icon.
In the System Preferences window that opens, select the Startup Disk preference pane.
Click the lock icon in the bottom left corner, and then provide your administrator credentials. Click the unlock button.
Icons representing the various bootable devices that are currently connected to your Mac will be displayed. Each icon will include the macOS version that’s installed on the device.
Make your selection by clicking on an icon.
You can choose to restart now by clicking the Restart button, or defer changing to the new startup disk until the next time you start your Mac up.
Click the Restart button or close the Startup Disk preference pane.
To use the Startup Manager to temporarily select the startup device:
Restart your Mac while holding down the option key.
Continue to hold the option key until you see the display change to show one or more icons of available startup devices.
Release the option key.
Use the arrow keys to select the device you wish to start up from this one time.
With the device highlighted, press the return or enter key.
The Mac will start up using the selected device.
Up Next
We’ve covered the basics in part one of this Rocket Yard guide to using an external drive as your startup drive. For many, this may be enough to move ahead, choose an external, and start to set up and use your new startup device.
Choosing an SSD
If you’ve decided this is the right path for you, it’s time to choose an external SSD.
Storage Size
All your apps, files, photos, videos, etc. will be moved to the external SSD, so it’s a good idea to get an external SSD with a large storage capacity. To see how much storage you are currently using, go to the Apple menu () > About This Mac > Storage.
Choosing the Specific SSD Model
Mac desktop computers that use a standard hard drive and have at least a FireWire 800, USB 3.0, or Thunderbolt 3 port, and are compatible with OS X El Capitan or later, are compatible with this solution of using an external SSD as its startup disk for improved performance.
For iMac (Mid 2007) – iMac (Late 2011) computers and Mac mini (Early 2009) – Mac mini (Mid 2011) computers, for good performance, FireWire 800 should be used. Since this is an older technology, your only choice now is the OWC Mercury On-The-Go Pro SSD – OWC. Although this drive is also available in hard drives models, you must purchase a solid-state drive model. You must also purchase an OWC Power Adapter – OWC.
For iMac (Late 2012) – iMac (2019) computers and Mac mini (Late 2012) – Mac mini (Late 2014) computers, an excellent choice for the external SSD is the LaCie Mobile SSD Secure USB-C Drive – Apple. However, if you have an iMac (Late 2015) or earlier, or a Mac mini (Late 2014) or earlier, you will also need this cable. iMac (2017) and newer computers do not require this separate cable.
For iMac (2017) – iMac (2019) computers only, the LaCie Rugged SSD Pro External Drive with Thunderbolt 3 – Apple could also be considered. It is a more powerful external SSD than the LaCie Mobile SSD Secure USB-C Drive, however, both are very fast.
Before you Start
Make sure macOS is fully up-to-date before you begin. If macOS is already fully up-to-date, you can skip this step. See this macOS compatibility information:
iMac Computers:
iMac (Mid 2007) – iMac (Mid 2009) computers should upgrade to OS X El Capitan.
iMac (Late 2009) – iMac (Late 2011) computers should upgrade to macOS High Sierra.
iMac (Late 2012) – iMac (Late 2013) computers should upgrade to macOS Catalina.
iMac (Mid 2014) – iMac (Mid 2015) computers should upgrade to macOS Big Sur.
iMac (Late 2015) and newer computers should upgrade to macOS Monterey.
Mac mini Computers:
Mac mini (Early 2009) and Mac mini (Late 2009) computers should upgrade to OS X El Capitan.
Mac mini (Mid 2010) and Mac mini (Mid 2011) computers should upgrade to macOS High Sierra.
Mac mini (Late 2012) computers should upgrade to macOS Catalina.
Mac mini (Late 2014) computers should upgrade to macOS Monterey.
If you need to upgrade to OS X El Capitan, macOS High Sierra, macOS Catalina, or macOS Big Sur, get the right version here: How to get old versions of macOS – Apple Support. If you need to upgrade to macOS Monterey, see: How to upgrade to macOS Monterey – Apple Support.
Also before you start, delete any anti-virus, anti-malware, cleaners, or any other similar types of software. Mac computers do not need any sort of anti-virus, cleaners, VPNs, etc. The only thing they are good at is creating false marketing promises and taking consumers’ money. Furthermore, anti-virus and other cleaners cause performance issues, security issues, and make macOS appear buggy. Your Mac is far worse with these types of Apps installed. Mac computers have protection built-in, which is the best protection for your Mac. For specifics on macOS Security, see: macOS – Security – Apple and Protecting against malware in macOS – Apple Support. Mac computers also have built-in storage recommendations: Optimize storage space on your Mac – Apple Support. You can even use the built-in macOS Firewall: Block connections to your Mac with a firewall – Apple Support. Other than that, all you should do is restart your Mac approximately once a week and keep macOS up to date: Update macOS on Mac – Apple Support. To delete these Apps, see: How to Delete Anti-Virus, Cleaners, VPNs,… – Apple Community. However, should you ever get adware or malware on your Mac, the only tool that should be used to remove it is the free Malwarebytes for Mac. This App is the only exception to the general rule that no anti-virus, anti-malware, etc. should be used.
Setup and Moving Data
Once you have your external SSD, it is time to set it up and move your data.
Backup
First, you need a Time Machine backup. Not only is always having a backup good practice, but it is a good idea to have a backup of your data during this process. If you do not have a Time Machine backup drive, here’s a few excellent ones sold by Apple:
- LaCie Mobile Drive External Hard Drive USB-C – Apple
- LaCie Rugged USB-C Portable Hard Drive – Apple
If you have an iMac (Late 2015) or earlier, or a Mac mini (Late 2014) or earlier, you will also need this cable. iMac (2017) and newer computers do not require this separate cable.
After connecting your backup drive, you can then follow the steps in this Apple Support article to setup your Time Machine backup: Back up your Mac with Time Machine – Apple Support.
Also, moving forward, I recommend that you use iCloud in addition to Time Machine to sync all your files and photos to all your Apple devices. Although iCloud is not a “true” backup service, iCloud can also act as an emergency off-site backup, but this is why iCloud should be used in addition to Time Machine. Here are some resources on setting up iCloud for Mac:
- Upgrade to iCloud+ – Apple Support
- Set up iCloud Drive – Apple Support
- Add your Desktop and Documents files to iCloud Drive – Apple Support (requires macOS Sierra 10.12 or later)
- Set up and use iCloud Photos – Apple Support
After you setup iCloud, turn off “Optimize Mac Storage” in System Preferences > Apple ID/iCloud. That way, all changes made to files in iCloud are also backed up to Time Machine. If you have this setting on due to a limited amount of storage on your Mac, that is fine. Just know changes won’t be backed up to Time Machine, only iCloud.
Connect
Next, you need to connect your new external SSD to your Mac.
If you have an iMac (Mid 2007) – iMac (Late 2011) or a Mac mini (Early 2009) – Mac mini (Mid 2011), connect the external SSD using FireWire 800.
If you have an iMac (Late 2012) – iMac (Late 2015) or a Mac mini (Late 2012) – Mac mini (Late 2014), connect the external SSD using a USB Type-A port.
If you have an iMac (2017) or later, connect the external SSD using a USB Type-C/Thunderbolt port.
See: Identify the ports on your Mac – Apple Support for more information.
If after you connect the external SSD you receive a message asking if you would like to use the external SSD as a Time Machine backup drive, click “Don’t Use”.
Format
After connecting your external SSD, you need to format it. Do not install any software from the drive manufacturer. To format, go to Disk Utility (Finder > Go > Utilities). From there, select “View” > “Show All Devices” (only for macOS High Sierra and later). Now, select the main external SSD drive. It will be at the top of the hierarchy and non-indented in the “External” section of Disk Utility. You will see “Media” at the end of the name. (Make sure you are selecting the SSD and not another external drive, such as your Time Machine backup!) Now, click “Erase”, and make sure the following information matches:
Name: Macintosh HD
Format: APFS (If APFS is not shown, change the Scheme to GUID Partition Map first, then choose APFS) If you are using macOS Sierra or earlier, use Mac OS (or OS X) Extended (Journaled).
Scheme: GUID Partition Map
Now, click “Erase”. After a few moments, you should see a new “Macintosh HD” volume on your external SSD.
You can also refer to the Apple Support article for erasing a drive with Disk Utility: Erase and reformat a storage device in Disk Utility on Mac – Apple Support.
Get the macOS Installer
After the external SSD is formatted, you can now install macOS on it. Even if you just upgraded macOS, you need to get the installer again for the external SSD. See this macOS compatibility information:
iMac Computers:
iMac (Mid 2007) – iMac (Mid 2009) computers should download OS X El Capitan.
iMac (Late 2009) – iMac (Late 2011) computers should download macOS High Sierra.
iMac (Late 2012) – iMac (Late 2013) computers should download macOS Catalina.
iMac (Mid 2014) – iMac (Mid 2015) computers should download macOS Big Sur.
iMac (Late 2015) and newer computers should download macOS Monterey.
Mac mini Computers:
Mac mini (Early 2009) and Mac mini (Late 2009) computers should download OS X El Capitan.
Mac mini (Mid 2010) and Mac mini (Mid 2011) computers should download macOS High Sierra.
Mac mini (Late 2012) computers should download macOS Catalina.
Mac mini (Late 2014) computers should download macOS Monterey.
If you need to install OS X El Capitan, macOS High Sierra, macOS Catalina, or macOS Big Sur, get the right version here: How to get old versions of macOS – Apple Support. If you need to install macOS Monterey, you can get it from the App Store using the “Get macOS Monterey” link. See: How to upgrade to macOS Monterey – Apple Support, specifically this section:
Download macOS Monterey
Or use this link to open the macOS Monterey page on the App Store: Get macOS Monterey. Then click the Get button or iCloud download button.
After getting the proper macOS Installer, wait for it to download. This may take some time.
Install macOS
After the macOS Installer has been downloaded and installed, you can now install macOS to the external SSD. Open the macOS Installer, and follow the prompts. When it asks where the macOS install destination should be, select “Show All Disks”. You can then select the external SSD drive. External disks are orange and silver in macOS. Installation may take some time.
Setup Assistant & Migration Assistant
After macOS is installed, you should be presented with Setup Assistant. Follow the setup prompts for language, region, etc. When it asks you if you would like to Transfer Data, follow these steps: Restore your Mac from a backup – Apple Support. If you have both data on your internal startup disk and a Time Machine backup drive, I recommend moving from the Time Machine backup drive, as long as it has a recent backup. If not, simply select the internal drive. Migration Assistant may take some time to complete. Once done, verify all your data is transferred to the new external SSD.
Startup Disk Preference
After Migration, you can now make the external SSD with macOS your new default startup disk. To do this, go to System Preferences > Startup Disk > Select the external SSD, and select “Restart”. Let it restart.
You can also refer to the Apple Support article: Change your Mac startup disk – Apple Support, specifically, this section:
Change your startup disk for every startup
On your Mac, choose Apple menu > System Preferences, then click Startup Disk.
If the lock at the bottom left is locked, click it to unlock the preference pane.
Click the icon of the disk you want to use, then click Restart.
At this point, the external SSD is fully set up with macOS and your data. However, you may need to setup certain settings again, such as Time Machine.
About the Internal Drive Now
After you feel comfortable with the external SSD and you have done the above, it is best to erase your internal drive. You could then use it as additional storage. Or, you could also leave it as-is with macOS on it.* To erase this disk, go to Disk Utility (Finder > Go > Utilities). From there, select “View” > “Show All Devices” (only for macOS High Sierra and later). Now, select the main internal drive. It will be at the top of the hierarchy and non-indented in the “Internal” section of Disk Utility. You will see “Media” at the end of the name. Now, click “Erase”, and make sure the following information matches:
Name: any name other than the name of the external SSD now running macOS, which should be “Macintosh HD”
Format: APFS (If APFS is not shown, change the Scheme to GUID Partition Map first, then choose APFS) If you are using macOS High Sierra or earlier, use Mac OS (or OS X) Extended (Journaled).
Scheme: GUID Partition Map
Now, click “Erase”. However, if your internal drive is failing, do not rely on it to store data! You will lose it!
You can also refer to the Apple Support article for erasing a drive with Disk Utility: Erase and reformat a storage device in Disk Utility on Mac – Apple Support.
*- If you plan to leave it as-is with macOS on it, exclude the internal drive from Spotlight indexing: Change Spotlight preferences on Mac – Apple Support. This setting is found in “Privacy”. Also, rename the internal drive to something other than “Macintosh HD”, since that is what the external SSD should be named.
Closing
I hope you found this User Tip helpful. If you have any questions, you can ask below, or start a new question thread here on Apple Support Communities.
Cheers,
Jack