How to recover from a failed BIOS update. If your computer cannot enter the Windows operating system due to a failed BIOS update (such as a forced shutdown) while you have previously updated the BIOS, you can follow the steps below to continue the process. Ngolongtech.net will introduce you How to recover from a failed BIOS update.
Table of Contents
How to know if BIOS update failed
In most cases, if a BIOS update fails, the motherboard is bricked. It’s not defective hardware-wise; there is just no interface locally available anymore to reprogram the BIOS RAM. The IC should physically be removed and externally reprogrammed with the intended *.bin file. Desoldering and reprogramming this IC quickly complicates matters where most users are concerned, and they have to weigh whether it’s worth spending $$ to bring back the wretched motherboard to life, or just buy a new one.
Some motherboards have two such BIOS RAM chips on board with identical contents. If, during an update it fails, the good copy from the other is loaded and life goes on without missing a beat. Many Gigabyte brand motherboards have this feature, and they waste no time and space promoting it in their ads.
Some motherboards have an onboard ASIC separate from the chipset which is just for programming the BIOS RAM while controlling with keyboard, USB port, and LED indicators. If a BIOS update fails, the *.bin file is put on the root of a USB stick, and plugged into one of the specified USB ports of the motherboard. A specific combination of keys are pressed as computer is reboot. A series of beeps and motherboard LED indicators in conjunction with further specific keyboard presses and progress is shown as ASIC attempts to reprogram BIOS RAM (there is no video). I have done this on an HP desktop.
BIOS update is an uber-critical process and lots of precautions have to be taken. No matter how careful, in my experience, ASUS and MSI tend to top the list of BIOS update fails, even though rare. MSI has a so-so record with regards to their Z370 boards; BIOS update completes, then computer just absolutely refuses to boot again. OTOH, I have never encountered any BIOS update fail with any Gigabyte motherboard, whether of the single or dual-BIOS chip type.
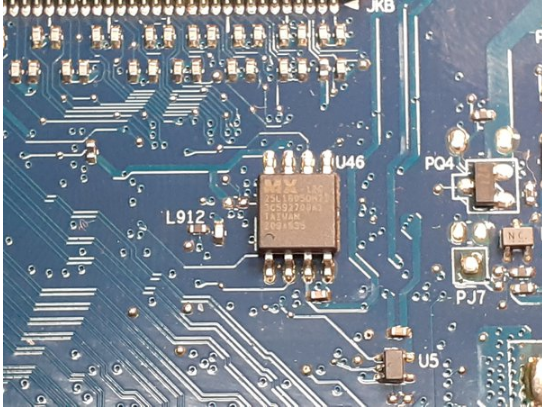
The BIOS information is contained in a small memory with 8 pins soldered on the motherboard.
How to recover from a failed BIOS update
If your BIOS update procedure fails, your system will be useless until you replace the BIOS code. You have two options:
-
Install a replacement BIOS chip (if the BIOS is located in a socketed chip).
-
Use the BIOS recovery feature (available on many systems with surface-mounted or soldered-in-place BIOS chips).
There are many ways but it depends on the motherboard vendor.
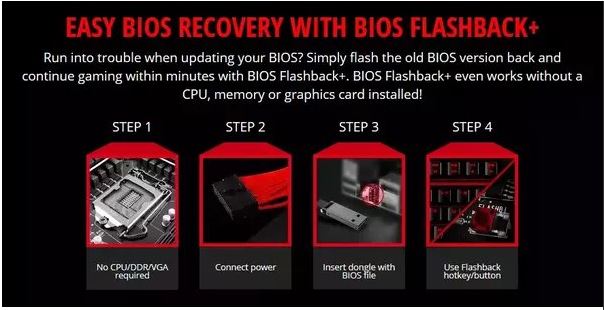
Some newer systems have dual BIOS chips but a lot offer automatic firmware recovery tools, a BIOS hardware flash back button or a flashback software utilities. The latter can be loaded onto a USB drive containing the BIOS file and used for reflashing the BIOS.
For exact steps heck the motherboard vendor website and the documentation for your motherboard.
This can be done today because you don’t even need the BIOS or even processor, RAM or graphics card plugged in to start a modern computer in a minimal state. The platform coprocessors (like Intel ME) or some other onboard controllers can already initialise and enumerate some basic hardware devices even before the BIOS/UEFI is started.
This is typically the BIOS recovery process on most modern motherboards today:
MSI:
ASUS:

Gigabyte:

What you can do is to use a programmer like CH341A to write the chip directly. For this you need to get the BIN file from the internet or to Copy the binary file from a similar working motherboard and then write it to yours. You can also ask on forums for the bios binary file you need with the exact, complete name of your motherboard.
In some cases is better to take off the BIOS chip and read/program it in a SOIC8 or SOP8 socket. If the chip works at 1.8V you also need the 1.8V board adapter.
USB Flash Recovery Guide BIOS update failed – HP
However, it is possible to do so when your Laptop has a partition of the HP_TOOLS drive , which is a default partition created by the manufacturer on Laptops when they are shipped.
However, if in your Laptop case the HP_TOOLS volume (Windows 7) or UEFI (Windows 10, 8) partition on your hard drive has been deleted or if the emergency BIOS recovery feature did not solve the problem, then you need to do it in a different way below.
YOU COMPLETE THE INSTRUCTIONS OF SECTIONS I, II, III, IV LA
I. Download alternative BIOS file
Note : This step you need to do on another computer that is working properly and has a stable internet connection
Step 1 :
• You access the following address to download BIOS update software: https://support.hp.com/vn-en/drivers
• Enter the laptop’s model number that doesn’t start in Enter the HP product name (Model) , product number or serial number , for example HP ProBook 4420s , then click Find .
• In the Software Drivers and Drivers results page for your model, make sure the operating system is Detected Correctly. If necessary, click Change , select the operating system and version in use on your laptop, and then click Change .
• Click BIOS . (If you want to see more information about the BIOS update package, click (Details ) Details .)
• Click Download next to the BIOS update file and save it to your computer when the download is complete. Make sure to note the location of the save file.
If there are multiple BIOS files, click Download next to the most recently released file or the one you need (if a specific BIOS file was recommended to restore your notebook).
II. Create a BIOS recovery USB flash drive for a Laptop.
Use HP BIOS Update and Recovery to create a BIOS recovery flash drive. To complete this step, you need an empty USB flash drive (no data). The USB drive is not a boot – boot drive.
1. Connect an empty flash drive to the work computer.
2. Locate the BIOS file you downloaded and saved, and then double-click it.
If a User Account Control window is displayed, click Yes then the InstallShield Wizard dialog box will open.
3 Click “Next” .
Instruction pictures:
Figure 1. Click Next
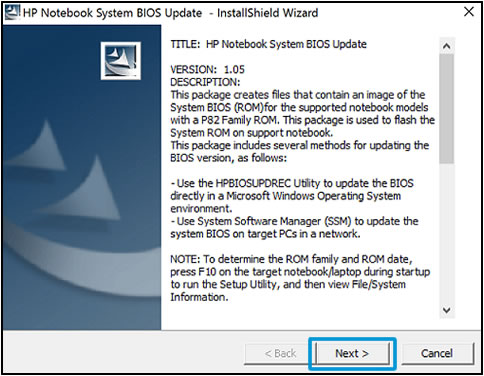
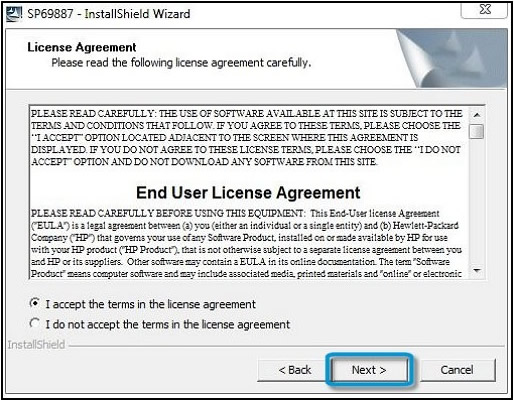
Figure 2: Click the line “I accept the terms in the license agreement” and select Next
5.Select whether or not to delete files from the USB drive after BIOS recovery, and then click Next. The HP Bios Update and Recover dialog box opens.
6. Select Create Recovery USB flash drive, then click Next.
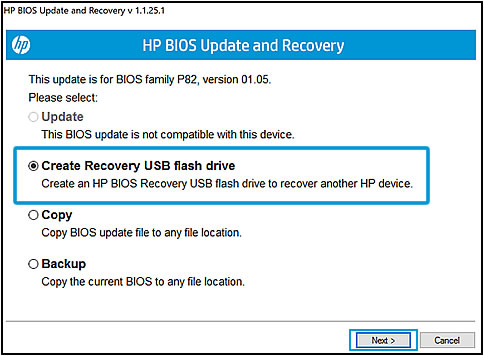
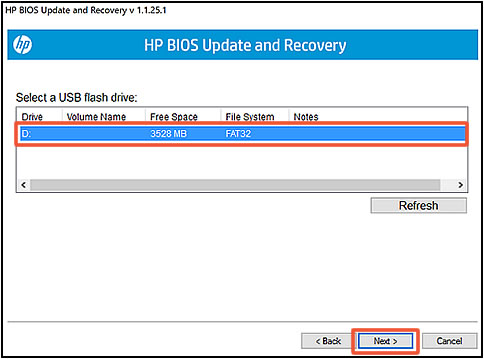
7. Select the USB drive and then click Next . The computer performs the process of copying the BIOS files to the USB drive
When the successfully created BIOS recovery USB drive displays, click Finish.
The recovery BIOS is saved on the USB drive.
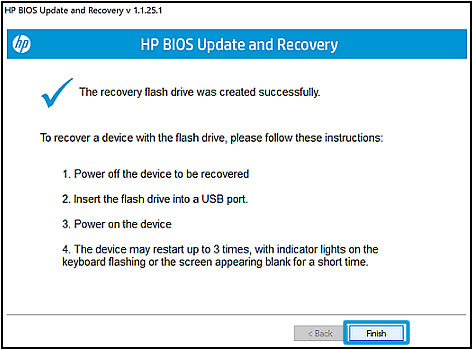
9. Remove the flash drive from the computer.
I II. Restore BIOS using the USB drive just created in step II
Use the HP Emergency BIOS recovery feature and the recovery flash drive to restore the BIOS.
1. Turn off the non-booting laptop, and wait 5 to 10 seconds.
2. Plug the laptop into a power source using the AC charger.
3. Connect the BIOS recovery flash drive to the laptop.
4. When the notebook is off, press and hold the Windows logo key and the B key at the same time.
NOTE:

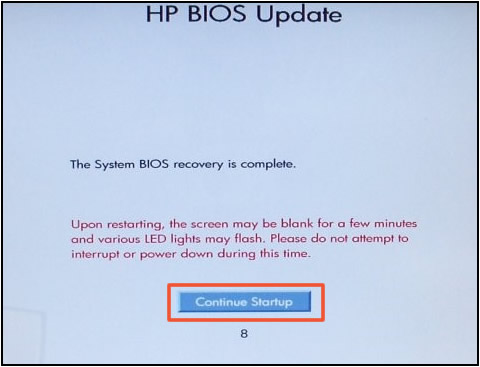
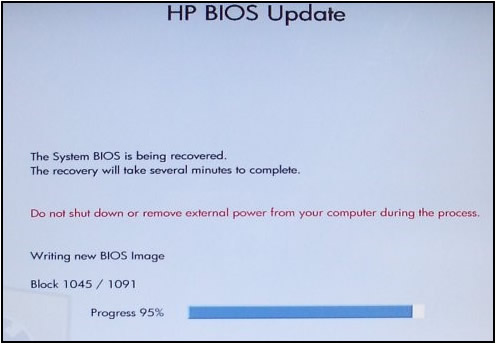
screen is displayed, and the BIOS update will begin automatically. This may take a few minutes and you may hear additional beeps.
