
How to fix Windows 11 not getting enough RAM. In some cases where your Windows 11 computer does not receive enough RAM, receives insufficient RAM that you have equipped for the machine, the following article will help you fix the error Windows 11 does not receive enough RAM fastest. Those who often use computers, surely know how important RAM is, the higher the RAM, the faster your computer will run. The error of not receiving enough RAM on Windows 11 is equally common, so how to fix it, let’s find out the causes and how to fix the error Windows 11 does not receive enough RAM through this article.
Table of Contents
Note Before Fixing The Error Of Not Receiving Enough RAM On Windows 11
– Make sure the RAM is firmly plugged into the motherboard
– Make sure the RAM is not damaged
– Make sure the RAM is compatible with the Mainboard
– Be sure to use the official BIOS version.
Instructions To Fix Windows 11 Error Not Receiving Enough RAM
Step 1: Press the Windows + R key combination on the keyboard.
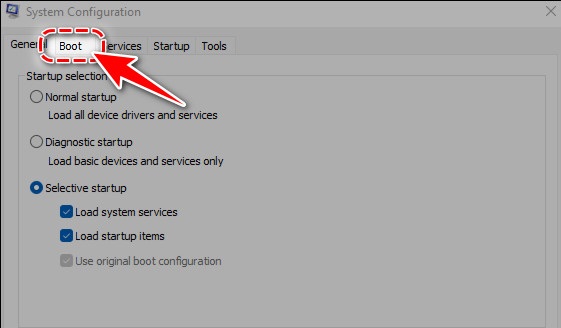
Step 2: Type msconfig into Runs => press Enter.
Step 3: In the System panel, select Boot.
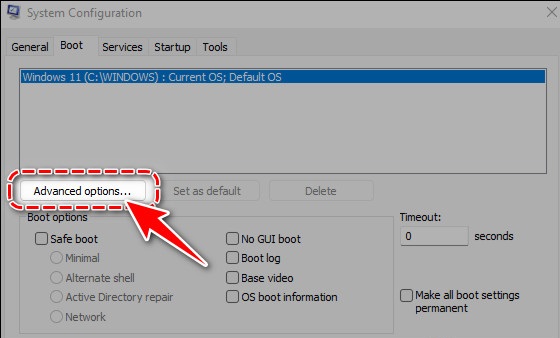
Step 4: Next, click Advanced Options.
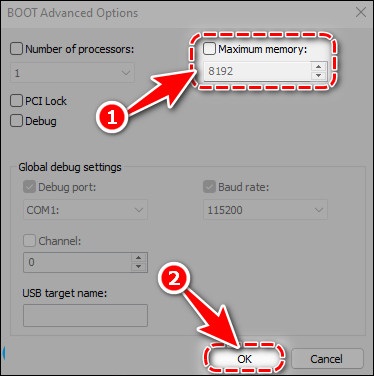
Step 5: Uncheck Maximum memory and click OK .
– Maximum memory : When checked in this box, your computer’s RAM capacity will be limited to the parameter that the blank box displays.
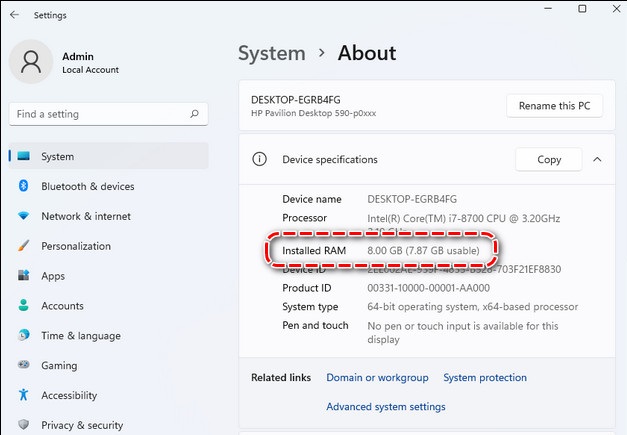
Step 6: Restart the computer and the error of not getting enough RAM on Windows 11 will be fixed, you can right-click My Computer (This PC)=> select Properties. See RAM information.
How to increase RAM Windows 11
1. Increase virtual memory using Settings
While these methods are fairly straightforward, you should always follow the correct procedure and not attempt to adjust any of your computer’s settings unless you have proper knowledge of it. Because a single wrong action can cause your computer screen to turn blue.
Step 1. First of all, click the windows or Search icon button on the taskbar.
Step 2. Now find Icon Settings and click on it.
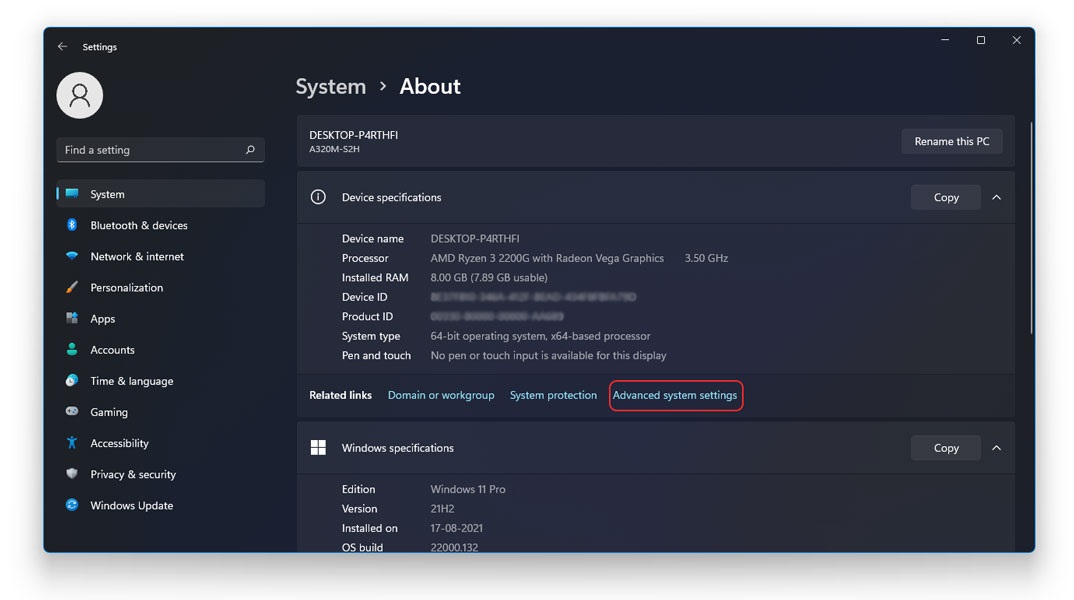
Step 3. In the Settings menu, under System Settings, go to About
Step 4. Now click on Advanced System Settings
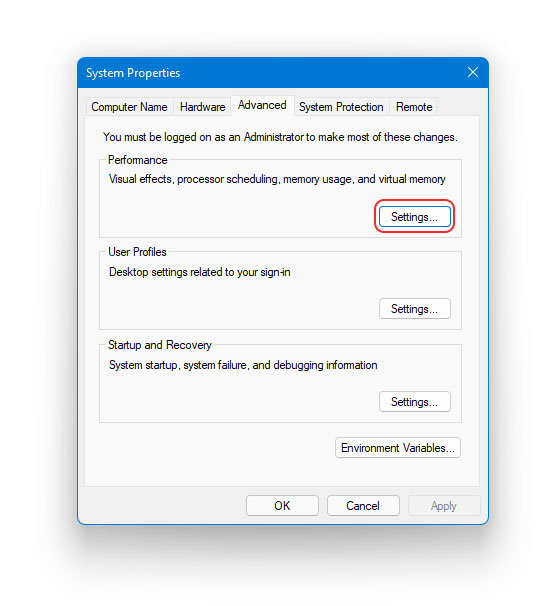
Step 5. A small window of System Properties will pop up on the screen, go to Advanced
Step 6. Now, under Performances, click Settings
Step 7. Again, in the next window, go to Advanced
Step 8. Here you will find Virtual Memory section, click Change

Step 9. On the next window, Uncheck the option that says “Automatically manage paging file sizes for all drives”.
Step 10. Now click Custom Size button to set Virtual Memory
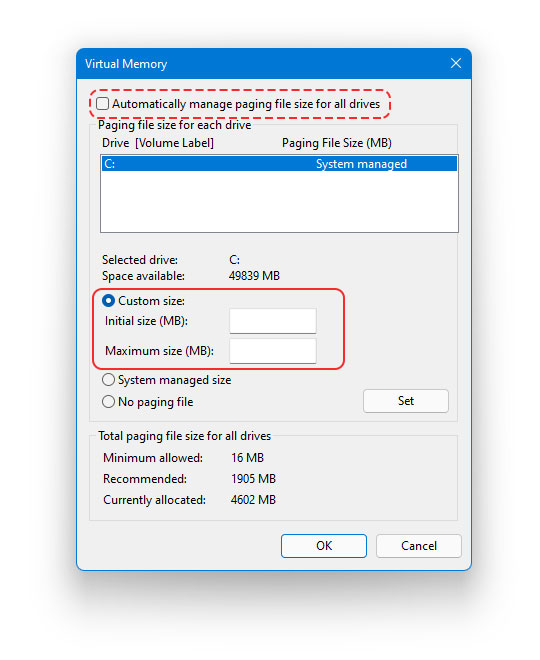
Step 11. Here you can enter initial size and maximum size of Virtual Memory.
Step 12. Click Sets
Step 13. Click YES to finish.
Step 14. Finally, reboot the system to apply the changes successfully.
Tip: There is no universal size to set as Virtual Memory because this aspect is unique to each system. However, what you can try is to check how much RAM is currently available on your computer. And, set 1.5 times available memory as Initial Memory and 3 times available memory as Maximum Virtual memory.
As soon as you reboot the system, the new settings will be applied. Although, as we said earlier, these are not permanent changes and you can reset the Virtual Memory at any time. For that, you will need to follow this same process all the way to Step 9 and click the “Automatically manage paging file sizes for all drives” button. Simple as that!
2. Increase virtual memory with Command Immediate
Step 1. Click on Home windows or Begin icon
Step 2. Now, search for “Command Prompt”.
Step 3. Right-click on the command prompt option and select Run as administrator .
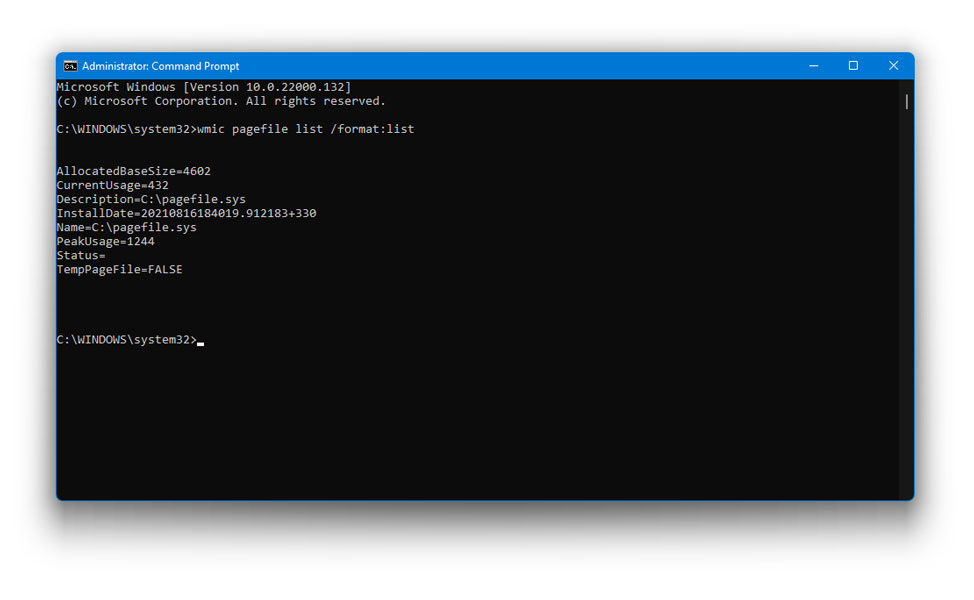
Step 4. To check the current status of the paging file or virtual memory, enter the following command and press Enter
wmic pagefile record /format:record
Step 5. For the next step, you will have to disable the automatic management of paging file management. To do so, type the command and press Enter
wmic computersystem the place title="%computername%" set AutomaticManagedPagefile=false
Step 6. Now, to set the initial and maximum virtual memory size, enter the following command
wmic pagefileset the place title="C:pagefile.sys" set InitialSize=YOUR-INITIAL-SIZE,MaximumSize=YOUR-MAXIMUM-SIZE
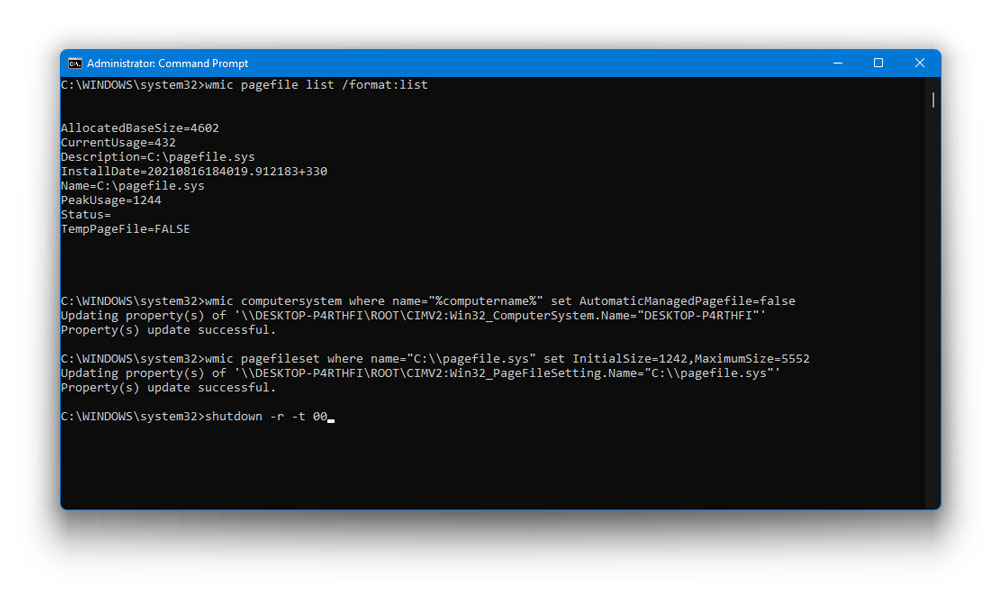
Step 7. Finally, enter the following command to restart your computer
shutdown -r -t 00
Like previous method, you can adjust virtual memory in Home windows 11 easily and also reset virtual memory. To do so using command prompt, all you need to do is follow the same procedure up to Step 5 and type the last true instead of false in the command given in step 5. Otherwise, you can copy the below mentioned command and reboot the system to save the changes.
wmic computersystem the place title="%computername%" set AutomaticManagedPagefile=true


