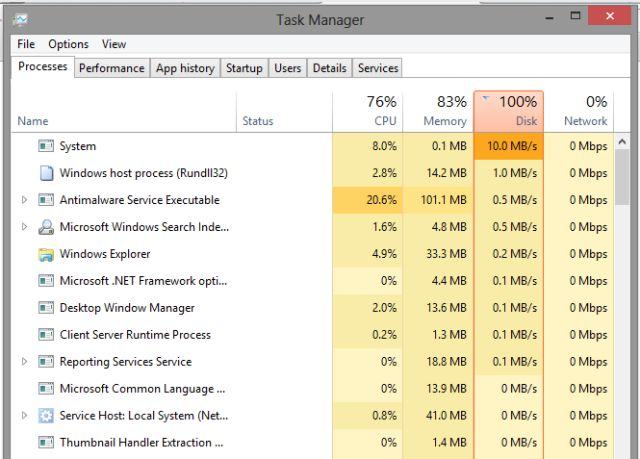
How to create System restore point in Windows 10. Restore Point, first introduced in the Windows ME version, is one of the best and unique features of the Windows operating system, helping users to quickly restore system files to their status without modifying saved data.
In the article below, we will provide you with some guidance as to how to create a backup and restore point on Windows 10.

Table of Contents
1. How can I check if a backup and restore point (System Restore Point) is activated?
To check if a System Restore Point is activated, follow the steps below:
1. Open Start Menu and then enter the keyword Create a restore point in the Search box and press Enter.
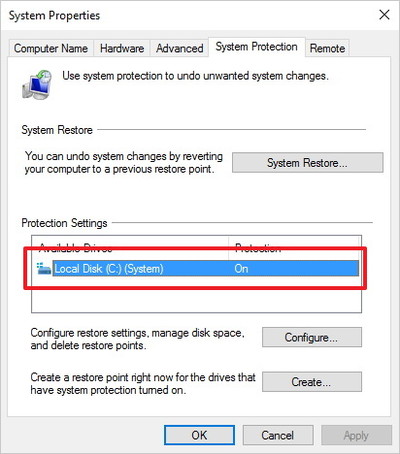
2. The System Properties window appears on the screen. Click the System Protection tab .
Under Protections Settings , check if the option setting is ON or OFF.
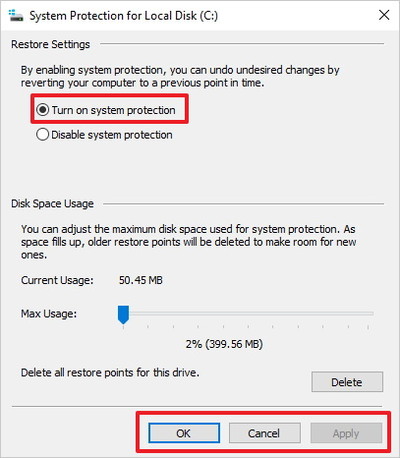
If System Protection is OFF, select the system drive on your computer and click Configure .
3. Select the Turn on system protection option .
4. Click Apply .
5. Click OK.
2. Create a backup and restore point shortcut (System Restore Point Shortcut)
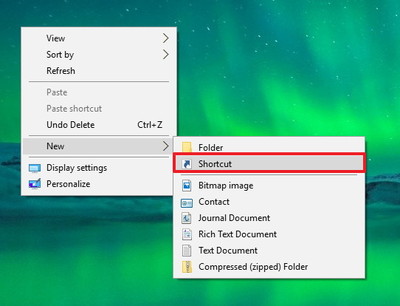
1. Right-click on the desktop, then select New and then select Shortcut .
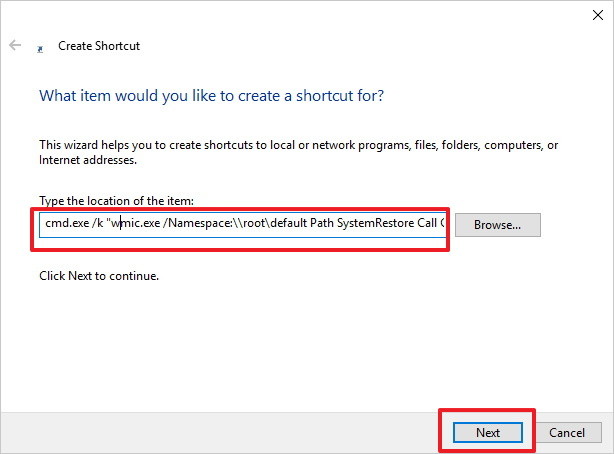
2. On the Shortcut Wizard window, enter the following command:
cmd.exe / k “wmic.exe / Namespace: \\ root \ default Path SystemRestore Call CreateRestorePoint” My Shortcut Restore Point “, 100, 7”
Then click Next.
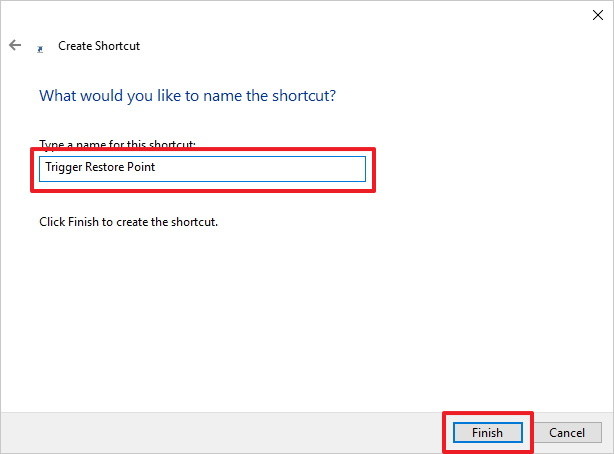
3. Enter the name of the shortcut and click Finish.
4. Right-click the shortcut you just created, and then select Properties.
5. If you want to add another icon, click Change icon .
![]()
6. Type the following path into the box and press Enter:
C: \ Windows \ System32 \ imageres.dll
7. Select the icon you want and then click OK .
8. Click Advanced .
9. Select Run as administrator .
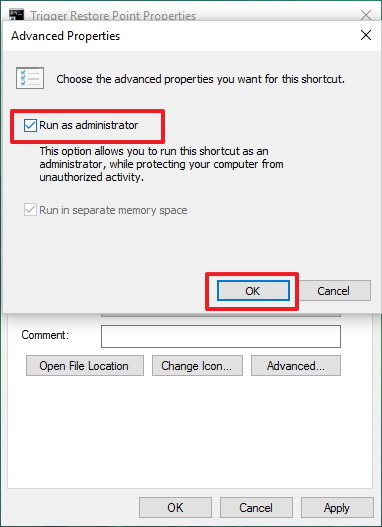
10. Click OK.
11.Click Apply.
12. Click OK to complete the process.
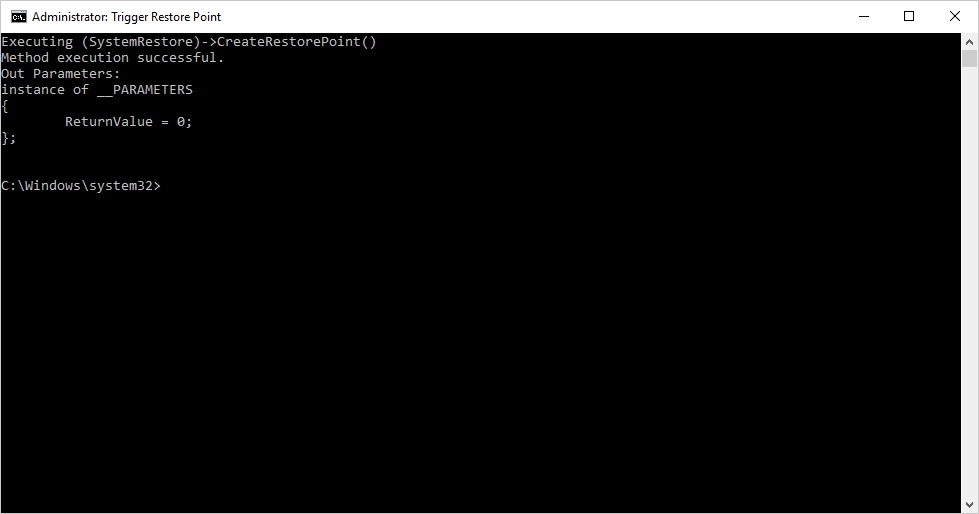
13. Finally double click on the Shortcut icon you just created on the Desktop to check.
If the Command Prompt window is shown below, you have done the correct steps:
3. How to create a restore point using Command Prompt or PowerShell
By default, Windows automatically creates a restore point before you make a major change to the operating system, such as installing a new driver or application. To create more frequent backups, you’ll need to manually create restore points or schedule tasks to run daily or weekly.
In this part of the tutorial, make tech easier than ever to show you how to create system restore points in Windows 10 using Command Prompt or PowerShell.
To do this, after enabling System Protection as described in section 1 above, disable the system restore point creation limit.
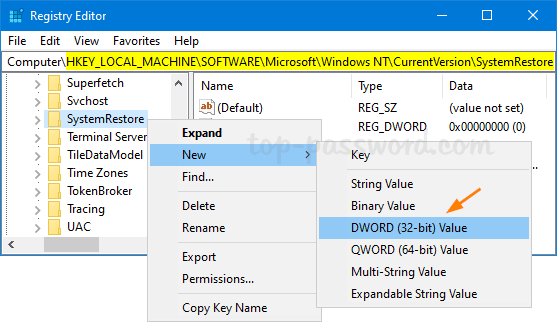
By default, Windows allows you to create only one restore point every 24 hours. To remove this limitation, open Registry Editor and navigate to:
HKEY_LOCAL_MACHINE\SOFTWARE\Microsoft\Windows NT\CurrentVersion\SystemRestoreRight-click the SystemRestore key on the left and choose New> DWORD (32-bit) Value .
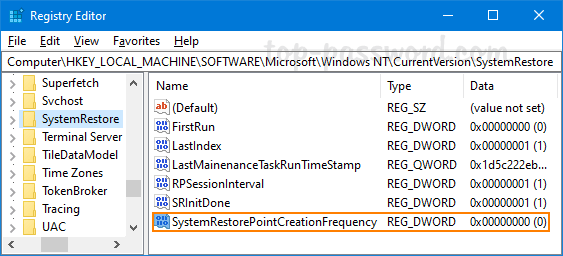
Name the new DWORD SystemRestorePointCreationFrequency and set its value data to 0 .
Create a system restore point using CMD or PowerShell
Open Command Prompt with admin rights and type the following command:
wmic.exe /Namespace:\\root\default Path SystemRestore Call CreateRestorePoint "MyRestorePoint", 100, 7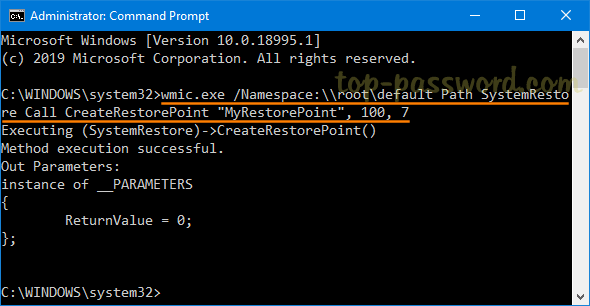
Or launch Windows PowerShell as admin and enter:
powershell.exe -ExecutionPolicy Bypass -NoExit -Command "Checkpoint-Computer -Description "MyRestorePoint" -RestorePointType "MODIFY_SETTINGS""
After you tap Enter, a new system restore point will be created immediately. You can use Task Scheduler to make the system run the above command and create an automatic restore point during boot.


