
Fix Windows Defender not working in Windows 11. Integrated into Windows 11, Windows Defender provides advanced security and threat protection solutions to protect all Windows devices. When the problem occurs and Windows Defender is not working properly or Windows 11 cannot open Windows Security. What to do if Windows Defender does not work? Follow the instructions below in this article to fix the issue.
Table of Contents
Why does Windows Defender stop working?
If you have third-party antivirus software installed on your computer, it may cause problems with Windows Defender. Also, if it’s a new laptop, check to see if it has a trial version of anti-virus software pre-installed as this may prevent Windows Defender from working properly.
If you work with programs like Flash or Java, it may be necessary to uninstall free security scanners as they can cause some problems. There are also some other common reasons why Windows Defender might not start is an incorrect date and time as most system functions depend on date and time.
Moreover, an outdated computer can also lead to many errors, so it is recommended that you perform a full update on your computer and anti-virus program as well. In that case, follow one of the ways below to fix Windows Defender not working on Windows 11.
Fix Windows Defender not working on Windows 11
Change date and time
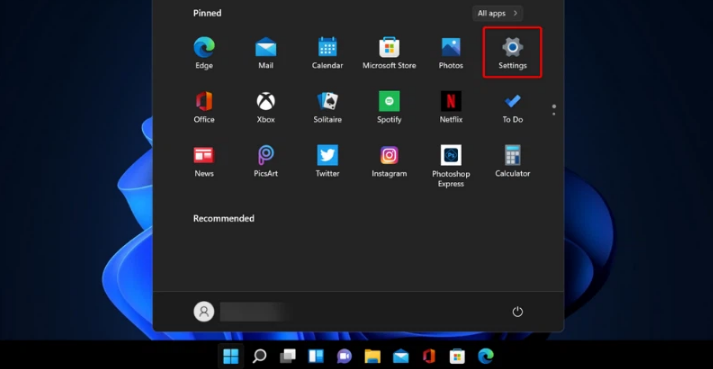
Step 1. Access the Start menu > Settings. Or press the Windows + I key combination to immediately access the Settings application.
Step 2. Select the Time & language option in the left pane.
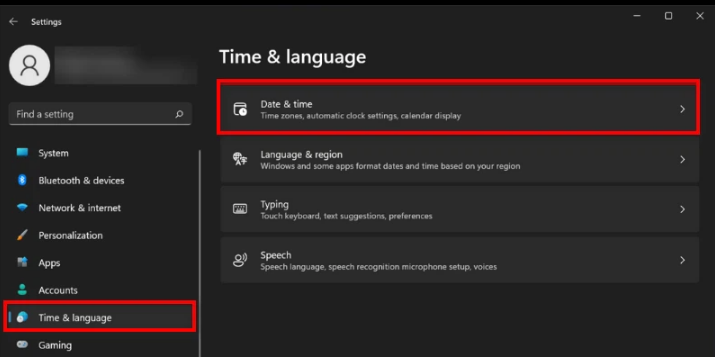
Step 3. Select Date & time in the right pane.
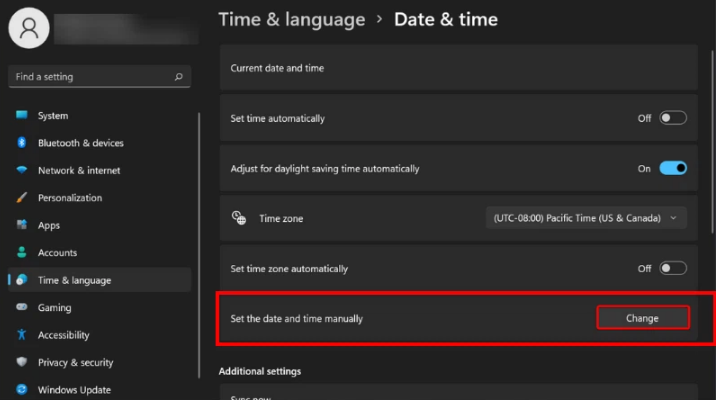
Step 4. Click the Change button to the right of Set the date and time manually to set the correct date and time for your area.
Windows Update
Step 1. Access the Start menu > Settings. Or press the Windows + I key combination to immediately access the Settings application.
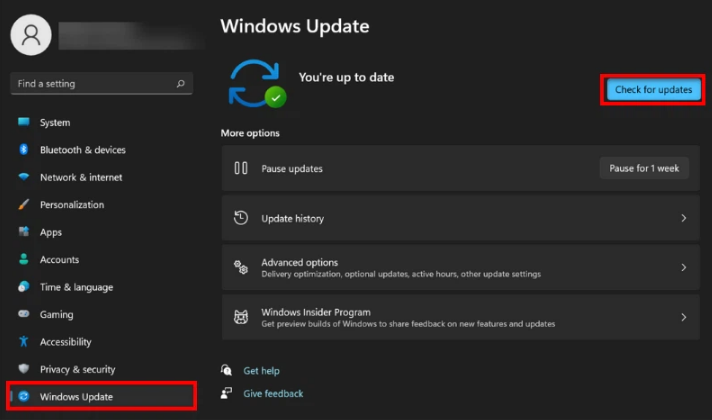
Step 2. Click the Windows Update option in the right pane. Then click the Check for updates button and Windows 11 will automatically perform the check, download and install process if there are any updates for the system.
Turn on real-time protection
Step 1. Click the Search icon next to the Start menu. Enter Windows Security in the search box and click on the corresponding displayed search results.
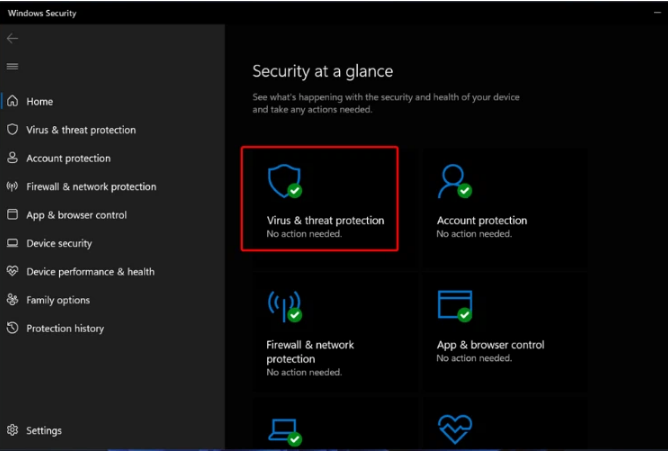
Step 2. In the displayed Windows Security window, select Virus & threat protection in the right pane.
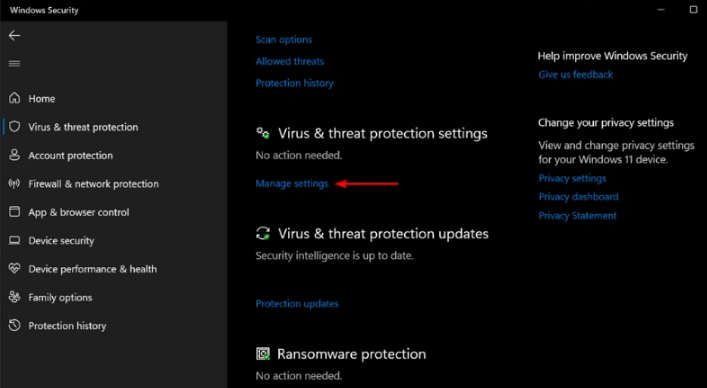
Step 3. Click the Manage settings link under Virus & threat protection settings.
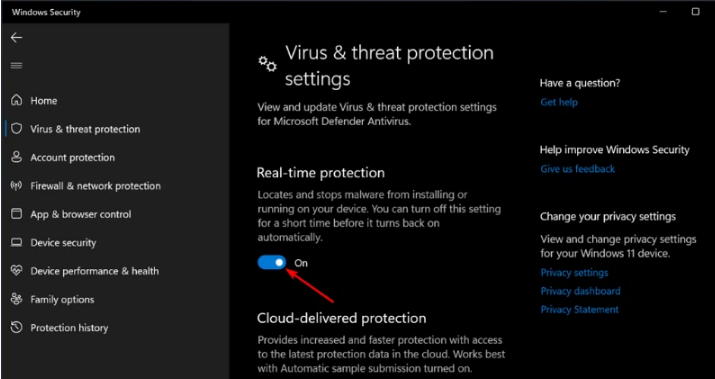
Step 4. Switch the setting under Real-time protection from Off to On to enable real-time protection.
Run SFC debugger scan
System File Checker (SFC) is a built-in Windows utility that will scan all protected system files and replace corrupted files with previous backups.
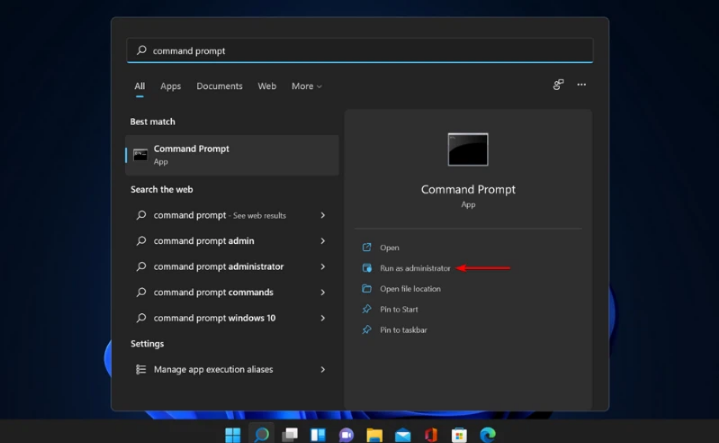
Step 1. Click the Search icon next to the Start menu. Type Command Prompt in the search box and click the Run as administrator button in the right pane to activate the command line window with Admin rights.
Step 2. In the new command line window, enter the command below and end with the Enter key.
sfc/scannow
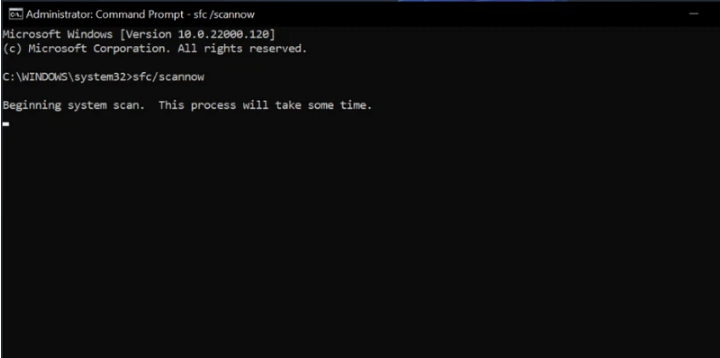
Step 3. Wait for the scan to finish, restart your computer to complete the process.
Change proxy server
Step 1. Click the Search icon next to the Start menu. Enter Command prompt in the search box and click the Run as administrator button in the right pane to activate the command line window with Admin rights.
Step 2. In the new command line window, enter the command below and end with the Enter key .
NETSH WINHTTP SET PROXY 1.1.1.1:8080
NETSH WINHTTP SET PROXY MYPROXY.NET:8080
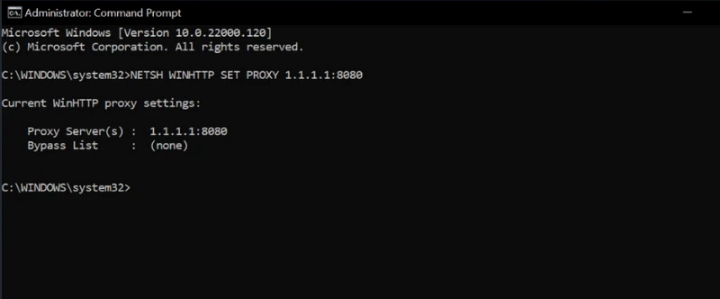
Step 3. Reboot the system and see if this solves the problem.
Fix Windows 11 cannot open Windows Security
Some users reported that when they clicked the Open Windows Security button from the Windows Security tab inside the Settings app, they only saw an unusual pop-up instead of actually opening the application.
Also you’ll get the message You’ll need a new app to open this windowsdefender link stating that a new app needs to be opened to open this Windowsdefender link along with an option to search for the app in the Microsoft Store.
But there is a simpler way to solve the problem. You press the Windows key, enter PowerShell in the search box, and then right-click the displayed results and select Run as administrator .
Then copy and paste the command below into the command window and press Enter.

Windows Defender on Windows 11 is similar to the version on Windows 10 but has a notable new feature called Microsoft Defender Application Guard (MDAG).
This feature is an additional security solution and is only available on enterprise editions of Microsoft Windows or Microsoft Edge, and privately owned laptops managed through Microsoft Intune or a similar tool. So try the above ways if unfortunately it doesn’t work, good luck!


