
Fix DNS Server Not Responding error. DNS Server Not Responding error is one of the common errors that occur on Windows 7/8/8.1 and Windows 10 operating systems. If you encounter this error, you cannot connect to the Internet to access the network.
Usually when fixing this error with the Windows Network Diagnostics feature, you will receive the message “Your computer appears to be correctly configured, but the device or resource (DNS server) is not responding”.
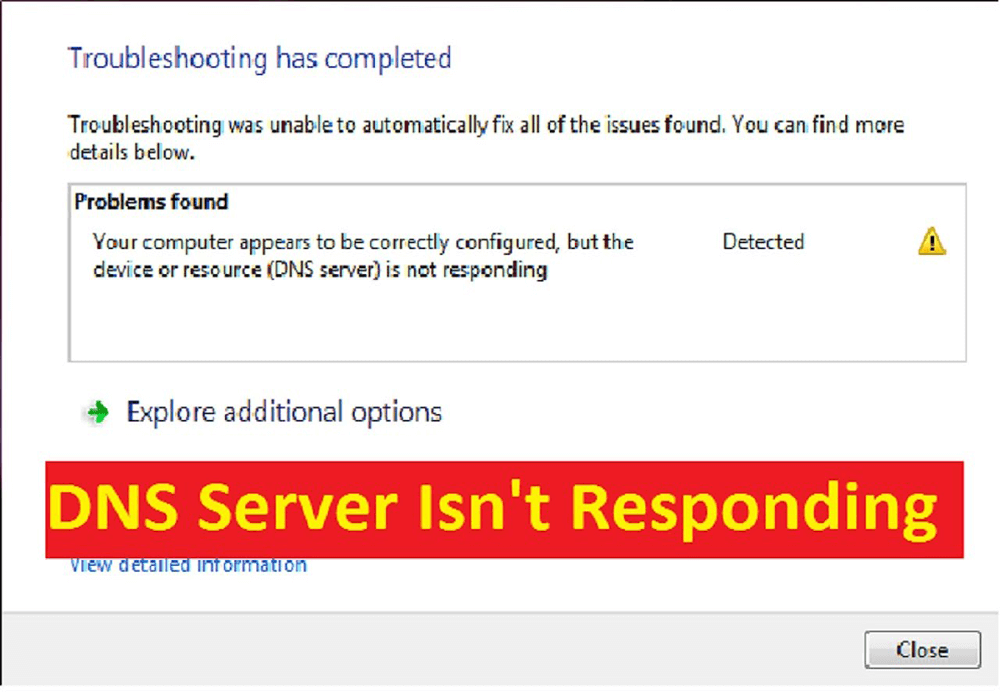
Table of Contents
What is domain name system?
The domain name system (DNS) is a directory service used for transforming alphanumeric domain names into numeric IP addresses. A decentralized process, name resolution generally takes place on DNS servers’ networks distributed throughout the world. Every internet address you enter into your web browser’s search bar is then forwarded by your router to a DNS server. This server then dissolves the domain name into a numeric sequence and returns a corresponding IP address. Should the DNS server fail to produce an answer, then it won’t be possible to access the desired website; the result is the error message ‘DNS server not responding’.
Causes of the error
Let’s first consider the source of the problem. Visit the website from another device, possibly using a 4G connection, to see if it loads. If everything is working properly, then the problem is with the router or the device. Connect to the router with another device to see if the web page loads like that. If so, the problem must be with the device side.
Besides, the cause of DNS Server Not Responding error on Windows 10/8/7 may be due to:
– Network card or Router error.
– The DNS service on the computer is interrupted.
– Anti-virus programs or Firewall (firewall) block access to the Internet connection.
Fix DNS Server Not Responding error on Windows operating system
1. Fix Network Address
First, click Start and then select Run to open the Run command window.
Next on the Run command window, enter that Network and Sharing and then press Enter to open the Network and Sharing Center.
Open the Network and Sharing window
On the Network and Sharing Center window, click Change adapter settings.
Select Change adapter settings
Next right-click your network, select Properties.
On the Local Area Connection Properties window, click the Internet Protocol Version 4 (TCP/IPv4) option to change the default DNS server to Google DNS or OpenDNS.
On the Internet Protocol Version 4 (TCP/IPv4) window, click the Use the following DNS server address option and enter the Google DNS address:
– Preferred DNS Server is: 8.8.8.8
– Alternate DNS Server is: 8.8.4.4
If you want to use OpenDNS, you use the address:
– Preferred DNS Server is: 208.67.222.222
– Alternate DNS Server is: 208.67.220.220
Internet Protocol Version 4 (TCP/IPv4)
Check the box Validate settings upon exit and then click OK.
The next step is to open Command Prompt. To open the Command prompt, click Start => Run, then enter cmd.exe in the Run command window and press Enter.
On the Command Prompt window, enter the command ipconfig /all and then press Enter.
Find and note down the Physical Address.
Now go back to the Network and Sharing Center window. Here find and right-click on the network you are connected to and then click Properties.
Next click Configure and select the Advanced tab. On the Advanced tab, find the Network Address and enter the Physical Address you just noted in the previous step.
Note: Fill in the physical address immediately, without dashes.
For example, if your Physical Address is BE-4C-C4-DB-A9-C0, enter the Value box as BE4CC4DBA9C0 and then click OK.
Finally proceed to restart your computer to check if the error has been fixed or not.
2. Reset DNS Settings
If you have fixed the Network Address address and still cannot fix the DNS server not responding error, you can reset the DNS settings to fix the error.
First press the Windows + R key combination to open the Run command window. On the Run command window, enter the cmd.exe command and press Enter to open the Command Prompt.
Next enter each of the following commands into the Command Prompt window:
• ipconfig /flushdns and then press Enter.
• ipconfig /registerdns and then press Enter.
• ipconfig /release and then press Enter.
• ipconfig /renew and then press Enter.
• netsh winsock reset and then press Enter.
Finally proceed to restart your computer to check if the error has been fixed or not.
3. Re-add Winsock Registries to fix DNS Server not Responding error
To fix DNS server not responding, all you can do is delete Winsock Registries and then add it again.
You should first back up Winsock Registries, then proceed to delete the key to avoid in the worst case scenario. Next, restart your computer, then add the Winsock Registries that you backed up earlier and restart the computer.
Follow the steps below:
– First press the Windows + R key combination to open the Run command window.
– On the Run command window, enter regedit there and press Enter.
– At this time, the Registry Editor window appears on the screen, here you navigate by key:
HKEY_LOCAL_MACHINE => SYSTEM => CurrentControlSet => Services
Path
– Right-click on Winsock and then select Export.
– Give any name, such as winsock1.reg and then click Save.
– Do the same with Winsock2.
– Now right-click on Winsock and Winsock2, select Delete to delete the Registry.
– Restart your computer.
– Open the Windows Registry Editor window again and navigate to the key above:
HKEY_LOCAL_MACHINE => SYSTEM => CurrentControlSet => Services
Click File => Import.
– Select the Registry that you backed up before and then click Open.
– Restart your computer again and check if the DNS server is not responding error is still there.
4. Disable NetBIOS
In fact, disabling or enabling NetBIOS may not affect these issues either. In most cases, the cause of the error can be a faulty Registry or other faulty configurations. But if you are not connected to the corporate network or do not set up the Home Network, you can disable NetBIOS and try to check if the DNS server is not responding error is still there.
To do this thing:
– Go to Control Panel => Network and Internet => Network and Sharing Center.
– Next, double click on the network connection you are using to open the Properties window.
– On the Properties window, double-click Internet Protocol Version 4 (TCP/IPv4).
– On the Internet Protocol Version 4 (TCP/IPv4) Properties window, click Advanced.
On the Internet Protocol Version 4 (TCP/IPv4) Properties window, click Advanced
– Select Disable NetBIOS over TCP/IP to fix DNS server not responding error.
Check Disable NetBIOS over TCP/IP
– Click OK.
– Finally close all windows and check if the DNS server not responding error is still there.
5. Reboot the system
To fix DNS Server Not Responding error on Windows 10/8/7, you can try the solution of restarting the system. No one can be sure that restarting the computer can fix the error, but the process is not difficult, so you should try it.
6. Disable Firewall/anti-virus program
Quite a few users reflect that the cause of DNS Server Not Responding error on Windows 7/8/10 is due to Firewall or anti-virus programs blocking your connection. Therefore to fix the error you should disable anti-virus programs and Firewall (firewall) on your computer and check if the error is still there.
7. Uninstall and reinstall network drivers
Before attempting this fix, make sure you have the necessary drivers available. Visit the PC manufacturer’s website and download the latest network adapter driver. Since the PC cannot connect to the Internet, use another PC to download the driver and save it to a USB flash drive, then install it on the PC if necessary. All you need to know is the manufacturer and the name or model number of the PC.
- 1. In the search box on the taskbar, type “Device Manager” and look for Network Adapters in the list of results.
- 2. Expand Network adapters and locate the network adapter for the device.
- 3. Right click on that network adapter.
- 4. Select Uninstall device.
- 5. Click the checkbox “Delete the driver software for this device” and click Uninstall.
- 6. After uninstalling the driver, restart the machine.
After the PC restarts, Windows will automatically find and install the required network adapter driver. Check if that fixes the connection problem you’re having. If Windows does not automatically install the driver, try installing the saved drivers before uninstalling.
8. Clear DNS cache
The DNS cache stores the locations (IP addresses) of web servers containing the web pages the user has recently viewed so that the computer can access them faster. Deleting it can remove any errors and let the machine check the DNS server again for the address.
- 1. Type cmd in the search window and open Command Prompt with admin rights.
- 2. Type the following in the Command prompt window:
- ipconfig /flushdns
Open Command Prompt - 3. Check if this has resolved the issue.
9. Update network drivers
A device driver is a piece of software that allows the operating system to start, use, and control a hardware device. If not updated, they may not work. Here’s how to update the network driver:
- 1. Go to Control Panel and open “Device Manager”.
- 2. Expand Network adapters by clicking the triangle in front of it.
- 3. Right click on your network.
- Select network
- 4. Click “Update Drivers”.
- 5. Let the computer check for driver updates.
- 6. Please install the driver if an update is found.
10. Update the router software to the latest version
Just like drivers need to be updated to work properly, so does the software on the router. Each router manufacturer will have a different way to do this. Start checking online by searching for updates with the router name to learn how to do this for the model you are using.
11. Turn off Virtual Wi-Fi Miniport Adapter
This option may or may not be available on the machine. If so, the following instructions will show you how to disable it.
- 1. Go to Control Panel.
- 2. Expand Network adapters by clicking the triangle in front of it.
- 3. Right-click on the Virtual Wi-Fi Miniport Adapter (if available).
- 4. Click Disable.
12. Change TCP/IP settings
TCP/IP, or Transmission Control Protocol/Internet Protocol, is a set of communication protocols used to connect devices on the Internet.
- 1. Type “control panel” in the search box.
- 2. Click Network and Internet.
- 3. Open Network and sharing center.
- 4. Click “Change Adapter Settings” on the left side of the window.
- 5. Right click on the WiFi network in use.
- 6. Click Properties.
- 7. Select “Internet Protocol Version 4 (TCP/IPv4)” and click the Properties button.
- 8. On the next screen, select “Obtain IP Address automatically” and “Obtain DNS Server Address automatically”.
- 9. Click OK.
13. Reinstall Windows
If you have applied all of the above solutions and still do not fix the error, the last solution for you is to reinstall Windows to fix the error.
14. Try a different browser
Sometimes browsers have a bit of a problem. If you’re having DNS issues using one browser, try a different browser. Browsing the web to download another browser can be difficult, but if you’re not using your device’s default browser, you can always use that instead.
If changing the browser fixes the problem, try updating or reinstalling the misbehaving browser. If that doesn’t work or you’re using the default browser on your device, try clearing your browsing data and uninstalling any add-ons.
15. Change DNS server
If the current DNS server is not available, why not try another server? You don’t have to be tied to the server you’re using by default, and it’s simple to tell the device to use another server.
To do this, you need to go to your computer’s DNS settings and ask it to connect somewhere else. If you are not sure how to do this, Quantrimang.com has outlined the steps in the guide to change DNS Server on Windows, Mac, iOS and Android.
As for what to enter as your new DNS server, there are several options for primary and secondary addresses:
Google has memorable 8.8.8.8 and 8.8.4.4 addresses for servers.
Cloudflare is also easy to remember, with 1.1.1.1 and 1.0.0.1.
OpenDNS has 208,67,222,222 and 28,67,220,220.
While these are useful, free DNS services, they should not be used for long periods of time. Free DNS servers often don’t have many security features installed, and there are many others who use free services.
Therefore, it is best to use a free DNS server until your normal server is back online. You can check your regular DNS server by undoing the steps above.
16. Restart the router
You may find that the problem extends beyond your device. If every device and computer on the local network cannot connect to the DNS server, there may be a problem with the router.
Like computers, some routers may have corrupted DNS caches. You can do a quick test by disabling the WiFi connection on your mobile device and using data. If this solves the problem, the router’s DNS cache may be corrupted.
To fix this, unplug the router from the power source and leave it on for 30 seconds. Plug in the power and try connecting again. If the router is the problem, this will fix it.
17. Try switching to Safe Mode
Use Safe Mode to find the culprit
Your antivirus isn’t the only program that has control over your connections. Other applications, software, and drivers can also affect your connection.
To check if something else is the culprit, try booting the device into Safe Mode. You can boot into Safe Mode in Windows 10, and macOS boot modes also have their own safe mode.
If you boot into Safe Mode and the problem is resolved, it means software is interfering. When you boot into Safe Mode, the PC intentionally doesn’t load unnecessary drivers and software.
Therefore, if Safe Mode fixes the problem, it means that anything that isn’t loading could be the culprit. However, there are many problems that lead to the error, so try reinstalling the driver and network-based software until it is fixed.
Video on Fix DNS Server Not Responding error
There are still other ways to troubleshoot DNS Server not Responding, but these are some of the most common. Hopefully, one of these will work.


