Fix 100% disk error on the latest Windows 10 2020. The problem of 100% disk error has appeared from previous versions and the majority appears in versions of windows 8, windows 8.1 and currently the latest version is released. is windows 10.
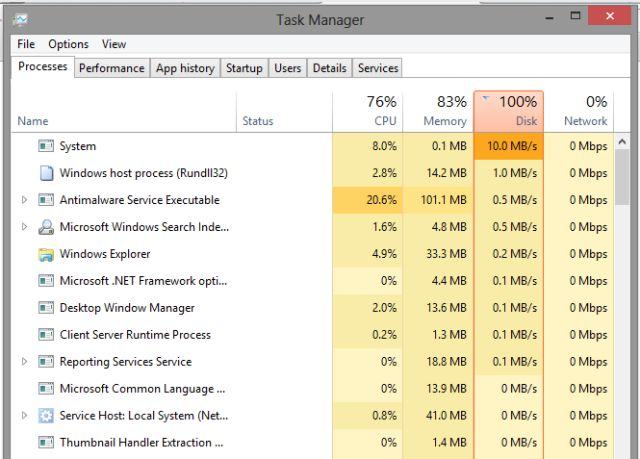
Table of Contents
Cause and effect
The problems that make this situation appear are numerous, and there are a number of methods online to overcome this situation. And in fact, some of you can fix it, some of you can’t.
Because there are many causes from hardware to software, 100% successful repair is a blessing.
You can not think of how to do it and how not to do it, really depends on the machine, the status of the device you are using.
As you can see, although the process I use does not consume much disk space, the machine still reports as 100%.
And here is the main problem, I will guide you to fix 100% disk error by the following tips:
Set reasonable virtual RAM
If your computer has a relatively large amount of RAM, you do not necessarily need to rely too much on virtual RAM.
Setting up too much virtual RAM will affect your hard drive more or less.
Because virtual RAM is actually shared from your hard drive, this makes your hard drive have to read and write more, leading to hard drive failure such as bad sectors.
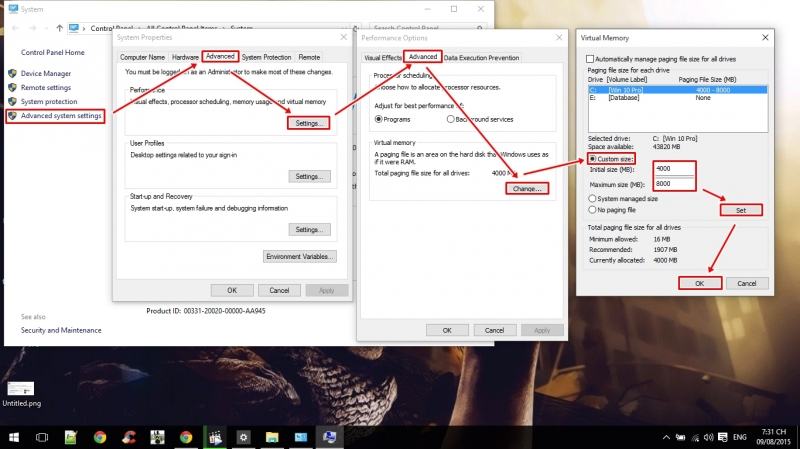
First, right-click on the Computer icon (This PC) and select Properties.
Next, select Advanced system settings, select Settings … and select Advanced, select Change …, then select Custom size.
Here you should set the Initial size (MB): 1/2 real RAM. Item Maximum size (MB): In real RAM.
Here, my RAM is 8GB, so I entered it. On the internet there are many instructions for setting with a ratio of: Real RAM and then 1.5 times of real RAM. However, in my opinion, if your real RAM is not too small, you should not abuse it to harm the hard drive as I said above.
After setup is complete, you need to reboot to see the changes.
Use the Troubleshooting feature
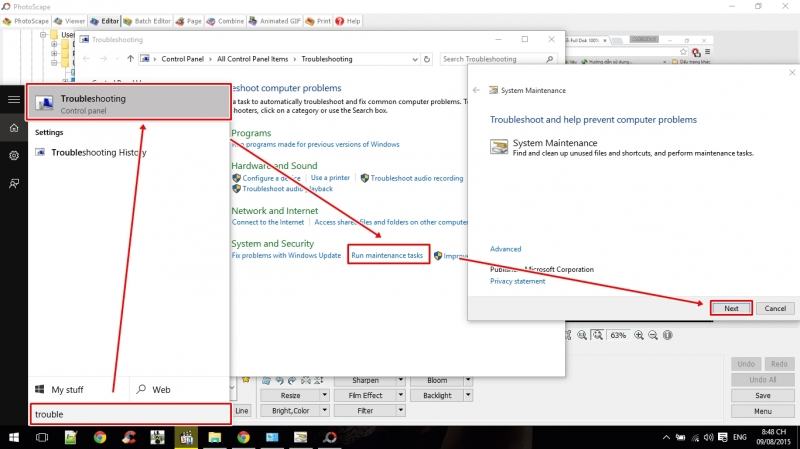
Troubleshoot problems automatically detect problems and can automatically fix problems. If it cannot be fixed, the program will issue a notice of problems and suggestions for fixing it.
Usually when wifi is limited we also use this feature, and most of it can be fixed, haha.
You go to Control Panel to go to Troubleshooting or you can find it by trouble as shown below. Next, select Maintenance tasks and keep Next, next to.
Turn off the Maintenance function
According to most online tutorials, this is also one of the causes of 100% disk error.
So you should also try to turn it off to see if the results are positive.
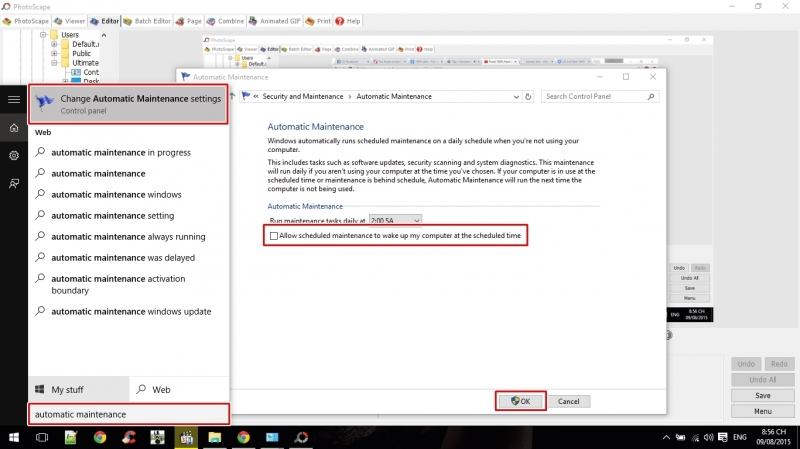
To turn off this feature, press Windows key + Q or you can right-click the Start icon (flag) and choose Search.
Then you type: automatic maintenance and choose like the following picture.
Turn off Smartscreen
SmartScreen is a new feature developed and integrated from Windows 8 onwards, it helps you avoid dangerous applications on the Internet, links that direct users to other phishing websites and prevent install software that is not properly certified by Microsoft. But if you already have a safe antivirus, this feature is not really necessary, to turn off this feature you can do the following:
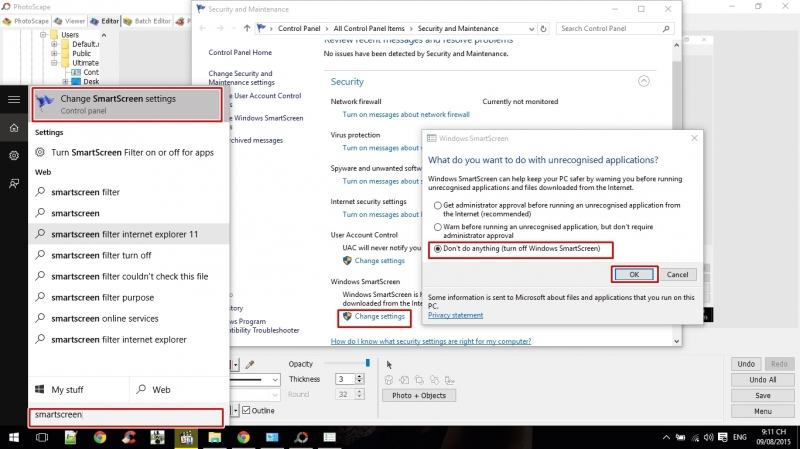
Press Windows key + Q and search with the following keyword: smartscreen and do as shown below.
Turn off the Superfetch service
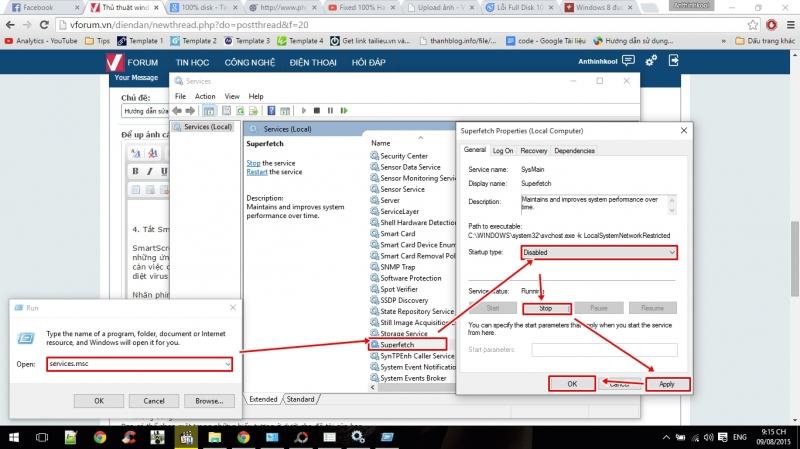
To turn off superfetch, press Windows + R to open the Command Prompt dialog box and type the following: services.msc and press enter.
Next you search for superfetch and double click, select as shown in the picture.
The above are some tips to help you fix 100% disk status, but nothing can be sure that you can completely fix it. So if you can not fix it, you should reinstall the operating system or use an SSD.
Good luck!

