Fix Windows 11 stuck on working on updates. Windows 11 is a new operating system that has received many positive reviews, but it is still incomplete. Specifically, this operating system still has many errors such as the update process via Windows Update being stuck for many hours at a certain % level. If the Windows 11 update process hangs for many hours, you can fix it with the instructions in this article.
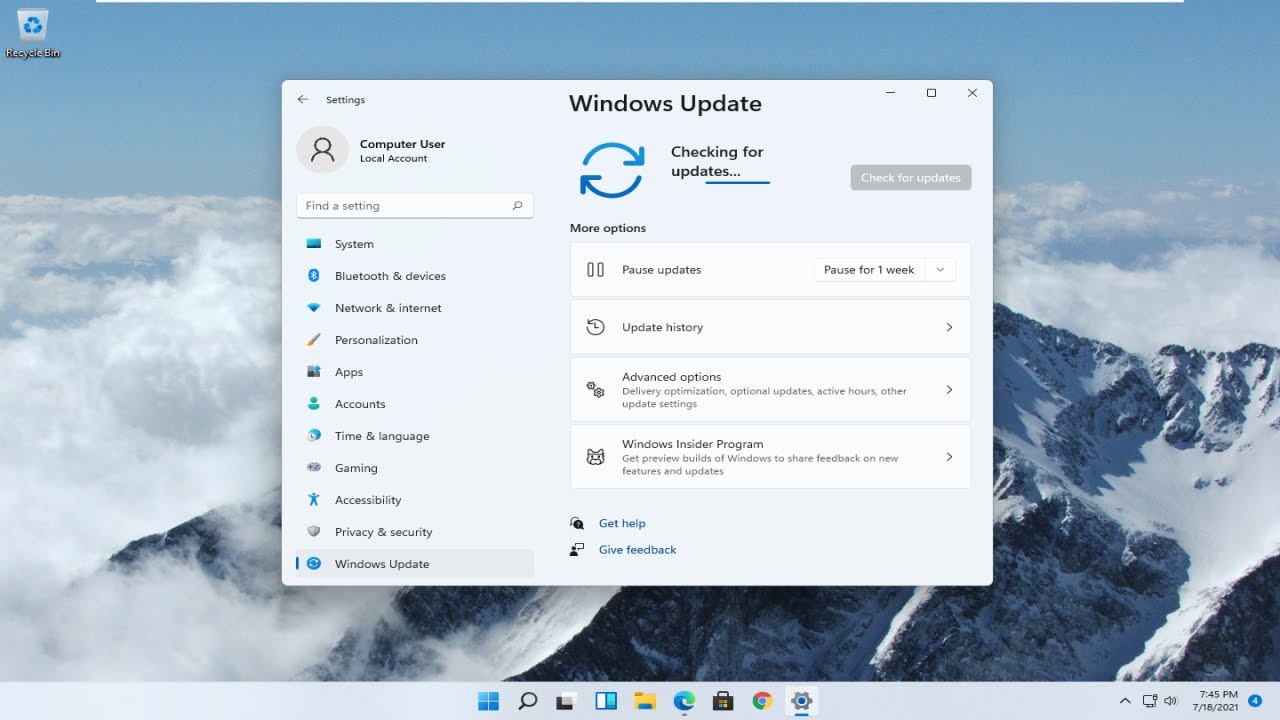
Table of Contents
Why Windows 11 stuck on working on updates?
There are many possible reasons why Windows updates hang. Some of them are:
- Any problem with internet connection.
- Problems with memory.
- The Windows Update service is disabled or corrupted.
- Conflicts with any existing processes or applications.
- The update file download is incomplete.
If the problem is caused by the internet, you only need to check the network connection, and the computer memory problem, you need to clean up junk files, large files for the Windows 11 installation partition. The rest of the problems, you can You can use the following methods to fix it.
How to fix Windows 11 stuck on working on updates
Using the Windows Update troubleshooters
Windows 11 has a dedicated troubleshooting section in Settings to help fix certain system program problems without needing to seek outside help.
– You open Settings .
– Click System > Troubleshoot > Other troubleshooters .
– You find Windows Update > click Run .
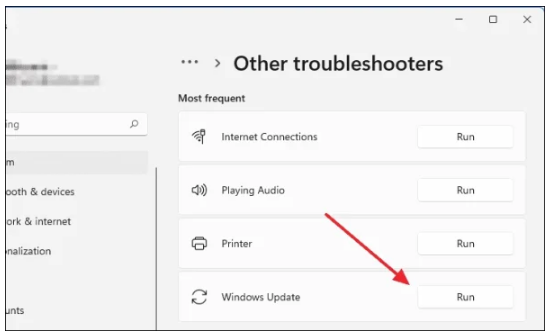
– The troubleshooter window will appear and it will automatically start looking for any internal errors that might have caused the update to hang.
– After the troubleshooter detects the problem, it will try to solve it by making the necessary changes to your computer.
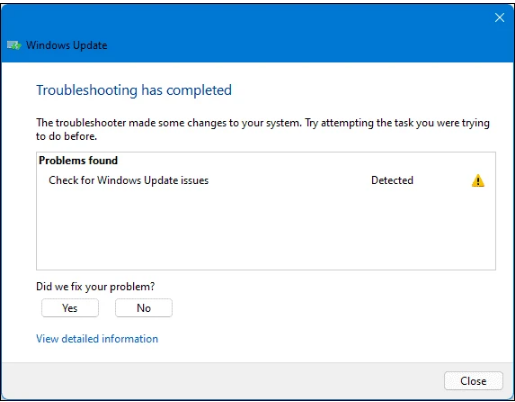
– Finally, the troubleshooting will end by showing you the results it fixed.
Boot into Safe Mode
It is possible that the update is stuck on your Windows 11 computer because the update may conflict with any running services, background processes, or any third-party applications running. In such cases, restarting your computer in Safe Mode may resolve the problem. Basically, safe mode is when Windows runs on its default settings and uses only the necessary drivers and files to run.
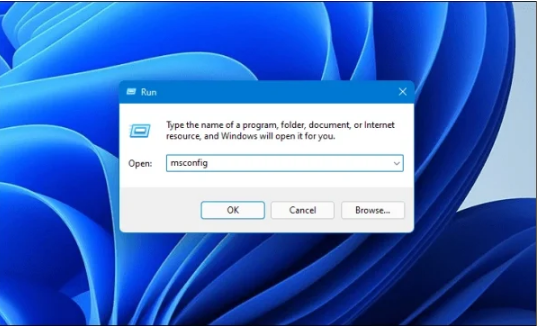
– You open the Run box (Win + R) > type msconfig > press Enter.
– System Configuration window opens, select Boot tab > check Safe boot with Minimal option > click OK .
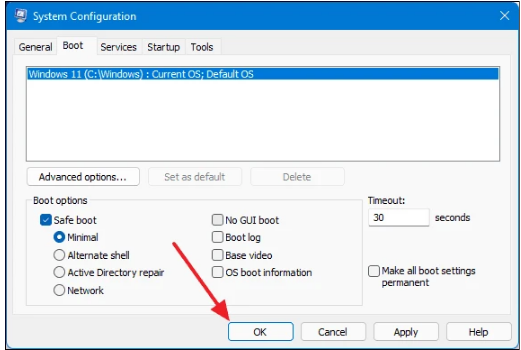
– Finally, restart your computer and perform the update in safe mode.
Make sure the Windows Update service is running
The Windows Update service is an essential background process that allows Windows to automatically download and install updates. And if it is stopped then it could be the cause of the update crashes. To check if this service is running, do the following.
– You open the Start menu> enter Services to launch it.
– From Services (Local) , find Windows Update in the right pane and double-click it.
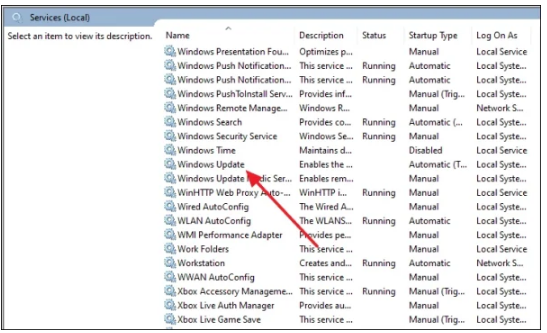
– In the Windows Update Properties (Local Computer) window, check that the Startup type option must be Automatic (if not, select it) and then click Start > click OK .
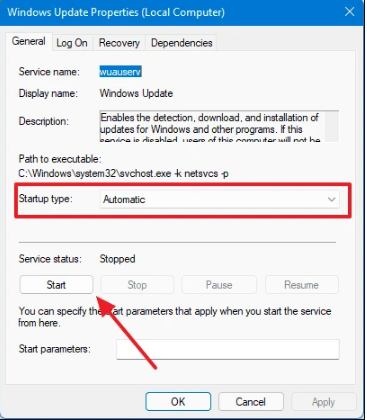
You restart the computer and try the update again.
Remove Windows Update files
Like any other file, Windows Update files are also saved in your primary storage device. Therefore, if Windows Update crashes, you can delete the downloaded files and it will force Windows to do the download again.
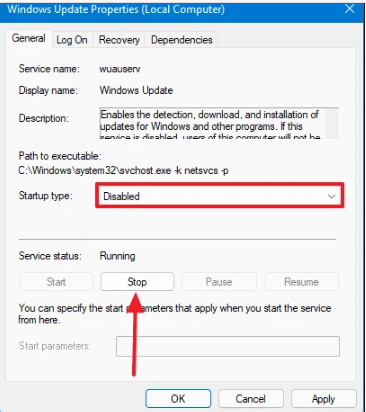
– First, you need to stop Windows Update from working by reopening the Windows Update Properties (Local Computer) window as above.
– You select Disabled at Startup type> click Stop > for the computer to restart.
– Open File Explorer > paste the path C:\Windows\SoftwareDistribution to open the SoftwareDistribution folder.
– Then, you press Ctrl + A to select all files and folders inside and press Delete to delete them.
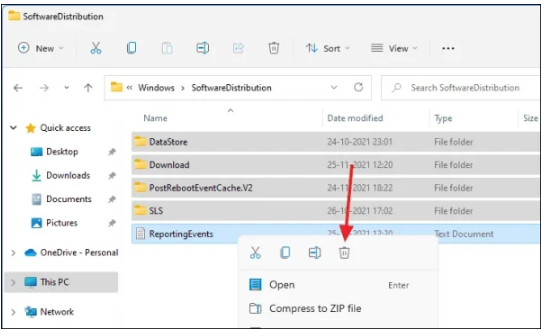
Then you restart Windows Update and perform the update again.
Reset PC
If all the above methods do not work and you encounter many other errors, you can Reset PC. The process of resetting the computer takes a long time and you need to consider when doing it.
– You open Settings .
– You click System> Recovery > click Reset PC .
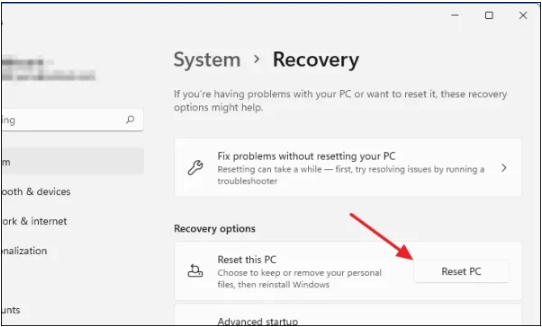
– In the Reset this PC window, select Keep my files to reset the computer with the application and settings removed but keep the personal files.
– In the next selection screen, select Local reinstall .
The window will now show you what changes will be made to your computer during the reset. You click the Reset button and your computer will go into the reset process.
Once your Windows 11 is reset, you can boot and go through the update process again.

