How to Fix backgroundTaskHost.exe critical error in Windows 11 ,backgroundtaskhost.exe application error, backgroundtaskhost.exe what is it, backgroundtaskhost.exe system error the system detected an overrun, backgroundtaskhost. webaccountprovider,

Table of Contents
BackgroundTaskHost.exe critical error in Windows 11
- Open Command Prompt as Administrator (search “cmd”, right-click, Run as admin).
- Type
sfc /scannowand press Enter. Let it finish. - Type
DISM /Online /Cleanup-Image /RestoreHealthand press Enter. Let it finish. - Restart your PC.
- Go to Settings > Update & Security > Windows Update and click Check for updates, installing all available updates (including optional ones).
- If you have a Surface or Dell, run their specific diagnostic/update tools (Surface Diagnostic Toolkit or Dell SupportAssist) to update drivers and firmware.
Received 2 backgroundTaskHost.exe critical error after the installation of KB3194798. Ran virus scan and sfc /scannow, with no errors being detected. Also, Troubleshooting has found an error with Background Intelligent Transfer Service
Issues found Service registration is missing or corrupt Fixed Reset service registration Completed
Potential issues that were checked Some security settings are missing or have been changed Issue not present Check for missing or corrupt files Issue not present
Issues found
< Service registration is missing or corrupt Fixed
Reset service registration Completed Potential issues that were checked
Some security settings are missing or have been changed Issue not present
Check for missing or corrupt files Issue not present
Detection details
Service Status
Problem with BITS service : The requested service has already been started. More help is available by typing NET HELPMSG 2182.
Service Status
Problem with BITS service : The requested service has already been started. More help is available by typing NET HELPMSG 2182.
Collection information Computer Name: DESKTOP-PC Windows Version: 10.0 Architecture: x64 Time: Monday, October 17, 2016 11:09:17 PM Publisher details
Background Intelligent Transfer Service Find and fix problems that may prevent background downloads from working Package Version: 3.5 Publisher: Microsoft Windows
Background Intelligent Transfer Service Find and fix problems that may prevent background downloads from working Package Version: 3.5 Publisher: Microsoft Corporation
Page 1 of 1
10/17/2016
Faulting application name: backgroundTaskHost.exe, version: 10.0.14393.0, time stamp: 0x57899bb2
Faulting module name: Windows.Networking.BackgroundTransfer.dll, version: 10.0.14393.321, time stamp: 0x57f4c40e
Exception code: 0xc0000005
Fault offset: 0x0000000000019eec
Faulting process id: 0xfbc
Faulting application start time: 0x01d228dca2a2c3f3
Faulting application path: C:\WINDOWS\system32\backgroundTaskHost.exe
Faulting module path: C:\Windows\System32\Windows.Networking.BackgroundTransfer.dll
Report Id: 843473c8-9fa8-4811-94ed-dce7bd7cd2f0
Faulting package full name: Microsoft.Windows.ContentDeliveryManager_10.0.14393.0_neutral_neutral_cw5n1h2txyewy
Faulting package-relative application ID: App
How to Fix backgroundTaskHost.exe critical error in Windows 11 Kindly do the following method:
Method 1: Running a system file checker.
- Press Wind+X on your keyboard.
- Select Command prompt (admin).
- Type the command sfc /scannow.
The system will scan for corrupted files and folders and will perform auto fix action.
Method 2: Running Deployment image servicing and management.
- Press Wind+X on your keyboard.
- Select Command prompt (admin).
- Type the command DISM.exe /Online /Cleanup-image/Scanhealth and DISM.exe /Online /Cleanup-image/Restorehealth.
You may also create another user account to check if your administrator account is corrupted.
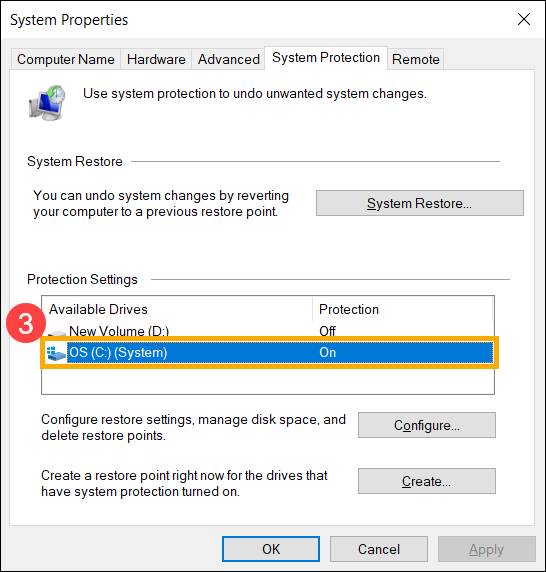
In general, the system restoration is enabled by default. You can also confirm whether the system restore is enabled by the following steps.
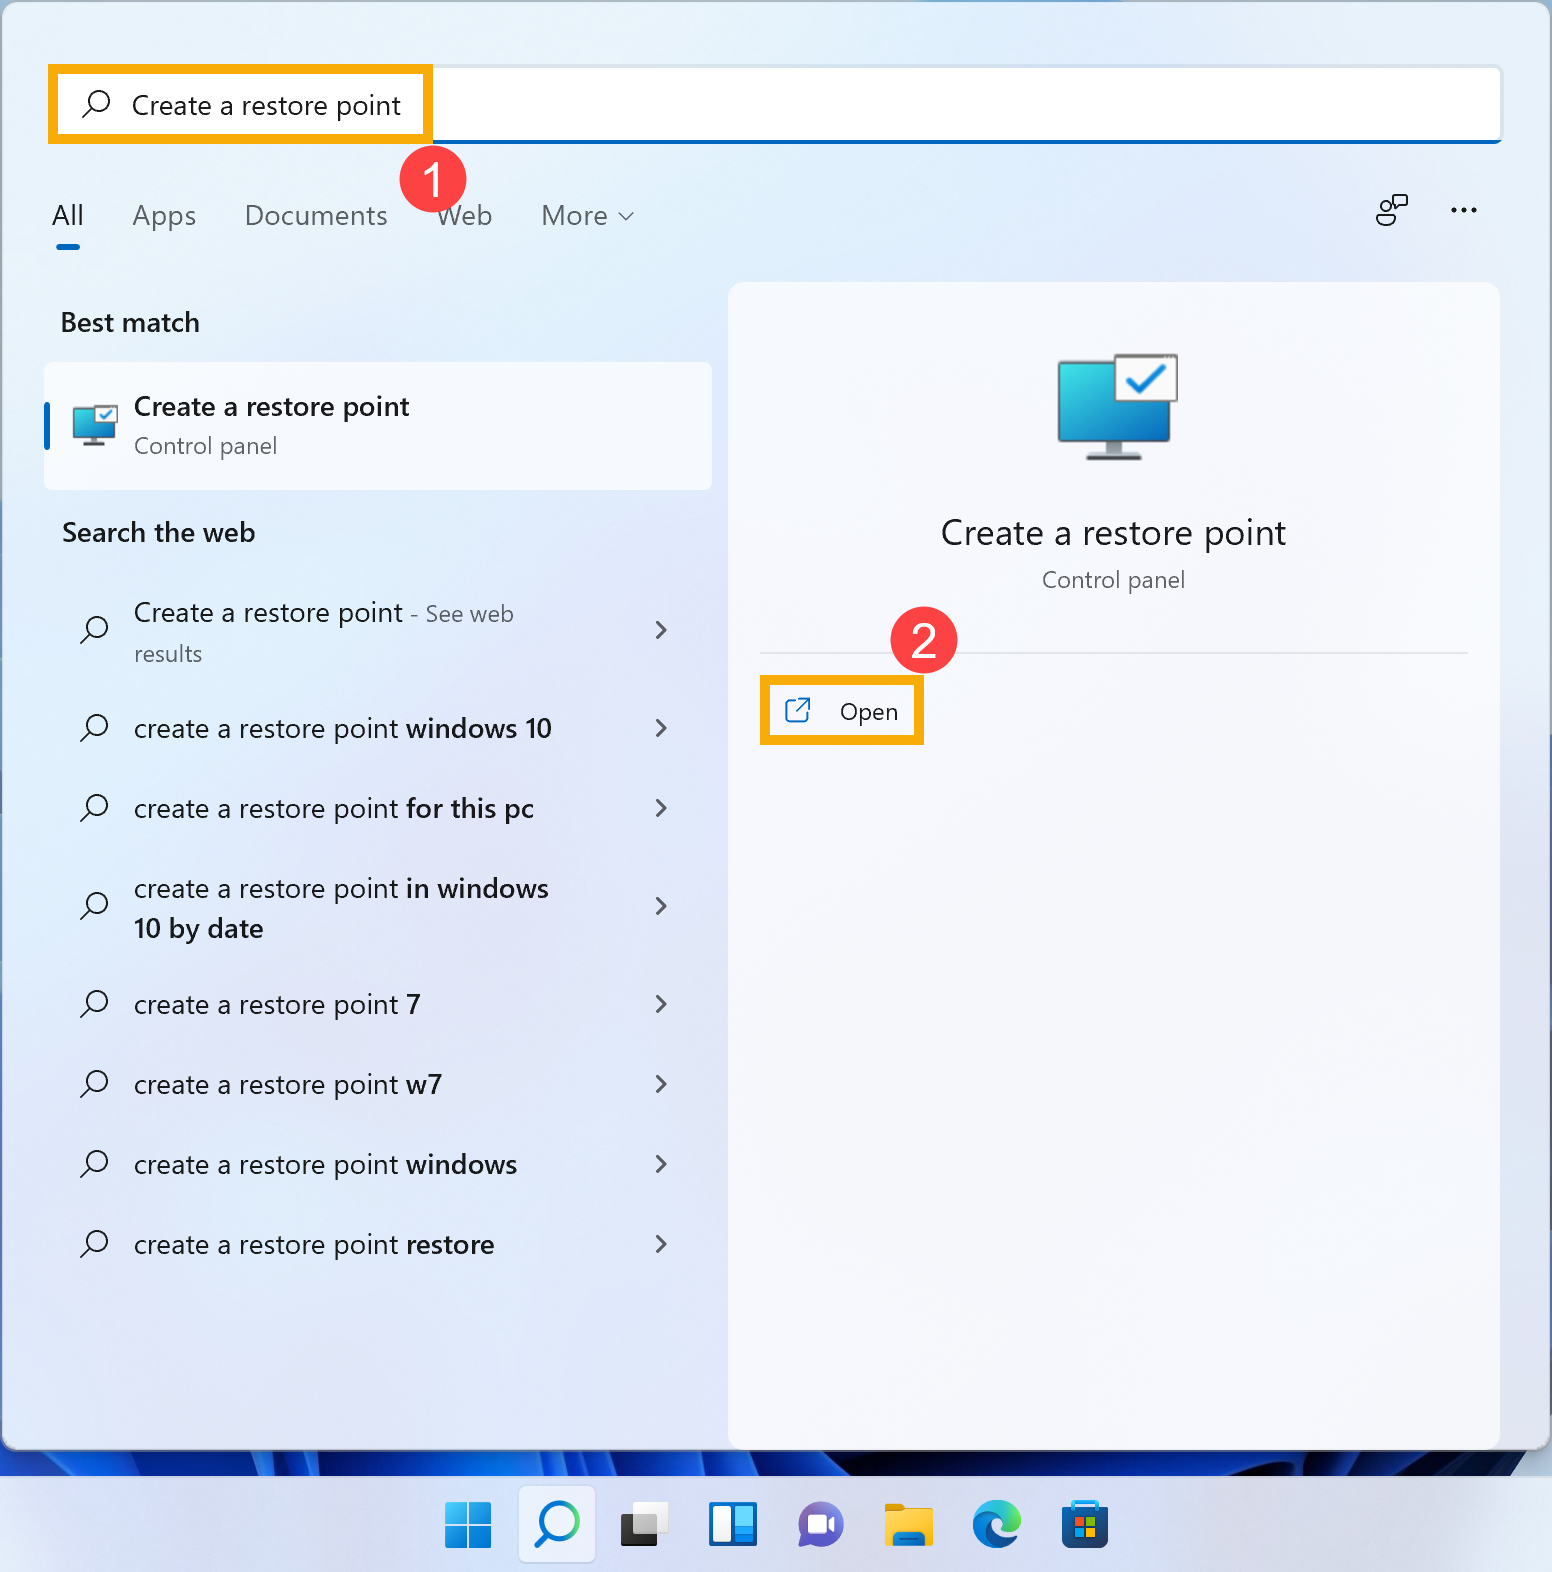
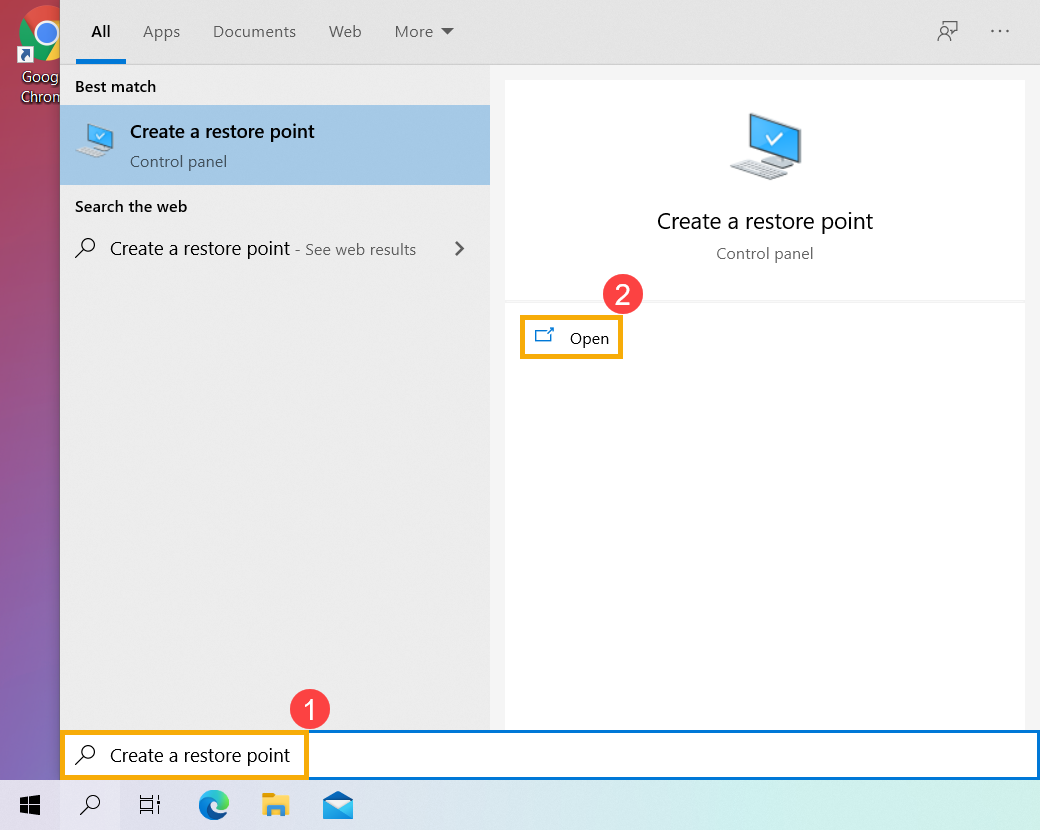
- Type and search [Create a restore point] in the Windows search bar①, then click [Open]②.
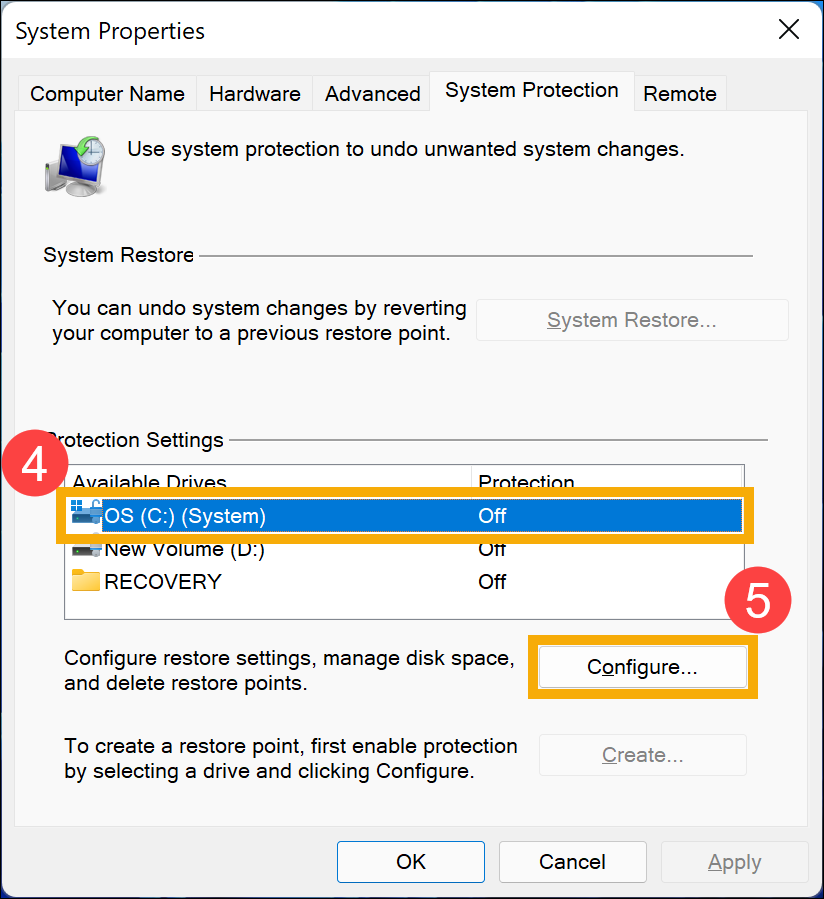
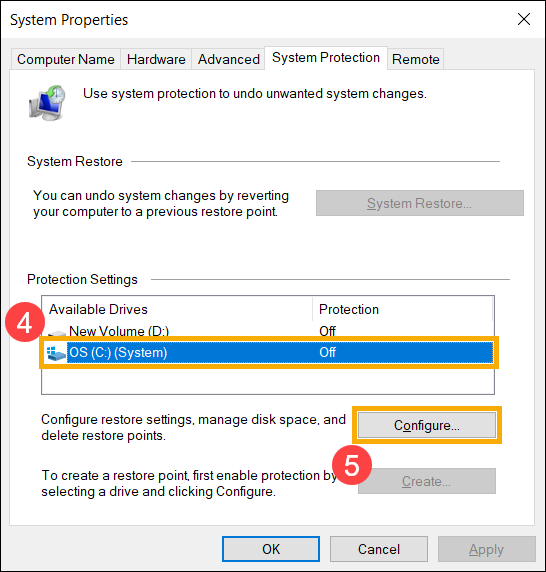
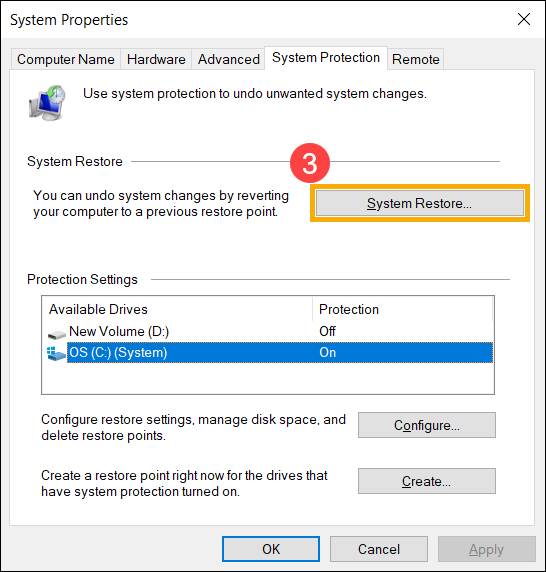
- If the Protection of system drive shows as On③, it means the system restore point is enabled.

- If the Protection of system drive shows as Off, please choose the [system drive]④ and then click [Configure]⑤.
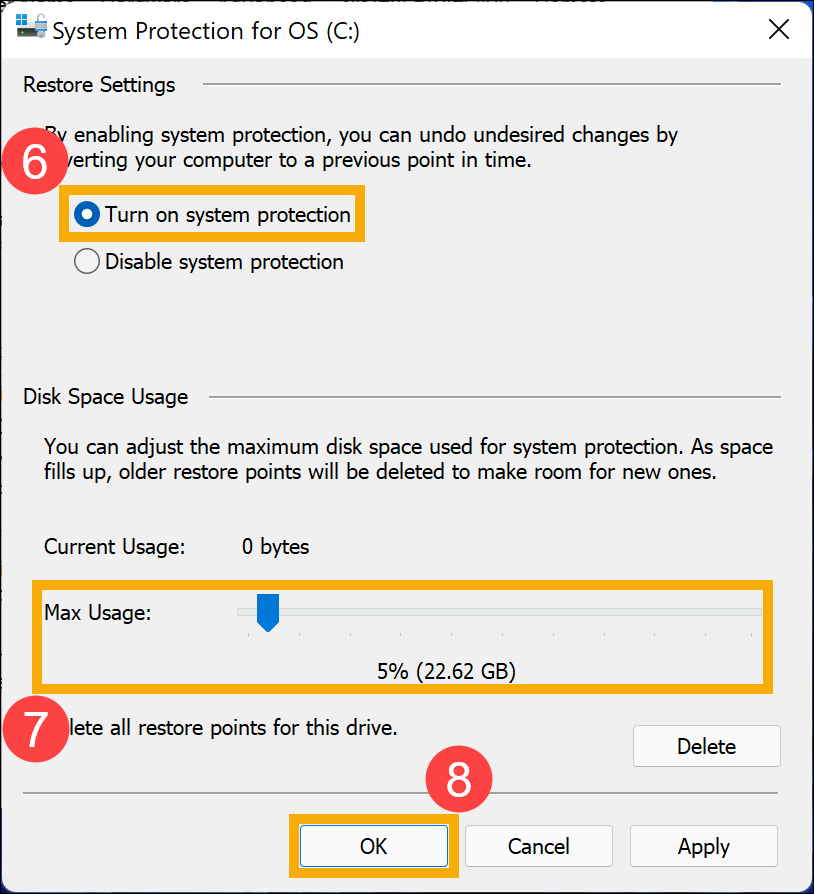
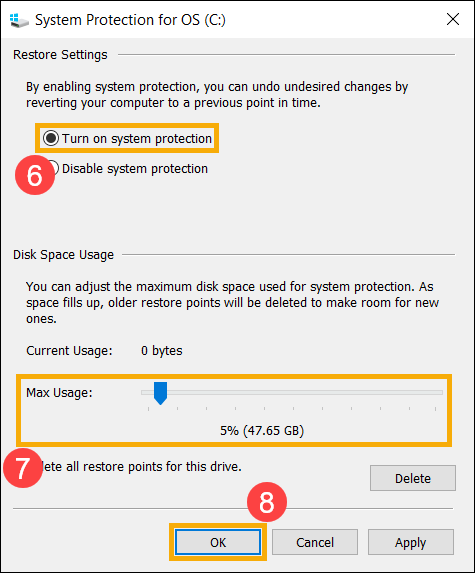
- Select [Turn on system protection]⑥ and set up the Max Usage of disk space (We suggest you set the Disk Space Usage ranging from 5% to 10%.)⑦, then select [OK]⑧. System Restore Point will be enabled.
The Max Usage will remain the disk space you set, and is used for System Restore Point. As space fills up, older restore points will be deleted to make room for new ones.
Manually create a System Restore Point
- Type and search [Create a restore point] in the Windows search bar①, then click [Open]②.

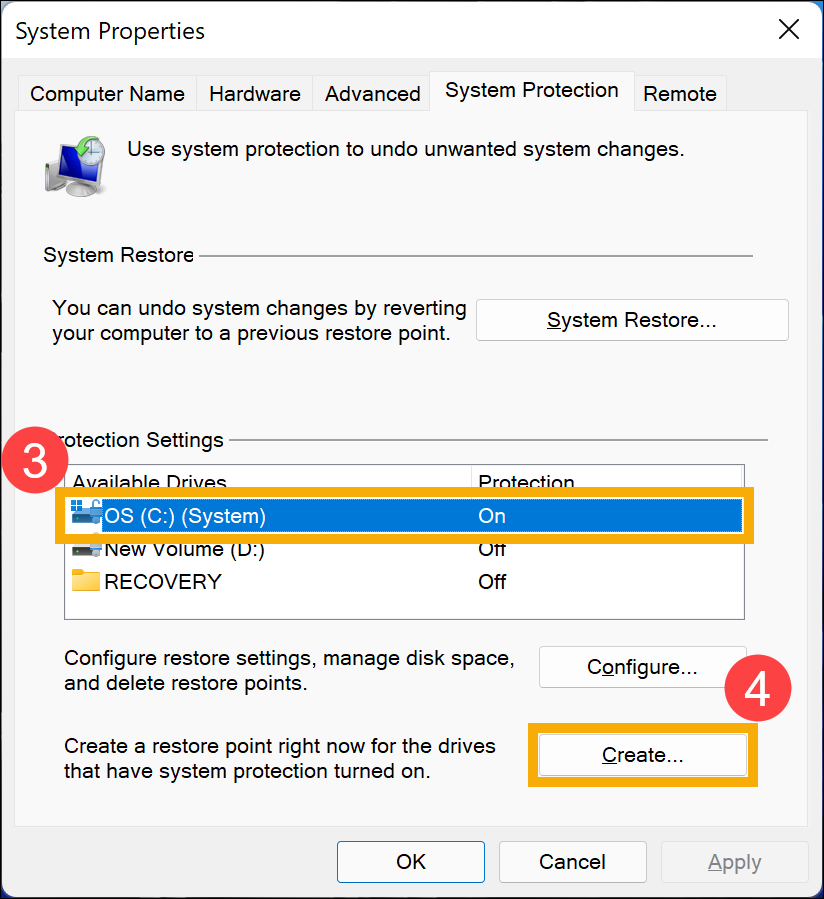
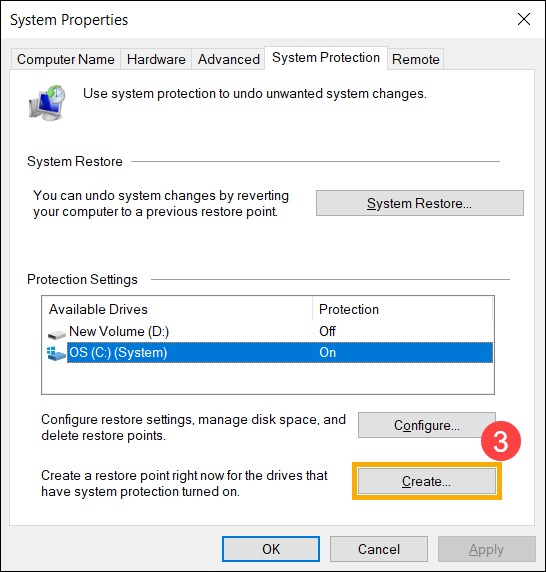
- Select a drive that have system protection turned on③, and then click [Create]④.
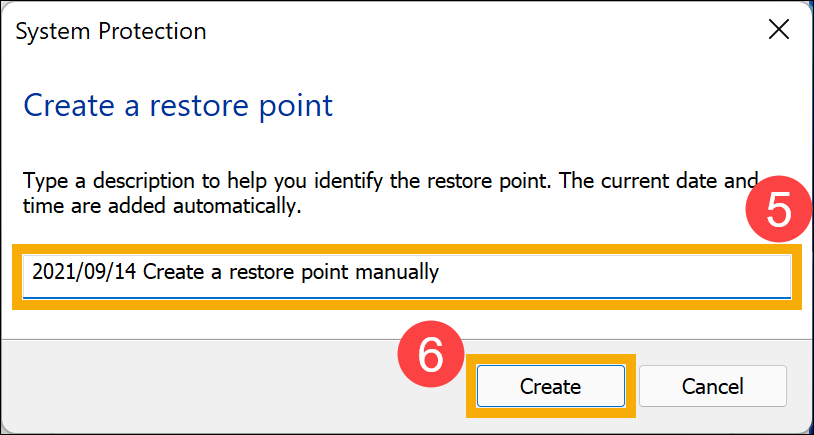
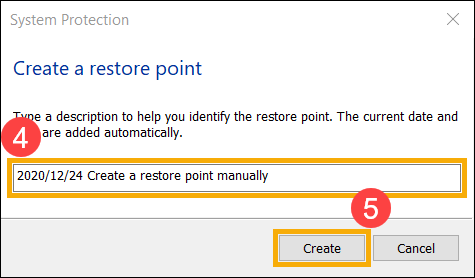
- Type a description to help you identify the restore point⑤, then click [Create]⑥.
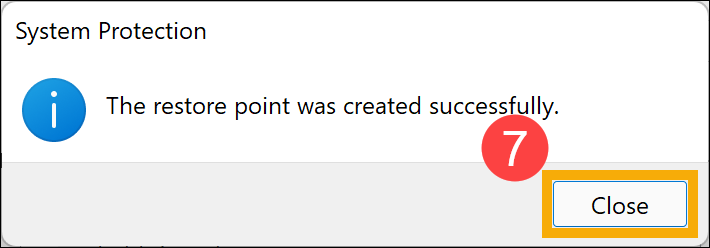
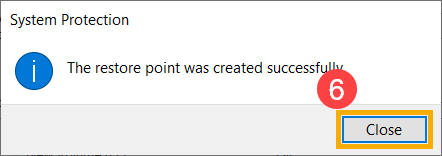
- After the below notice displays, it means the restore point is successfully created, then please click [Close]⑦.
Restore your computer from a Restore Point
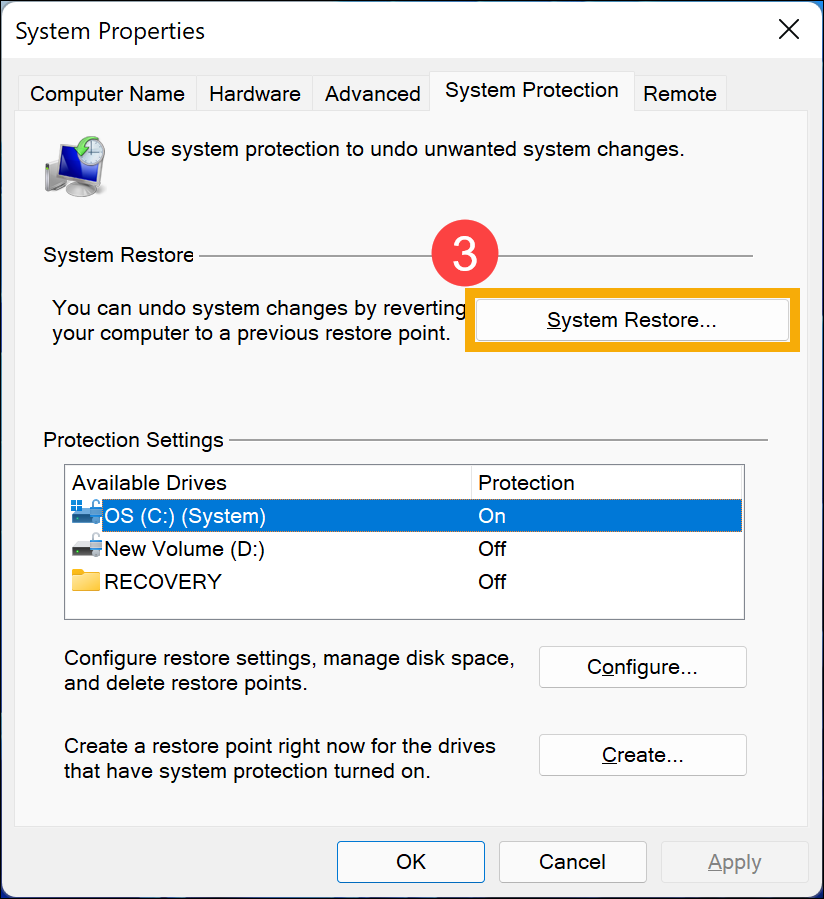
- Type and search [Create a restore point] in the Windows search bar①, then click [Open]②.

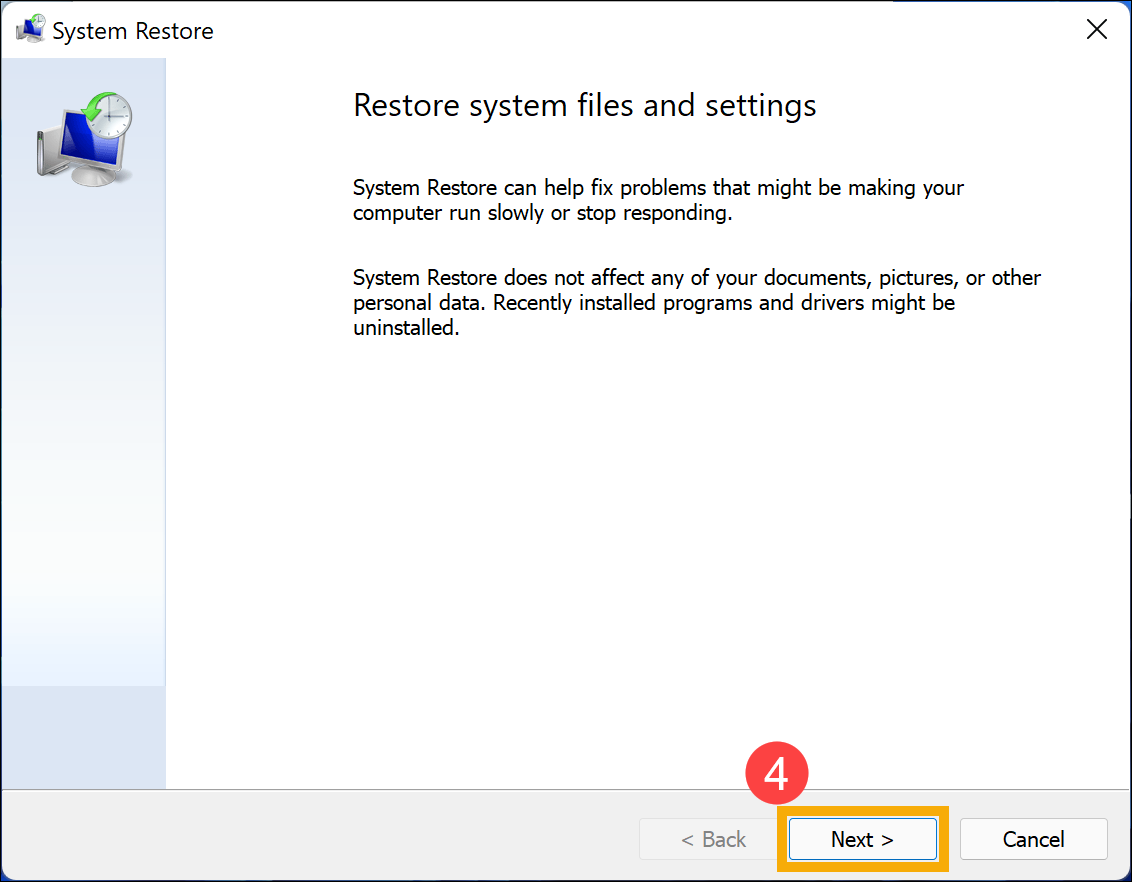
- Select [System Restore]③.
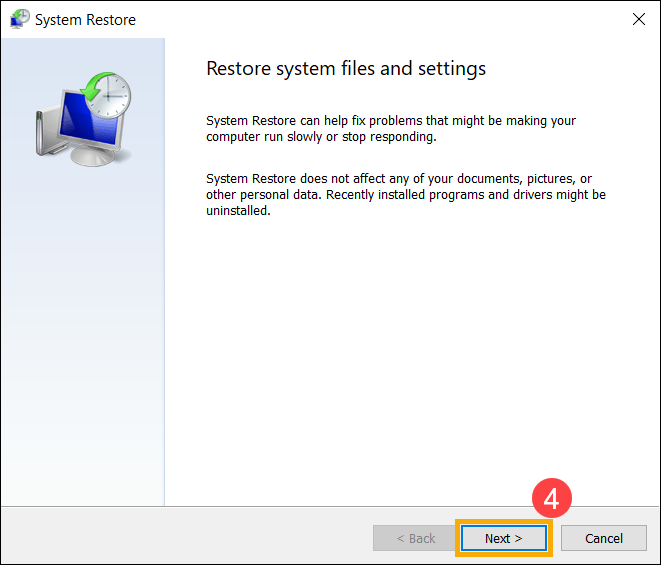
- Select [Next]④.
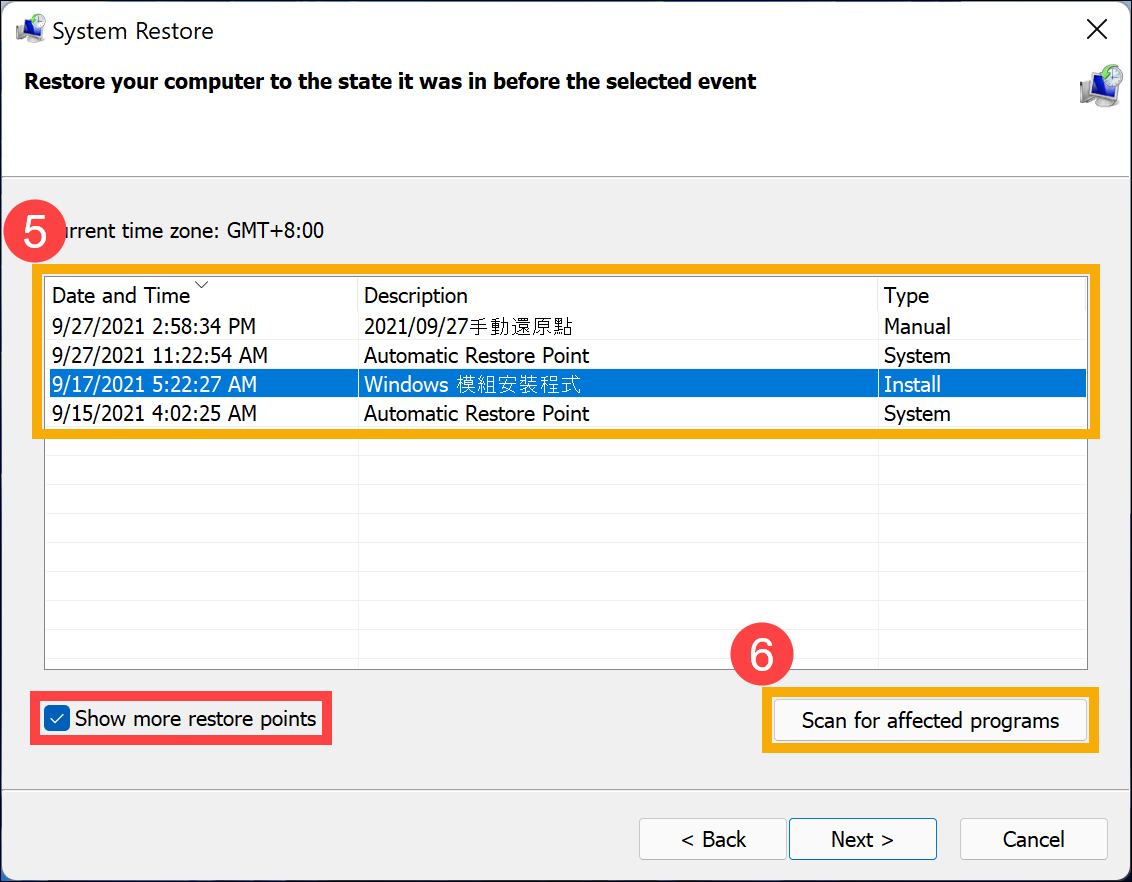
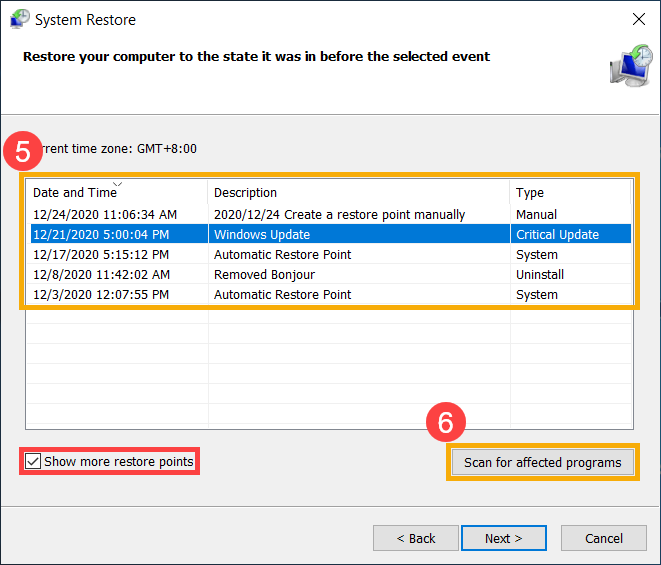
- Select the restore point that you want to use in the list of results⑤, then select [Scan for affected programs]⑥.
If you don’t see the restore point that you want to use, select the Show more restore points check box to see more restore points.
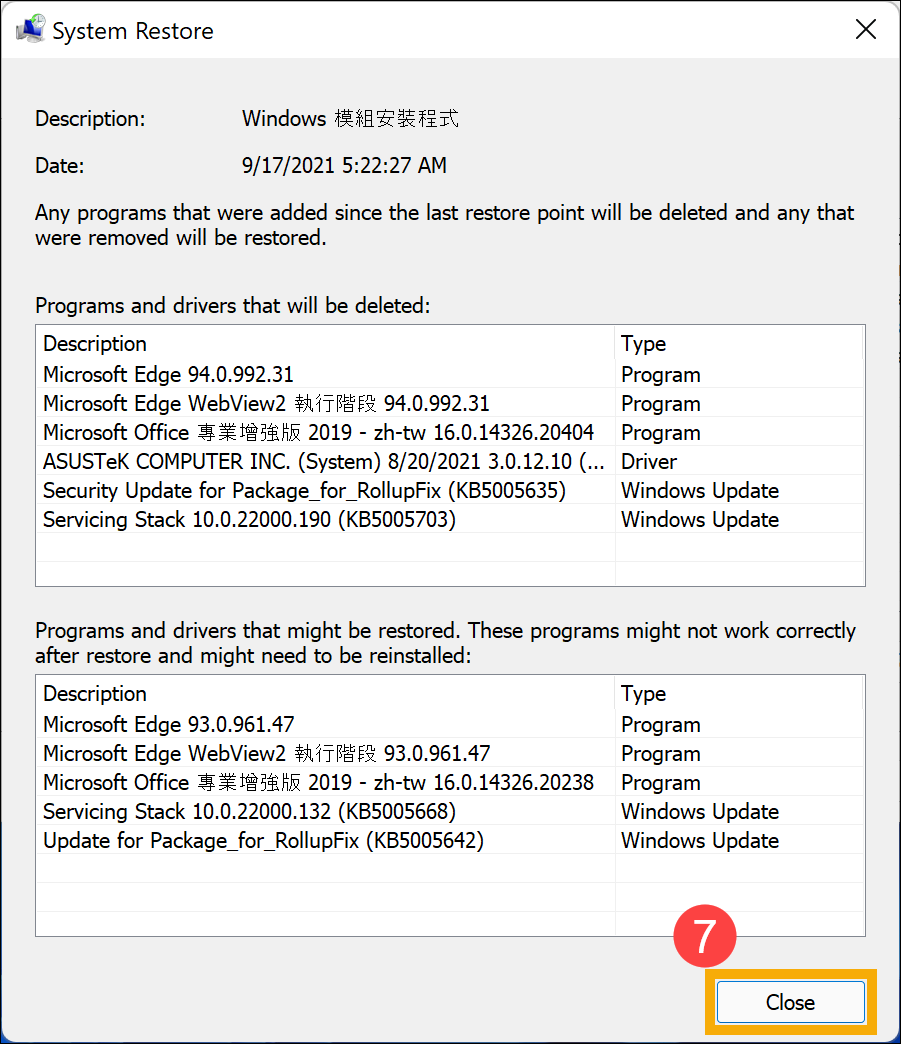
- You will see a list of items that will be deleted if you restore to this restore point. If you’re OK with the deletions, please select [Close]⑦ to continue the next step.
If this restore point doesn’t meet your requirement, please go back to the previous step and select another restore point.
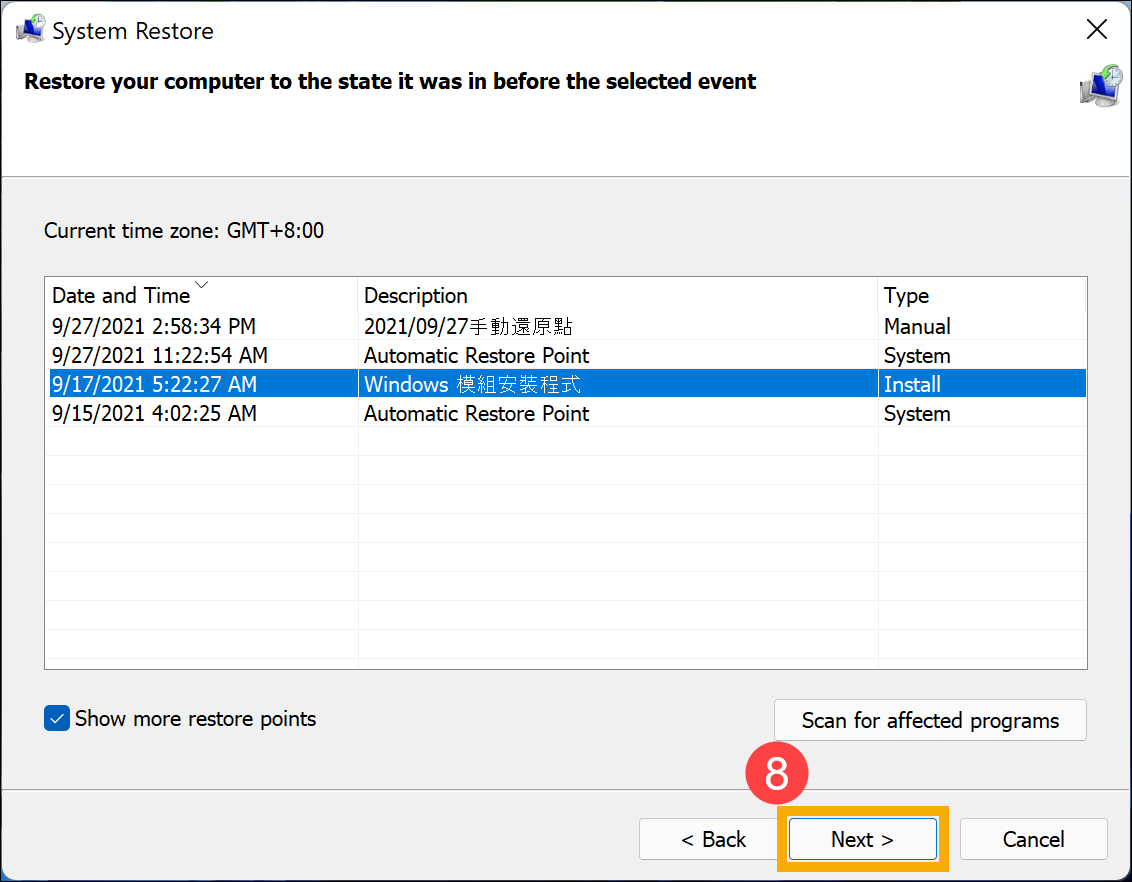
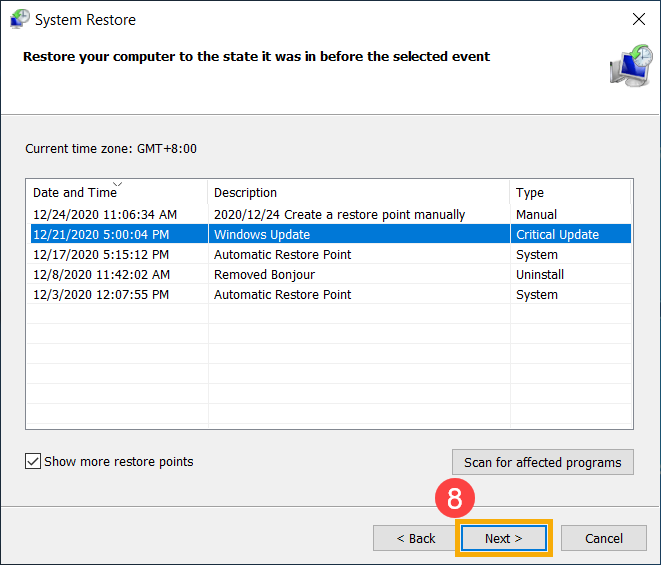
- Select [Next]⑧.
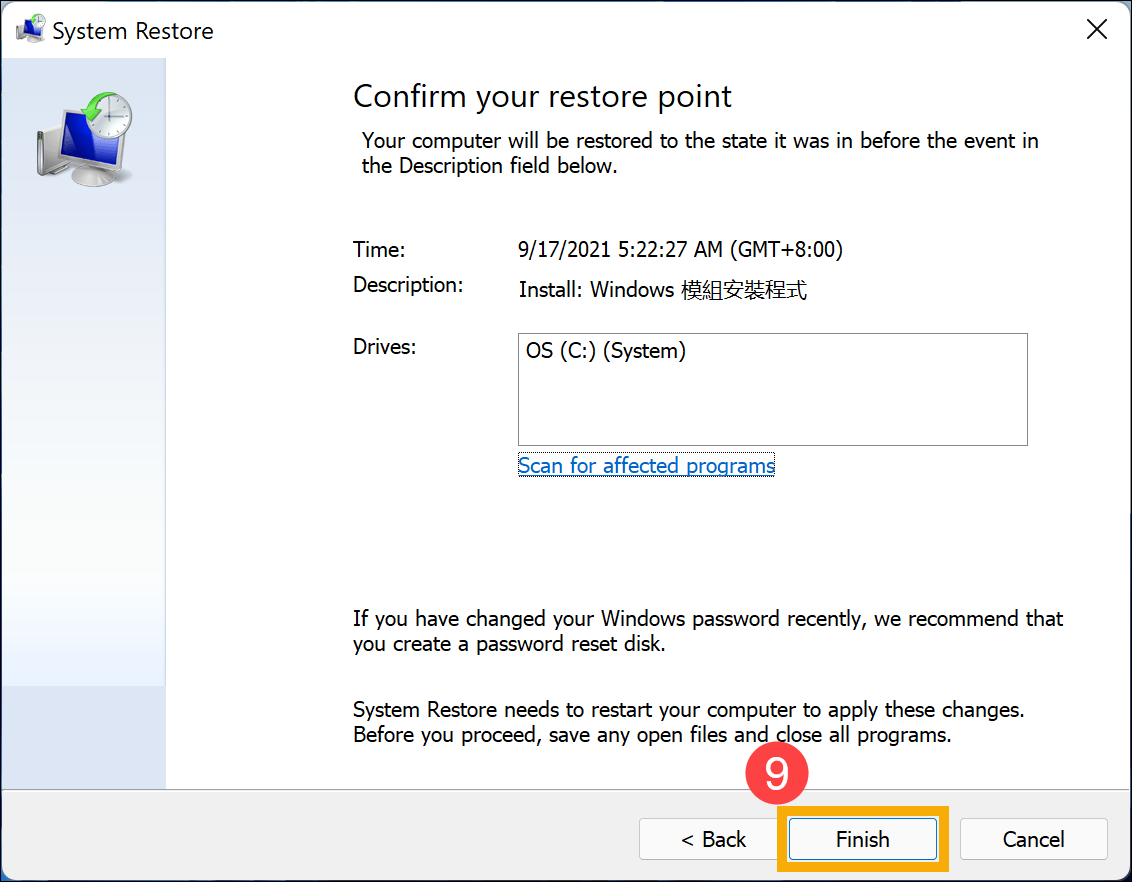
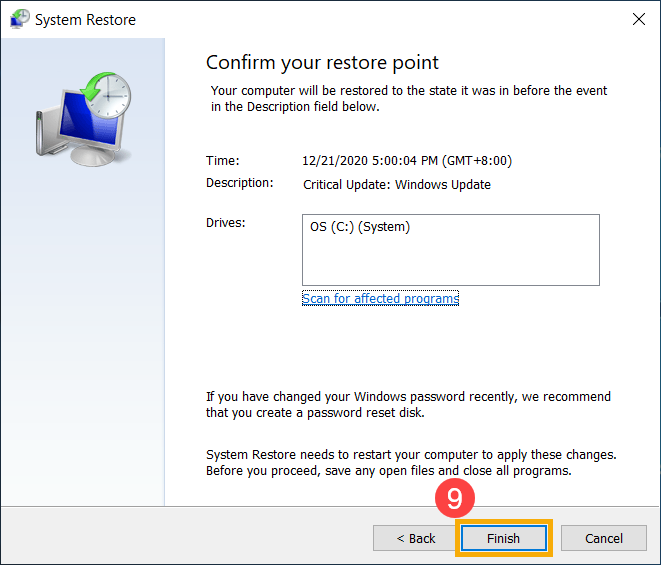
- Confirm your restore point information is correct or not, then please select [Finish]⑨.
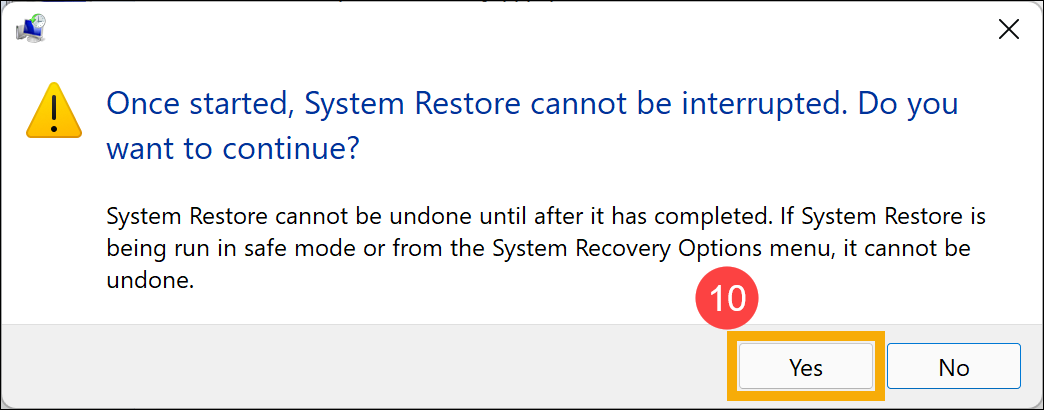
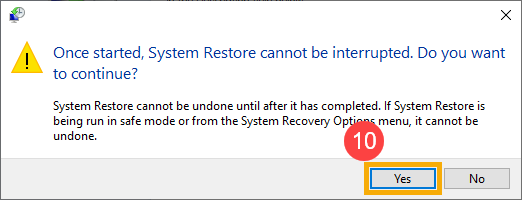
- Select [Yes]⑩ to start restoring system from the restore point and then your computer will restart.
Note: It will take some time to restore system from a restore point, so please make sure that the AC adapter is connected during the restore process. Also, please do not force to shut down to prevent any issue.
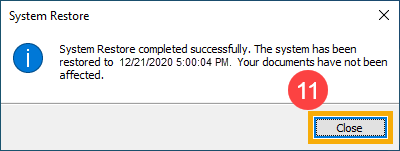
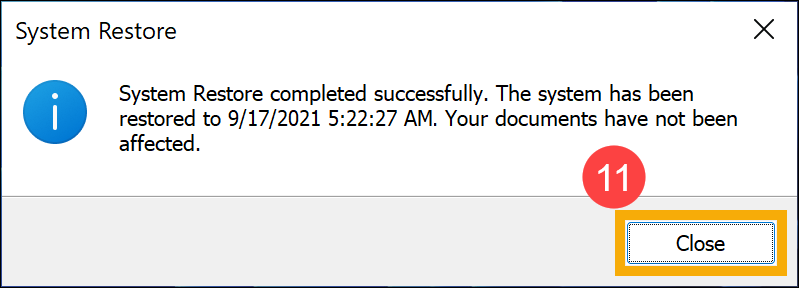
- After the computer restarts, System Restore is completed. Please click [Close]⑪.
In general, the system restoration is enabled by default. You can also confirm whether the system restore is enabled by the following steps.
- Type and search [Create a restore point] in the Windows search bar①, then click [Open]②.

- If the Protection of system drive shows as On③, it means the system restore point is enabled.
- If the Protection of system drive shows as Off, please choose the [System drive]④ and then click [Configure]⑤.
- Select [Turn on system protection]⑥ and set up the Max Usage of disk space (We suggest you set the Disk Space Usage ranging from 5% to 10%.)⑦, then select [OK]⑧. System Restore Point will be enabled.
The Max Usage will remain the disk space you set, and is used for System Restore Point. As space fills up, older restore points will be deleted to make room for new ones.
Manually create a System Restore Point
- Type and search [Create a restore point] in the Windows search bar①, then click [Open]②.
- Select [Create]③.
- Type a description to help you identify the restore point④, then click [Create]⑤.
- After the below notice displays, it means the restore point is successfully created , then please click [Close]⑥.
Restore your computer from a Restore Point
- Type and search [Create a restore point] in the Windows search bar①, then click [Open]②.

- Select [System Restore]③.
- Select [Next]④.
- Select the restore point that you want to use in the list of results⑤, then select [Scan for affected programs]⑥.
If you don’t see the restore point that you want to use, tick the Show more restore points check box to see more restore points.
- You will see a list of items that will be deleted if you restore to this restore point. If you’re OK with the deletions, please select [Close]⑦ to continue the next step.
If this restore point doesn’t meet your requirement, please go back to the previous step and select other restore point.

- Select [Next]⑧.
- Confirm whether your restore point information is correct or not, then please select [Finish]⑨.
- Select [Yes]⑩ to start restoring system from the restore point and then your computer will restart.
Note: It will take some time to restore system from a restore point, so please make sure that the AC adapter is connected during the restore process. Also, please do not force to shut down to prevent any issue.
- After the computer restarts, System Restore is completed. Please click [Close]⑪.