
Stop Windows from changing default printer. Microsoft removed the Network Location Aware feature for Printers in Windows 10 and changed its behavior. Windows 10 now sets the last selected printer as the default printer. This can sometimes be frustrating. If you are looking for a way to prevent Windows 10 from changing your default printer, you can use the Windows 10 Settings app or edit the Windows Registry.
Stop Windows from changing default printer
When a device changes on its own, it’s usually because there’s a setting On Windows 10 PC that allows the device to be changed to the most appropriate device it deems worthy. Follow the steps below to Turn off Windows manage my default printer preferences.
- Press Windows + I to open Settings .
- Click Devices and then choose Printer & Scanners .
- This interface allows you to select the printer and set it as the default, or remove the device.
- Select your printer, Click Manage and select Set as default.
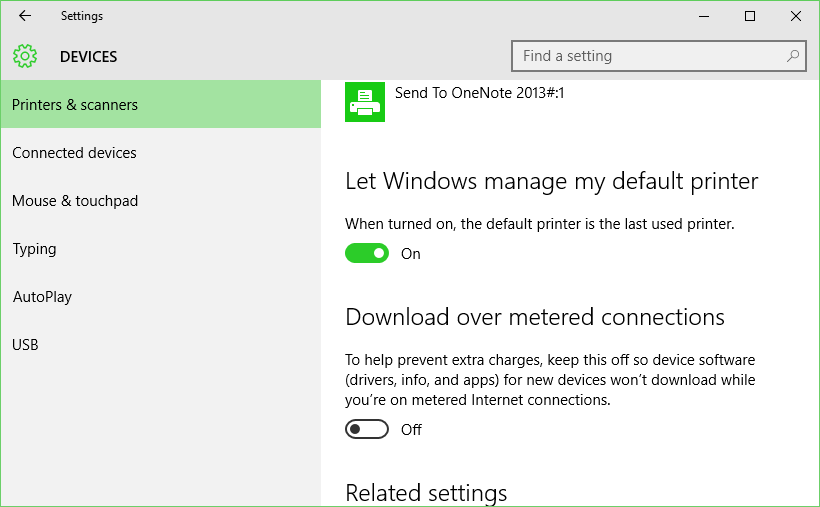
Now scroll down a bit until you see the setting Let Windows manage my default printer. - When this setting is On, the default printer is the most recently used printer.
- Make sure this option is unchecked.
Note: This option is not available in Windows 8’s Devices app, it’s new to Windows 10.
Set your default printer in Windows 10
Now set your default printer. You’ll see the entire list of printers slightly above this setting. Select the printer and click the Set as default button . It will show a green tick/check mark.
- Windows 10 won’t change it again, even if you use another printer.
- If it’s a wireless printer, make sure it’s connected to your wireless network.
- The easiest way to do this is to do the wireless setup again.
- If it’s wired via the USB Port, run the printer’s setup and add the printer again. (this will automatically) install the drivers.
- Open Settings then go to Devices > Printers and Scanners Set “Let Windows manage my default printer” to Off
Check your Sync settings
If the above setting turns on automatically after a while or after a reboot, check your Sync settings. If the “ Other Windows settings ” option is enabled in the Sync settings page , Windows will synchronize your printer, mouse, keyboard, and other settings.
Open Settings ( WinKey + i ), click Accounts , select Sync your settings then Disable Other Windows settings button .
Tweak the Windows Registry to set the default printer
If for some reason the above solution doesn’t work for you, here’s a tweak to the windows registry that prevents windows as the default printer from continuing to change.
- Press Windows + R , type regedit and ok to open the registry editor.
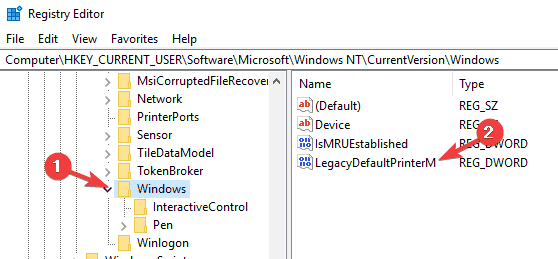
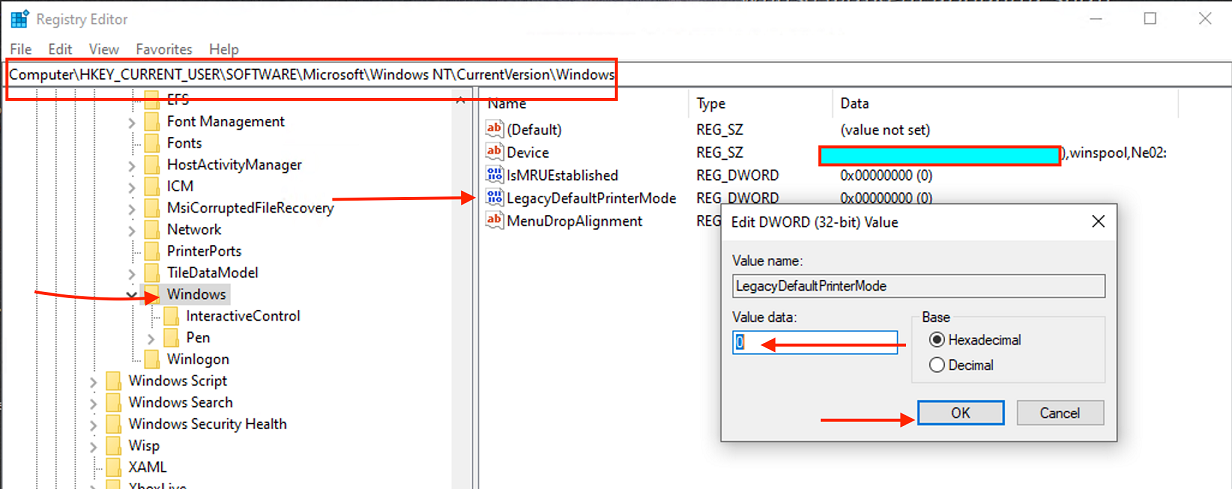
- Backup the Registry Database, then navigate to the following path: HKEY_CURRENT_USERSOFTWAREMicrosoftWindows NTCurrentVersionWindows
- Change the value of LegacyDefaultPrinterMode from 0 to 1.
- After doing this, Restart windows and reset your default printer.
If this doesn’t fix the issue then again open Registry Editor and navigate to the following path:
HKEY_USERS\USERS_SID\Printers\Connections
HKEY_USERS\USERS_SID\Printers\Settings

Delete all the entries present inside these keys and then navigate to:
HKEY_USERS\USERS_SID\Printers\Defaults
Delete the DWORD DisableDefault in the right-hand side window and again set your default Printer.
Reboot your PC to save the above settings.


