Photoshop Content Aware remove watermark. Some of the watermarks will not be needed, you can remove them with Adobe Photoshop software. Here, we will guide you in 3 simple ways to remove Watermark in Photoshop on your computer, helping you to have the image you want.
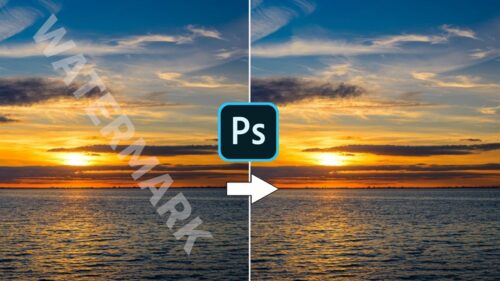
Table of Contents
How to remove watermark with Photoshop
Content Aware Fill and Clone Stamp
Step 1: Open the image in Photoshop. Then use the selection tools in Photoshop including Object Selection Tool , Quick Selection Tool or Magic Wand (Hold and hold Shift then press W to switch between the 3 tools above) to make a selection around the required logo part. erase.
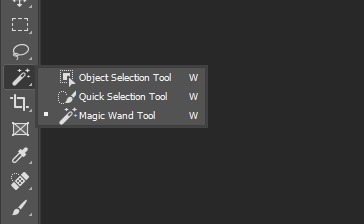
In the case below, because the color patches in the logo to be deleted are identical, we will use the Magic Wand tool to create a selection. Hold down Shift and then click on each color array of the logo to be deleted, a selection will be automatically created (illustration).

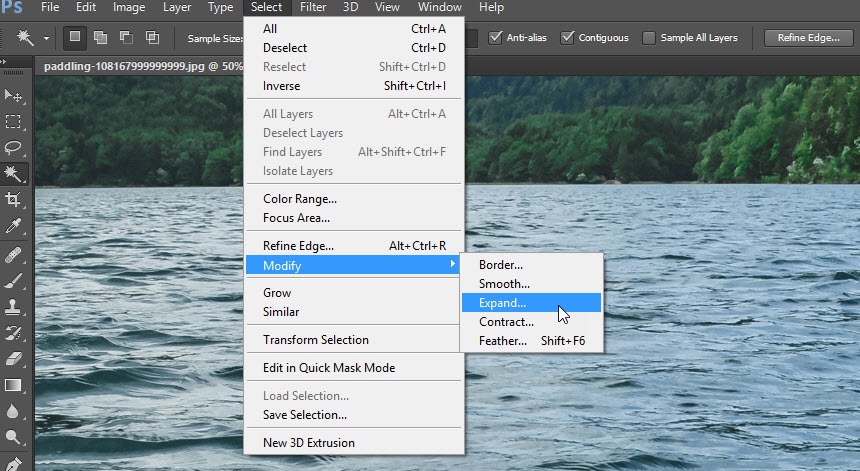
Step 2: In this step 2, we will make a small change to the selection, extending the edge of the selection by a few pixels (inflating a little beyond the background). Open the menu Select > Modify > Expand . In the dialog box that appears, enter the number of pixels you need to expand then click OK.
Step 3: After you have expanded the selection in step 2, open the Edit > Fill menu . In the Fill dialog box, select Content Aware in the Contents section , uncheck the Color Adaptation section . In the Mode section select the Normal option and leave the Opacity at 100% then click OK to finish.
And this is the result after applying how to remove the logo on the image with Photoshop with the Content Aware Fill feature.
Step 4: Use Ctrl + D to remove the selection. You will see that the deleted part still has some details on the border (illustration). We need to take the next step to remove this excess.

Step 5: In this step we will use the Clone Stamp Tool , you can activate this tool by pressing the S key. Next, hold down the “ Alt ” key (the mouse pointer will turn into an icon) heart) then click on the area to be sampled around the remaining logo area. Then click on the redundant details of the logo to be deleted.
Patch Tool
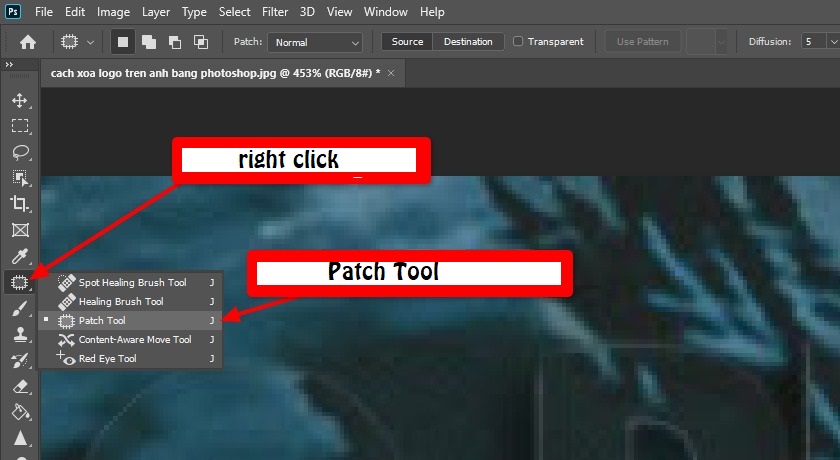
Step 1: Activate the Patch Tool in the left toolbar.
Step 2: Create a selection around the excess details to be deleted, drag and drop the selection to the surrounding areas. Then press Ctrl + D to delete the selection. You will see the logo part will be deleted as shown. Continue to do the same in other areas until the logo is completely erased.
We believe that with such simple steps, you can remove watermarks, logos in your photos easily. Before you leave, please don’t forget to share the article if you find it useful!