How to enlarge low resolution image in Photoshop. Enlarging photos in Photoshop is an essential tool for photo editors. So how to use this feature. Let Ngolongtech guide you in this article. With the image enlargement tool in Photoshop will make it easier to edit your photos and thereby help create your own products.

Table of Contents
How to enlarge low resolution image in Photoshop
Freeform Tool
To freely resize a layer with a mouse or trackpad, you should use Photoshop’s Freeform Tool option.
On the Photoshop interface, in the “Layer” panel on the right, select the layer you want to resize.

(Tip: If you don’t see the ‘Layers‘ panel, navigate to the menu bar at the top of your screen and click Window > Layers).
After selecting the layer to resize, click Edit > Free Transform in Photoshop’s menu bar.

Now you will see a border around the layer you selected. Click on one of the small square dots on the border and then drag and drop with your mouse (or trackpad) to resize the layer dynamically as you like.

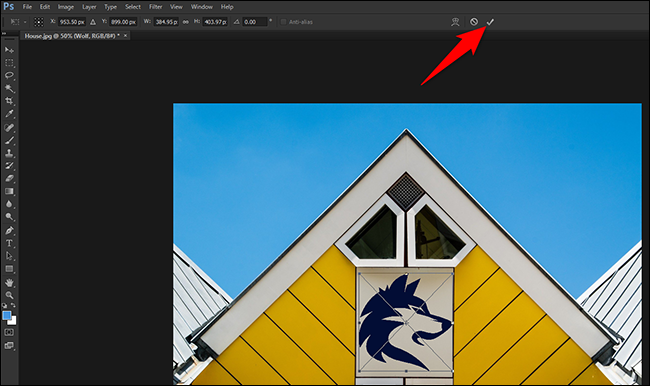
Once you have selected the desired size, click the checkmark icon at the top of the Photoshop interface to save the changes.

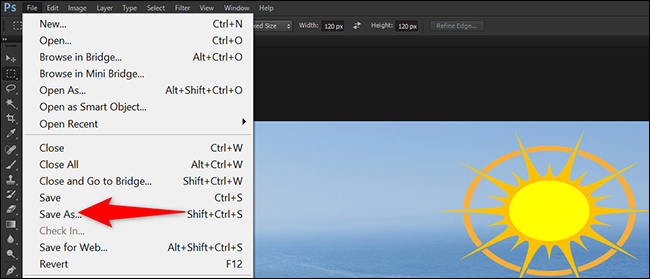
You can now save the image by clicking File > Save As.
fixed parameters
To resize the layer according to specific measure options, use the Move tool. With this tool, you can manually enter the width and height of the layer.
First, in the “layers” panel on the Photoshop interface, click on the layer that you want to resize.

From the list of tools on the left side of the Photoshop interface, click “Move” (the first tool in the list). Alternatively, you can also press V on your keyboard to activate this tool.

At the top of the Photoshop interface, activate the “Show Transform Controls” option.

Now you will see a border around the layer you selected. Click one of the small square dots on the border, but don’t drag and drop it.

At the top of the Photoshop interface, you’ll see different text boxes. Here, click in the “W” box and enter a new width for the layer, followed by “px” (without the quotes). Then click in the “H” box and enter a new height for the layer, followed by “px” (without the quotes). px here is the pixel size.

The layer size will change immediately according to the parameters you enter. Drag the layer to reposition it anywhere you want on the image. Then, click the checkmark icon at the top of the Photoshop interface to save the changes.
You can now save the image by clicking File > Save As.
Note
If it’s an image, you right click it, and you select “make smart object”, now you can scale it up and down without losing quality. If this is not done, scaling down and up will destroy the photo.
Please know that once you turn an image into a smart object, some editing features will not work on it anymore, unless you you right click and “rasterize” it again.
Texts don’t have this problem as they can be scaled up or down indefinitely, as well as shapes (square, circle…), including shapes you draw using the pen tool.
Always click Ctrl+1 (or Cmnd +1) to see if the objects are good quality or not.
You can zoom out by holding Alt while clicking.
In addition, the shortcut to zoom in on the image is Ctrl and + and to zoom out the image is Ctrl and –