How to create mockups in Photoshop. You want to introduce and impress your products to customers by creating unique Mockups yourself. In the article below, Ngolongtech will show you how to make a unique and impressive Mockup in Photoshop.
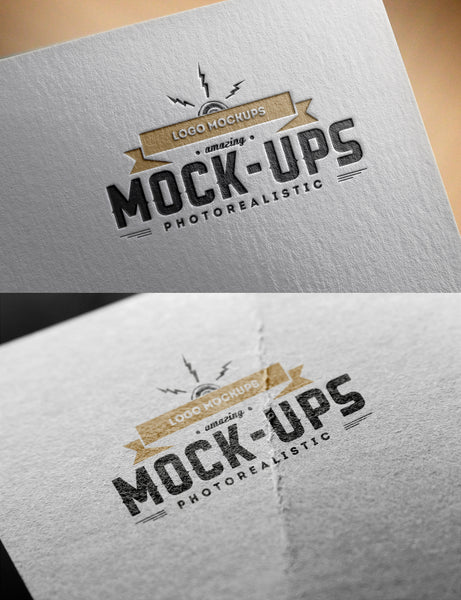
Table of Contents
General information about Mockup
Before teaching you how to make Mockup in Photoshop, we should go to understand in general what is Mockup? What are the benefits of mockups and where to get mockups?
To put it simply, Mockup is an object simulation. In graphic design, mockups are PSD or vector files intended to help designers simulate their designs when running on a computer.
As a concept, we can use mockups to produce more realistic images and products. Using mockups is a way to awaken customers’ eyes and senses, helping customers visualize their products more easily. In business, many people choose Mockup to meet customers and increase the closing rate up to 80%.
Another note that you should also pay attention to about mockups is where to get the mockup? You try to Google and type “Mockup”, the results returned are a lot of images for you to choose from. However, not everyone knows how to download mockup and use it effectively. Therefore, we should make a mockup that suits our needs through Photoshop.
How to make effective Mockups in Photoshop
Step 1: Open the image you want to create Mockup
First, you need to use an image you want to mockup. It is best to choose a high-quality image because it will accurately ensure your design is not broken or hard to see. Then you start opening the .jpeg file in Photoshop.
Step 2: Create a frame
You use paths or Rule lines to ensure the correct layout and size of the frame. Press the key combination Cmd + R to activate the ruler bars. When the ruler appears, you need to drag the mouse on the ruler and drag out to create the paths.
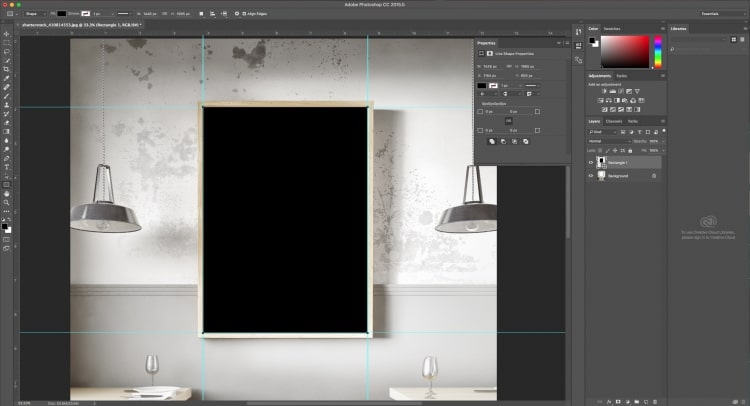
Step 3: Draw a rectangle
Select U or navigate the sidebar in the Rectangle Tool to create a rectangle for the design. It is best to choose dark colors to distinguish the rectangle from the frame. The rectangular shape doesn’t need to be exact since we’ll be manipulating the corners again.
Step 4: Lock the paths
After successfully drawing paths and rectangles, the next way to do Mockup in Photoshop is to lock the paths. Because if you leave, accidentally you move the mouse they will be out of position and you will lose time again. To lock, you can go to the View menu.
Step 5: Manipulate the Shape with the Free Transform Tool
Once the smart paths are locked, you’ll switch to working with the rectangle. Press the Cmd + T combination to access the Free Transform tool, when this tool is active, the corners will appear. To move the corners, press Cmd and drag the specified corner to the edges of the Poster frame. The pointer will appear as a white arrow when manipulating individual corners.
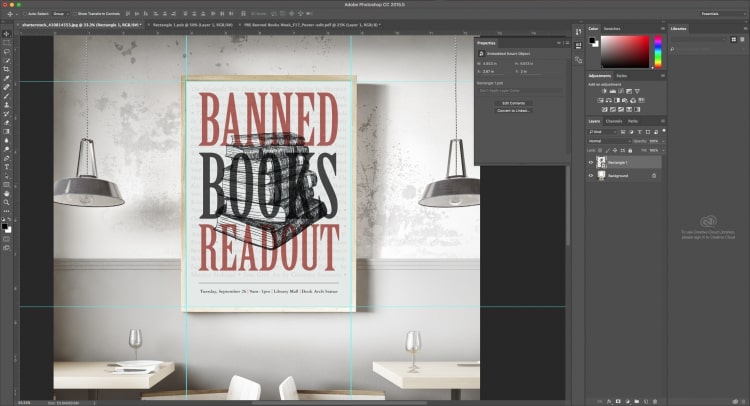
Step 6: Convert Shape to Smart Object
When you are happy with the shape and position of the rectangle, go to its Layer. You need to right-click and select Convert to Smart Object. Then when you click on the Smart Object Layer, Photoshop will automatically open the New Tab column and you can simply drag and drop the image onto it.
Step 7: Place your design in Smart Object
After you place your design in Photoshop, click Cmd + A to select a full design. To duplicate the design, press Cmd + C and then click on the smart document object and paste with Cmd + V. Use the Free Transform tool with Cmd + T to resize if needed. To scale properly, hold Shift while resizing and finally press Save or Cmd + S to finish your position and navigate the product to the original Mockup document.
Step 8: Review the design
Smart Object is really a very good tool. After knowing how to make a mockup in Photoshop, you need to review the design. As you can see, your design is now placed in the ad frame via the Rectangle Smart Object class and you can simply use Multiply to allow the frame’s shadow to be visible.
Mockups are available designs, there are many online that you can download and use. However, free Mockup is also available, paid for even more. Therefore, knowing how to make Mockups in Photoshop will save you a lot of time, quality images, beautiful and professional designs.
Ngolongtech hopes this will be useful information you can refer to in the process of using. Thanks for reading!
Visit Macwintips.com to update the most practical and useful tips for Mac and Windows!