How to use Private DNS Android 12. Android 12 is the latest version of Google’s mobile operating system and it’s packed with How to use Private DNS Android 12h features. Among these are the ability to use Private DNS and adaptive connectivity to enhance the network experience.
What is Private DNS?
Private DNS is the ability to use a custom DNS provider for a specific device. While the ability to do so has existed on desktop devices for a long time, mobile devices have started receiving the feature over the past few years.
DNS or domain name system is a hierarchical naming system that helps identify almost anything that exists on the internet. This includes websites, search engines, devices, servers, etc. By default, devices will use the DNS provided by the ISP. The problem is that many domain name systems used by private ISPs and more have been infected with additional trackers, malware, and adware. It may cause you to do extra captcha verification while blocking access in some cases.
Private DNS can help you get around these restrictions by using a custom censored DNS provider. This can help enhance the privacy of services while also ensuring that no one is monitoring internet traffic. There are many free and paid third-party services available that you can use on Android.
How to use Private DNS on Android
Before you start, you need to choose your DNS provider first and then get the DNS configuration for the provider for Android devices. You can then use this information on your mobile device to set up your own DNS.
Step 1: Choose a DNS provider
You should choose a reputable paid DNS provider in case you are worried about privacy. In case you are worried about bandwidth limits, website blocking, etc., but don’t want to pay a DNS provider, you can use Google’s DNS servers or Cloudflare. Here are the top recommendations when it comes to paid DNS providers.
Note: Before choosing a DNS provider, make sure that they support Android devices. Some services have not yet configured their DNS servers to properly support Android 12 devices.
- Quad9
- Comodo Secure DNS
- OpenDNS
- Google’s Cloud DNS
Once you have selected the desired DNS provider, source the configuration for the Android device from the support website. If you are looking to use free DNS providers, then you can use the following providers for Google and Cloudflare.
- Google: dns.google
- Cloudflare: one.one.one.one
Now we can set up private DNS on Android 12.
Step 2: Set up private DNS on Android 12
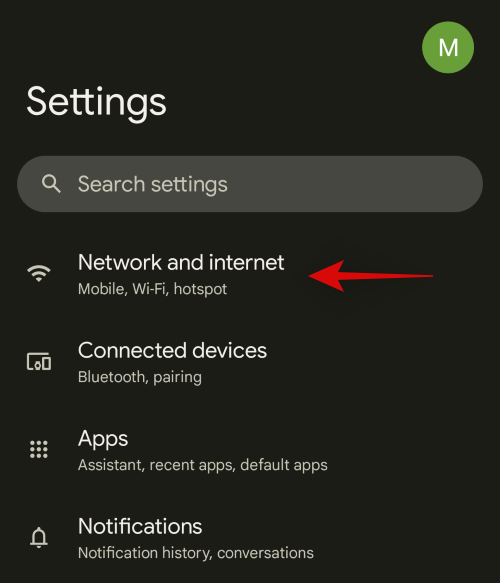
Open the settings app and tap Network and internet.

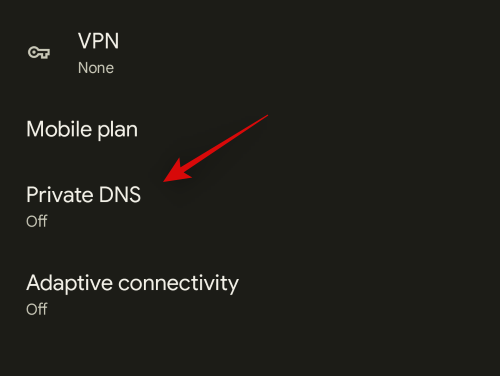
Click on Private DNS.
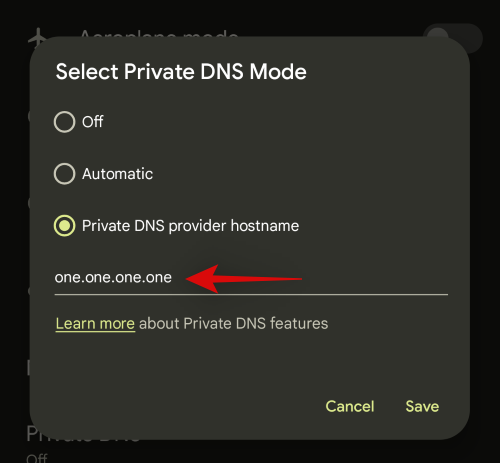
Click and select Private DNS provider hostname.
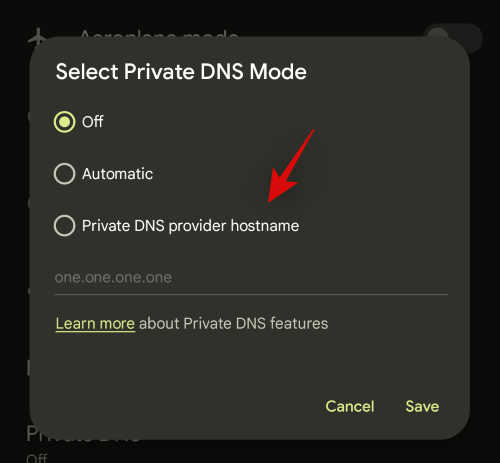
Enter the address for the DNS server you obtained earlier. For this example will use Cloudflare’s servers.
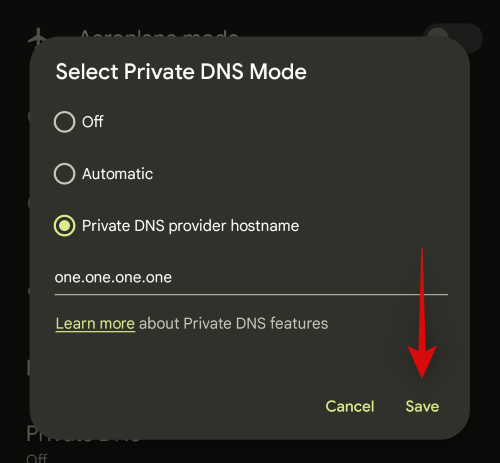
Click Save.
Private DNS should now be set on the device and all network queries should now be redirected through the same.
What is adaptive connectivity and how to use it
Google introduced many new features with the release of Android 12 and among them is Adaptive connectivity . Let’s take a quick look and how you can use it to your advantage on mobile.
What is adaptive connectivity ?
This is a battery saving and conserving feature in Android 12. Modern mobile devices spend a considerable amount of energy scanning for neighboring networks and cell towers, and then transmitting and receiving data from them similarly. response. When the device is connected to multiple networks, certain models may not handle these networks efficiently, resulting in high battery usage.
Adaptive connectivity can help do the same on all Android 12 devices. This new feature intelligently manages connections while putting other access points and connections to sleep. This helps conserve battery life and gives your device a longer battery life.
How to use Adaptive connectivity
You just need to enable it in your settings to take advantage of this feature. Follow the steps below to help you with this process.
Open the Settings app and tap Network and internet.
Now click on Adaptive connectivity.
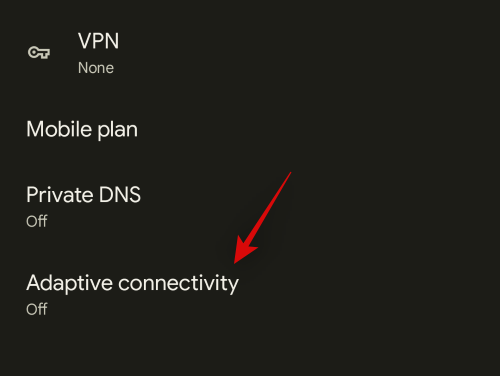
Turn on the analog toggle on top of the screen.
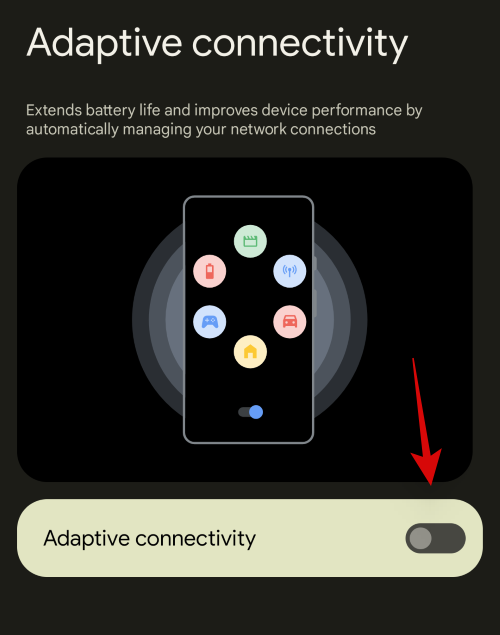
Now, Adaptive connectivity will be enabled, on the device and the device will now be able to better manage network connections to prolong the device’s battery life.
Frequently asked questions
Here are some FAQs about Private DNS and Adaptive connectivity on Android that will help answer some frequently asked questions.
Does Adaptive connectivity affect mobile data?
Adaptive connections will not affect any existing connections. This feature will also not affect network performance. This feature is designed to intelligently switch between mobile data and WiFi to ensure minimal battery usage. It also switches the mobile network bands depending on the existing WiFi networks on the device.
Is it safer to use a Private DNS provider?
Using a Private DNS provider can be safer in case you don’t trust your ISP. It’s fairly easy for an ISP to infect a DNS server and redirect traffic through trackers and ad servers if needed. DNS Tracking also allows providers to track online activities, so it’s a good idea to use Private DNS in case you’re worried about your ISP.
Can you use VPN with Private DNS and Adaptive connectivity?
You cannot use a VPN when a Private DNS provider is active on a mobile device. You will need to deactivate the same to use the VPN. However, you can use VPN when Adaptive connectivity is enabled.
We hope this article helps you! Visit Macwintips.com to update the most practical and useful tips for Mac and Windows.