
How to fix Windows 11 lock screen not changing. The Spotlight wallpaper on your Windows 11 lock screen hasn’t changed? Here are the best solutions to fix Windows 11 Spotlight not working.
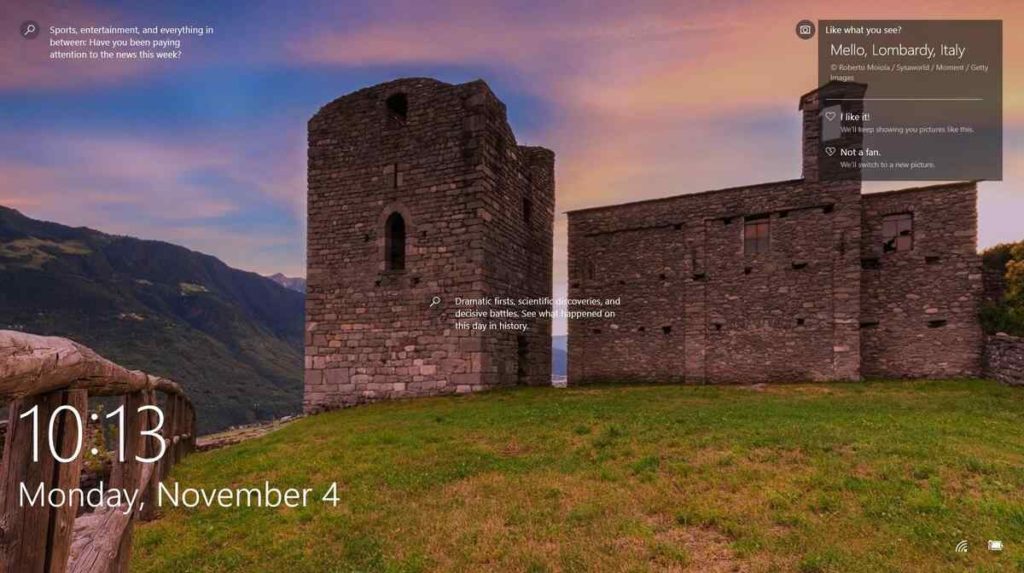
Table of Contents
How to fix Windows 11 lock screen not changing
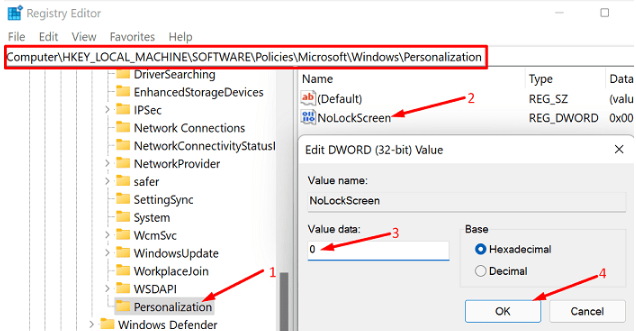
Edit your Registry to enable the lock screen on Windows 11
- Click on Search icon and enter Register.
- Open Registry Editor application.
- Navigate to Computer\HKEY_LOCAL_MACHINE\SOFTWARE\Policies\Microsoft\Windows
- Then right click on Windows folder.
- Select New → Lock.
- Name the new folder Personalization.
- Right click on the Personalize folder.
- Select Value new → DWORD (32-bit).
- Name the new key NoLockScreen.
- Make sure its Value data is set to 0 (zero).
- Save the settings and restart your computer.
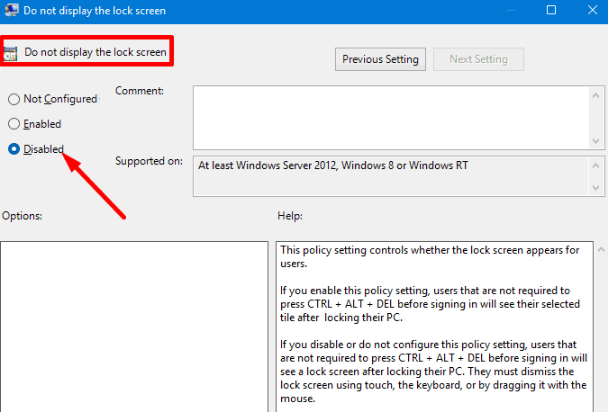
Edit GPO settings to enable lock screen on Windows 11
- Open Editor local group policy local.
- Then go to Computer Configuration .
- Select Administrative Templates .
- Click Control Panel .
- Go to Personalization .
- Double-click Do not show lock screen .
- Turn off this policy.
- Restart your PC.
Repair system files
Corrupt and missing system files can cause all kinds of problems including the Lock Screen problem you are experiencing. Use the Deployment Image Servicing and Management tool and the System File Checker to automatically detect and repair corrupted system files.
- Launch Command Prompt with administrative rights.
- Enter the command DISM.exe / Online / Cleanup-Image / Restorehealth .
- Press Enter and wait until your machine finishes running the command.
- Then enter the command sfc /scannow .
- Restart your computer and check the results.
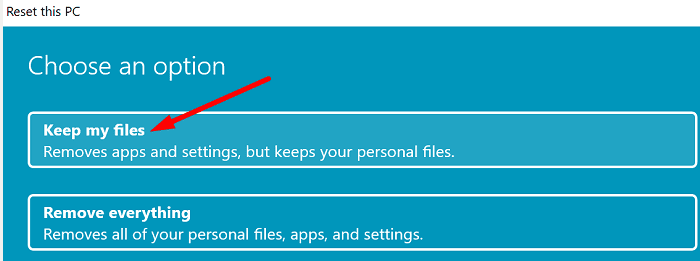
If the problem persists, try resetting your computer. Make sure to select the option that allows you to keep your files.
Navigate to Settings and select System. Go to Recovery and select Reset this PC. Then select Keep my files.
If there is no Lock Screen on Windows 11, make sure to enable it by adjusting your Registry Editor or GPO settings. Then run DISM and SFC to repair system files. If the problem persists, reset your PC and keep your personal files.


