
How to fix Windows 11 can not access shared folder. Here is a comprehensive guide to Fix Windows 11 unable to access shared folder error due to misconfigured network, incorrect settings, or wrong folder name. Modern computers have introduced many valuable features that have created a new standard where people expect everything to always work. Because of these standards, it can be frustrating when something as simple as a network shared folder stops working.
Windows 10 users also face this problem. The solution to this is to enable network discovery and ensure that network services are up and running.
Solving shared folder inaccessibility in Windows 11 is a simple task. It will assist you by displaying a network error message instructing you to check the spelling of the shared folder name.
Read the article to know how you can fix Windows 11 can’t access shared folder error.
Why can’t Windows 11 access shared folders?
There are many reasons why you may have difficulty accessing shared folders. It could be a misconfigured network, incorrect drive settings, or wrong folder names. And the most common problem is that the user account behind the folder has inappropriate permission settings.
You should talk to the person who controls the shared folder first. However, if you are in control of the shared folder, you will need to reconfigure and grant network share permissions to facilitate such access.
How to fix Windows 11 can not access shared folder
Grant network share access
You may have disallowed the directory to do so. You must have access to a shared folder. You can have access to a specific file in the drive for the entire drive. Follow the steps below to grant network share permissions:
- Open “ This PC ” on your computer.
- Navigate to the file or folder you want to access. Right click on it and select Properties .
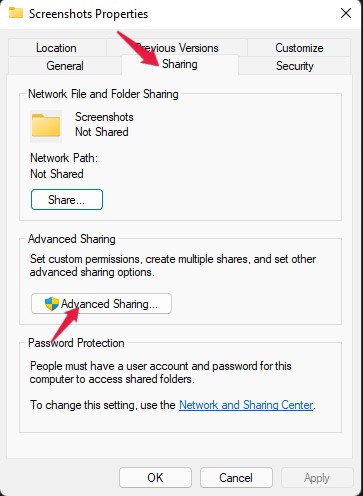
- Click on the Sharing tab and then on Advanced Sharing .
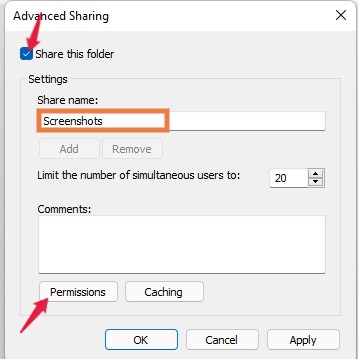
Grant network share access - Now tick the shared folder checkbox and you will be asked to enter the share name. Enter a name and click Permissions.
Enter a name and click Permissions - Here, select “everyone” and then click “OK”.
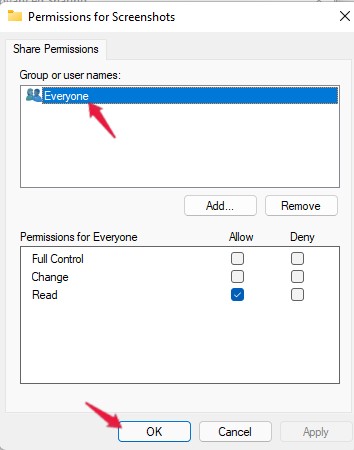
You have now been granted network share permission to access the shared folder.
Grant security permissions
Not having the correct security permissions can be another reason why you can’t access the shared folder in Windows 11. Follow these steps to give the shared folder security permission:
- Open “ This PC ” on your computer.
- Navigate to the file or folder you want to access. Right click on it and select Properties.
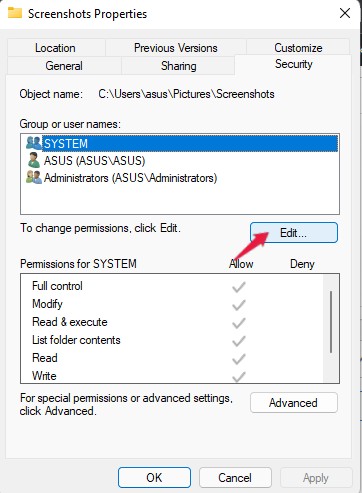
- Select Security in the properties window and click Edit to modify permissions.
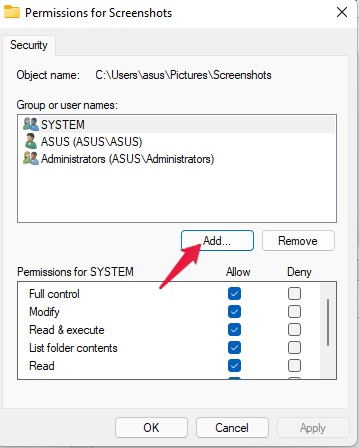
Grant security permissions - Click on “Add” and then “Advanced”.
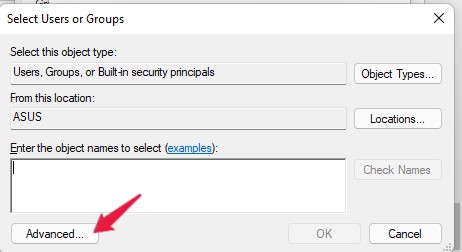
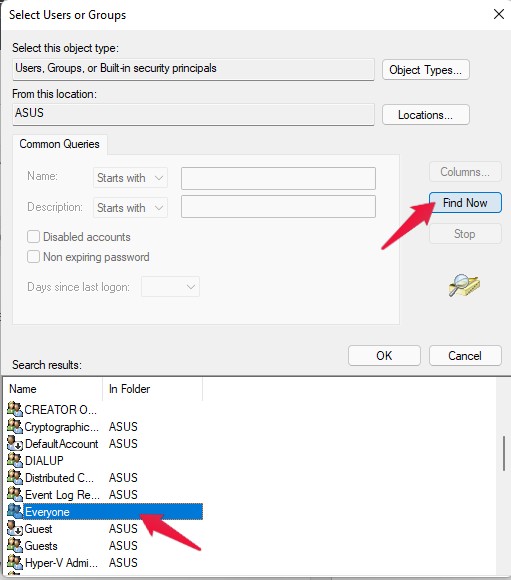
- Click on “Find Now” and select “Everyone”. Then click OK.
- You should now see everyone under Enter the object names to select. Click OK.
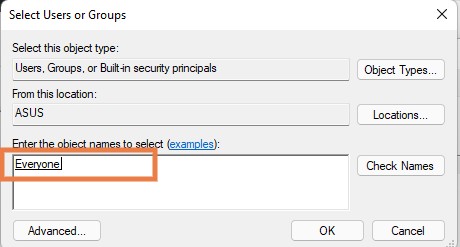
everyone under Enter the object names to select - Click “Apply” and then click “OK” to save the changes and grant security permissions.
Disable password protected sharing
Follow these steps to turn off password-protected sharing:
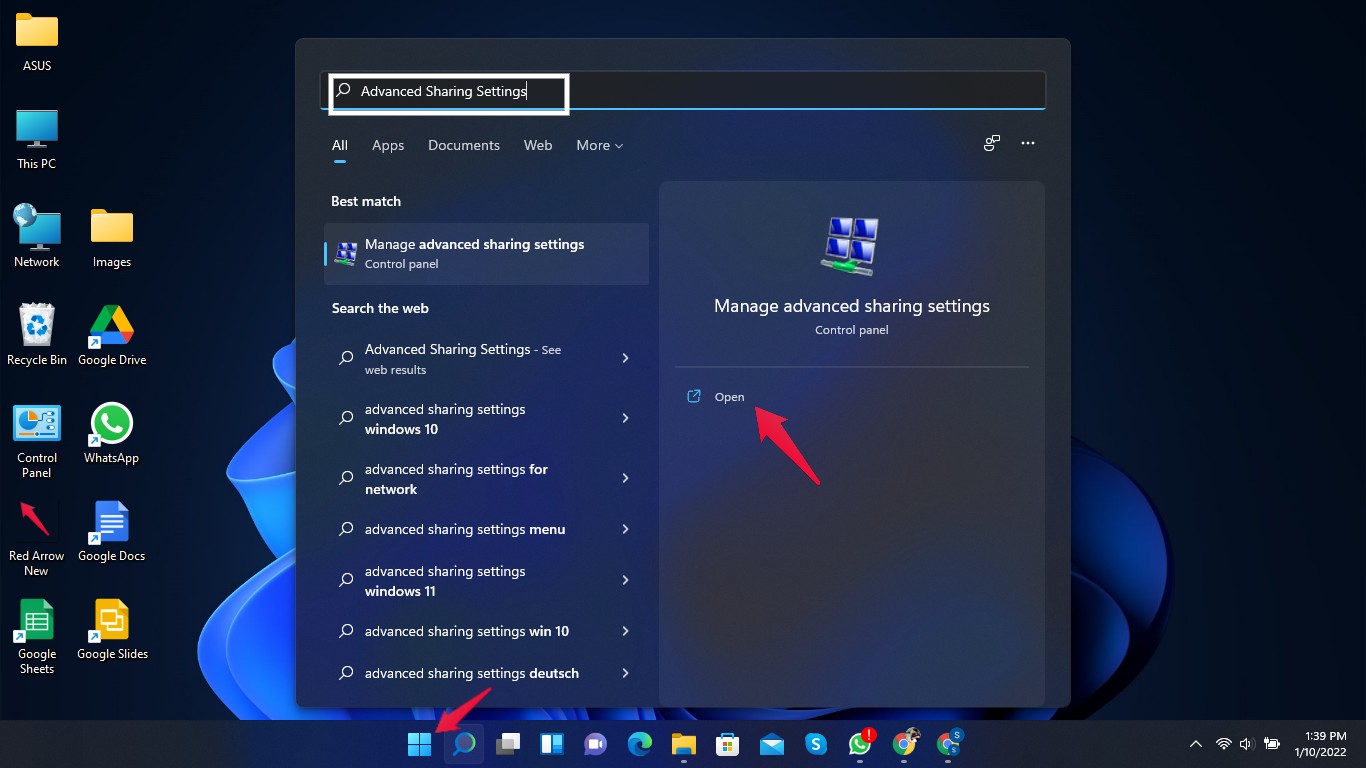
- Click on the Start button and search for Advanced Sharing Settings.
- Click on “Open”
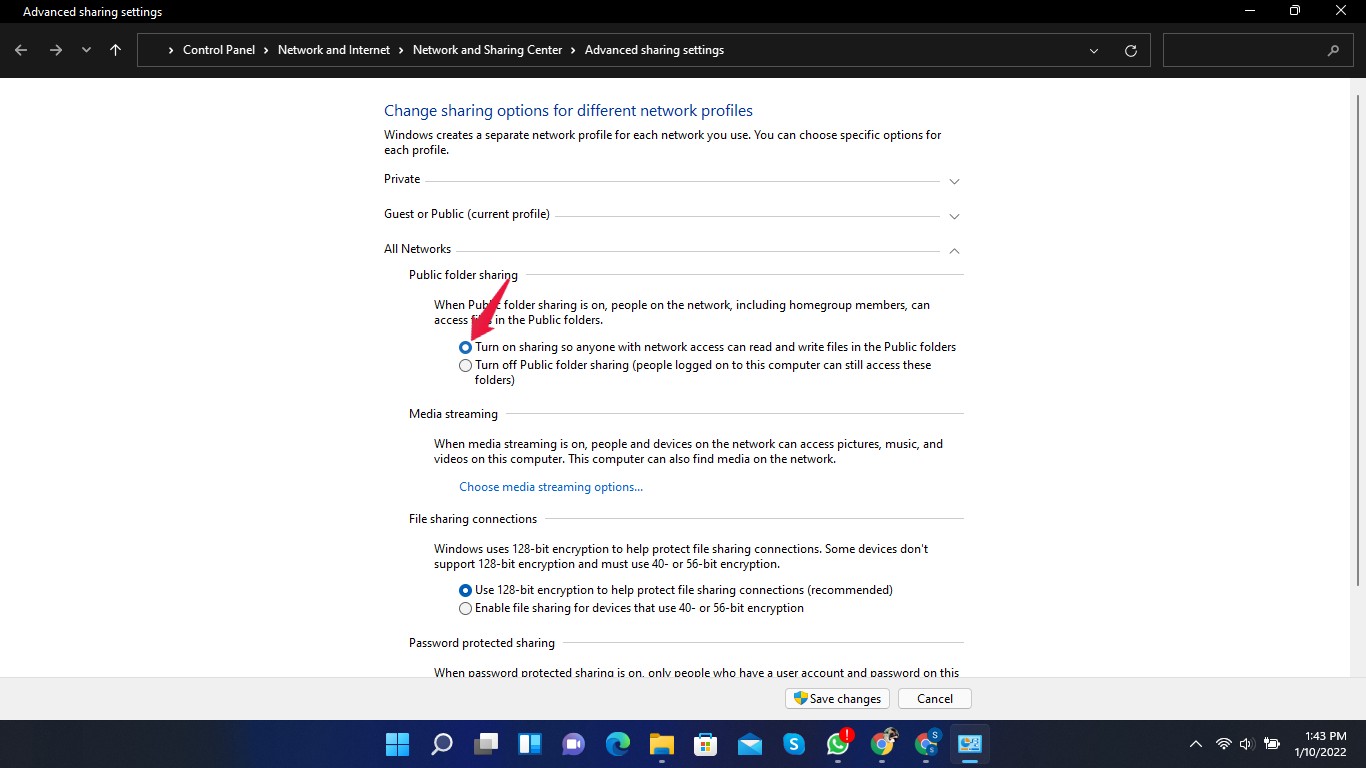
Advanced Sharing Settings - Click on “ All Networks ” to expand the options.
- Select Turn on sharing so anyone with network access can read and write files in public folders under Public Folder Sharing .
Turn on sharing so anyone with network access can read and write files - Scroll down to Password-Protected Sharing and enable Turn off password-protected sharing.
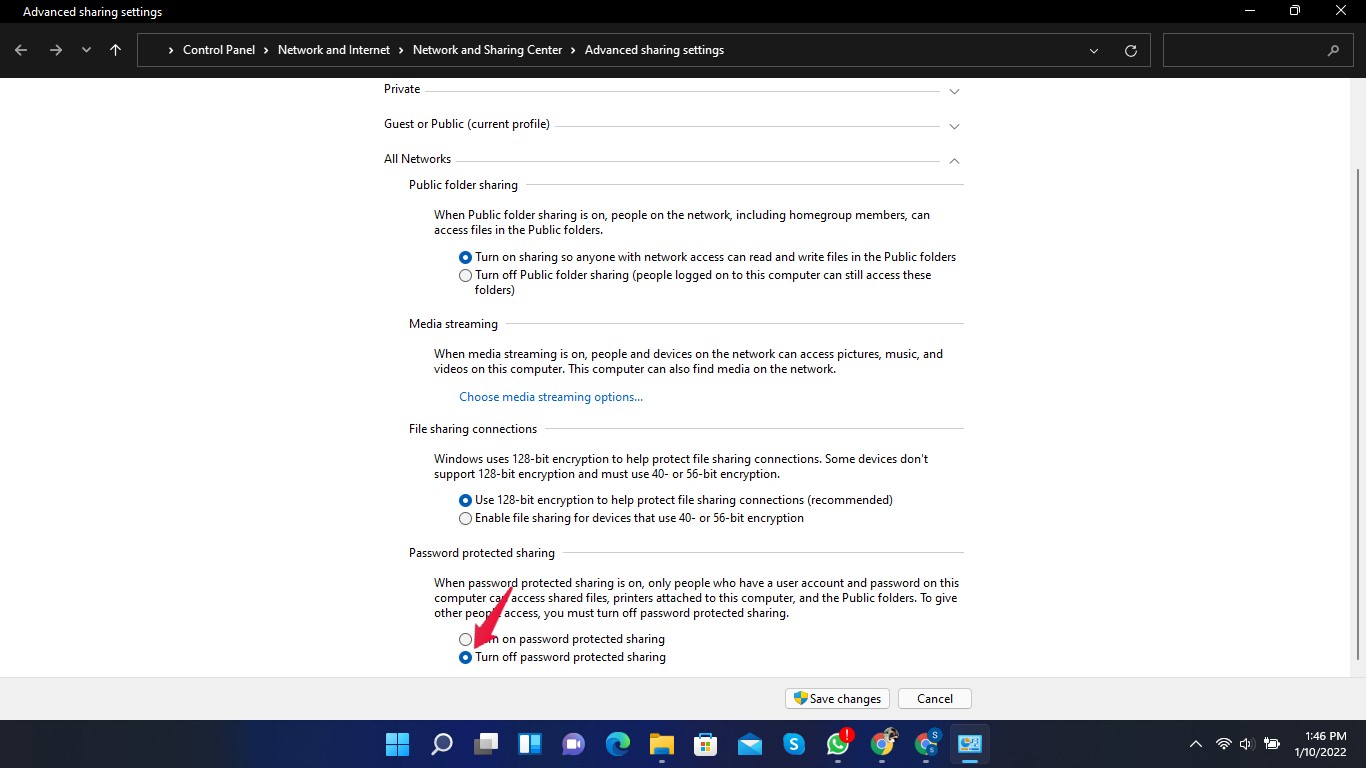
Turn off password-protected sharing - Click Save Changes at the bottom.
- Close advanced sharing settings and restart your computer.
This method can be risky on unsaved networks. If you allow public sharing, anyone can have access to your data.
Enable file and printer settings
Follow these steps to enable file and printer settings:
- Click on the Start button and search for Advanced Sharing Settings .
- Click on “ Open . ”
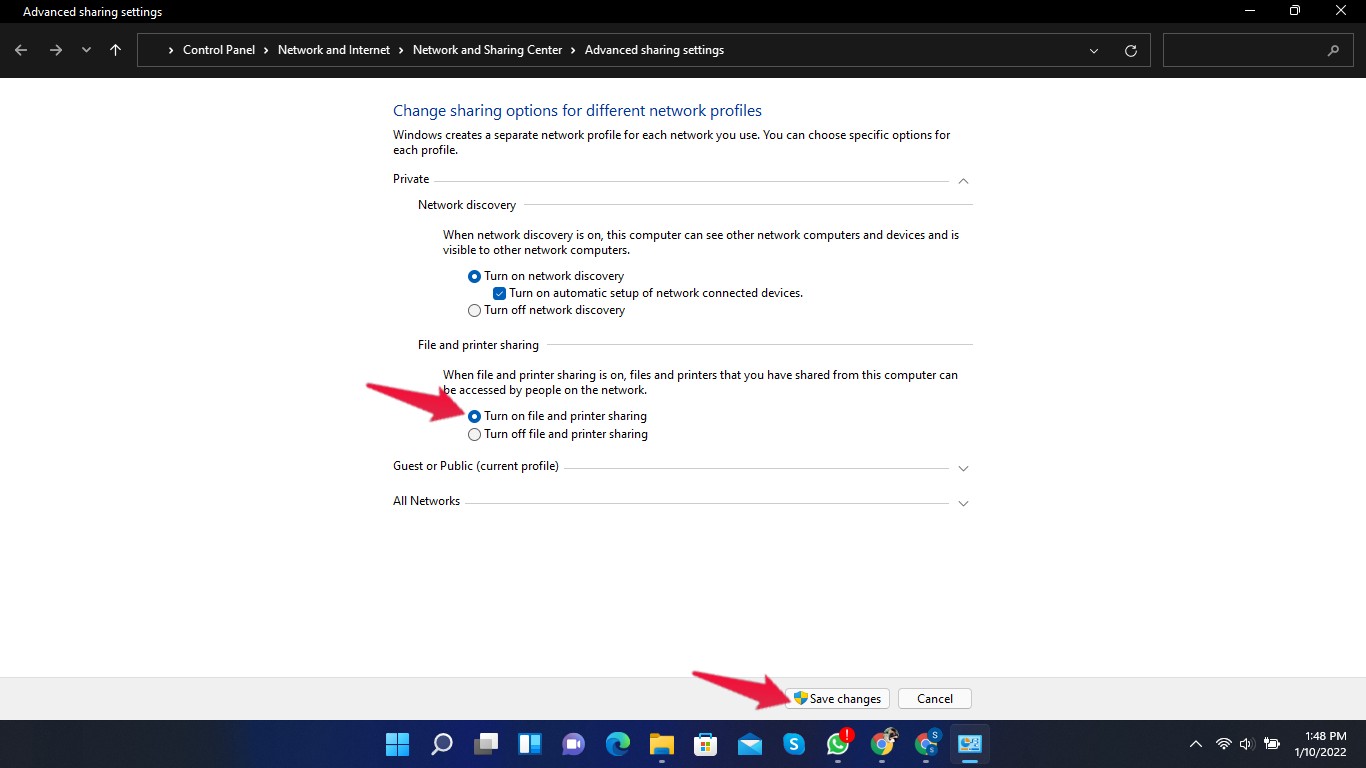
- Click on “ Private ” to expand the options.
- Under File and Printer Sharing , select Turn on File and Printer Sharing.
- Click Save Changes at the bottom.
Turn on File and Printer Sharing - Now click on Guest and public if you are on a public network.
- Under file and printer sharing, select turn on file and printer sharing.
- Click Save Changes .
- Close Advanced Sharing Settings and restart your computer.
The above is all about how you can fix Windows 11 cannot access shared folder. By following the steps mentioned above, you should be able to access the shared folder in Windows 11. However, if you face any problem, let us know in the comments section.


