
How to fix WINDOWS 10 UPGRADE ERROR 0XC0000017 – 2022. While this is an obvious step for the majority of users to upgrade to the latest available OS version, some of them still don’t want to do so. Many of them are quite satisfied with what Windows 7 has to offer. Others know about Windows 10’s downsides, it’s a fixer in some cases.
But, let’s say you finally decided to upgrade to Windows 10. And, all of a sudden, an error occurred. Example: error with code 0xc0000017. This is a common error that many users encounter when upgrading to Windows 10. For that purpose, we have enlisted several solutions to help you to solve the problem at hand.
If you’re having trouble with the upgrade, be sure to check out the steps below. But before you do, make sure your computer is compatible with the latest major update for Windows 10, as some users have reported some incompatibility issues with old hardware.

Table of Contents
How to fix Windows 10 upgrade error 0xc0000017
Solution 1 – Run DISM
The first thing you can do is run the Deployment Image Serving and Management tool. Specifically, this advanced troubleshooting tool is basically a built-in command in an elevated command prompt. With it, you can scan and repair corrupted or incomplete system files. In addition, DISM can be used in a variety of situations and ways, including using the installation media as the source.
We’ll guide you through both the standards and procedures for using the installation media below:
- Standard method
- Right-click Start and open Command Prompt (Admin).
- Paste the following command and press Enter:
-
- DISM / Online / Image Cleanup / Health Restore
- DISM / Online / Image Cleanup / Health Restore
-
- Wait until the scan is finished.
- Restart your computer and try updating again.
- With Windows installation media
- Insert your Windows installation media.
- Right-click the Start menu and, from the menu, choose Command Prompt (Admin).
- In the command line, type the following commands and press Enter after each one:
- remove / online / clean up / scanhealth images
- remove / online / clean up / restore images
- Now, type the following command and press Enter:
- DISM / Online / Image cleanup / Restore health / source: WIM: X: SourceInstall.wim: 1 / LimitAccess
- Make sure to change the X value with the letter of the drive attached to your Windows 10 installation.
- After the procedure is finished, restart your computer.
Solution 2 – Clear bad memory Boot Configuration
However, there was a possibility that an unusual culprit was behind this. Specifically, a bad memory list that could be deleted is preventing you from upgrading. Luckily, the Boot Configuration Data can be erased from those bad sectors so you can easily get back in the saddle. Follow the instructions below to clear bad memory areas and resolve the issue:
- Right-click on the Start menu and run Command Prompt (Admin).
- In the command line, type the following commands and press Enter after each one:
- bcdedit / enum all
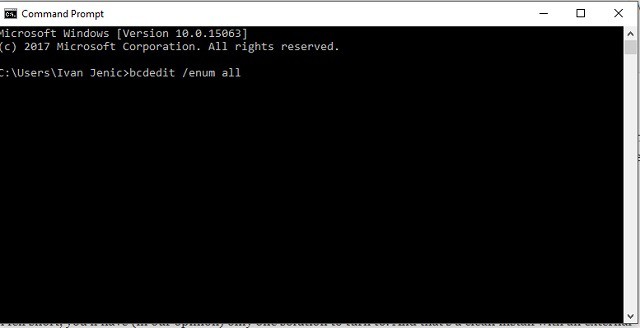
- bcdedit / deletevalue {badmemory} bad list
- bcdedit / enum all
- Restart your PC and try the upgrade again.
If this solution fails, you will have only one solution. And it’s a clean install with an external installation medium.
Solution 3 – Run the update troubleshooter
Luckily, Windows 10 comes with various troubleshooters that can fix common problems on your PC with ease. There’s even a special Windows Update troubleshooter you can use and to run it you need to do the following:
- Go to Settings.
- Headquarter for Update & Security > Troubleshooting.
- Select Windows Update and go to Troubleshooter.
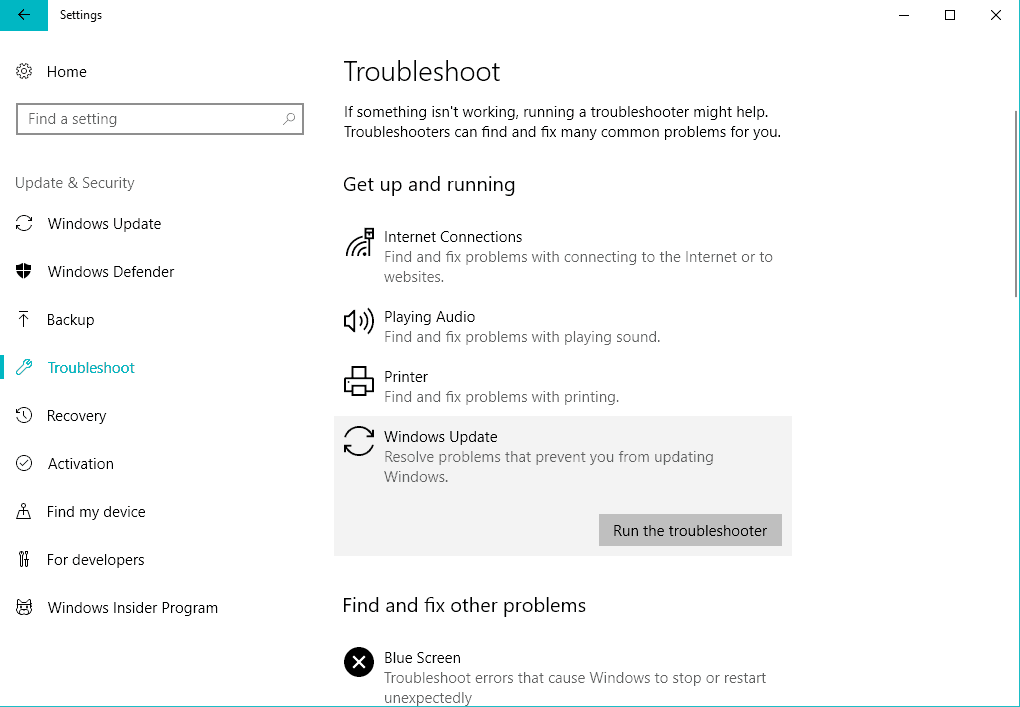
- Follow the on-screen instructions and let the process finish.
- Restart your computer.
Solution 4 – Run an SFC scan
If you keep getting the 0xc0000017 update error on your PC, the problem might be with your settings. Your Windows installation could be corrupt or corrupt and that might lead to this error. However, you can fix the problem just by performing an SFC scan. To do that, just follow these steps:
- Right-click the Start Menu button and open Command Prompt (Admin).
- Type the following line and press Enter: sfc / scannow
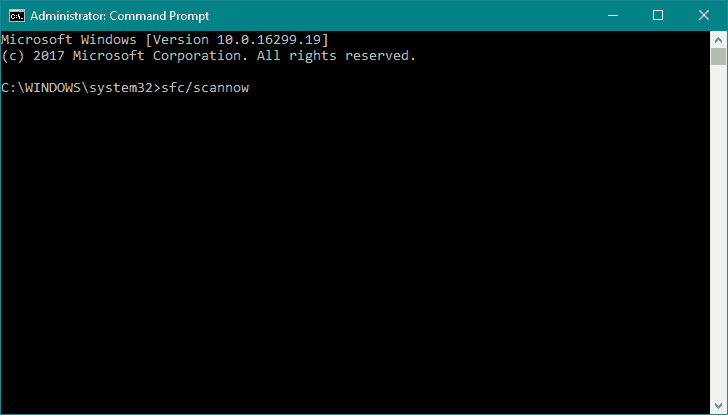
- Wait until the process is done (it may take a while).
- If a solution is found, it will be applied automatically.
- Now close the Command Prompt and restart your computer.
Solution 5 – Reset Windows Update components
If no troubleshooting tools have been managed to fix the problem, try resetting critical update components. Here’s what you need to do:
- Start Command Prompt as administrator.
- When the Command Prompt starts, run the following commands:
- net stop wuauserv
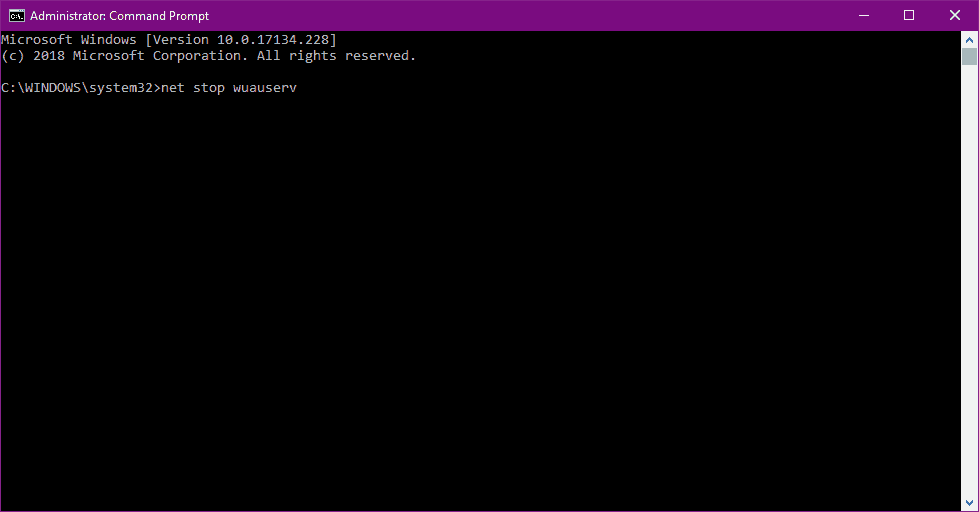
- net stop cryptSvc
- msiserver stopped net
- ren C: \ Windows \ SoftwareDistribution SoftwareDistribution.old
- ren C: \ Windows \ System32 \ catroot2 Catroot2.old
- network starts wuauserv
- cryptSvc started net
- msiserver net started
Solution 6 – Make sure the Windows Update service is running
The most important service for getting updates in Windows 10 is the Windows Update service. If the service is not running properly, well, you won’t be able to get any updates. So make sure it runs by doing the following:
- Go to Search, type services.msc and open Services .
- Find the Windows Update service . Right click and open Properties .
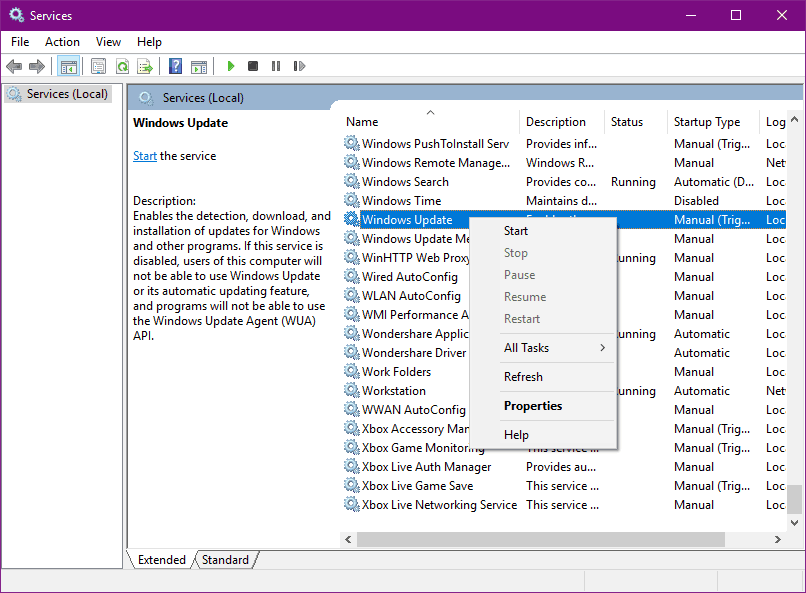
- On the General tab , find the Startup type and select Automatic .
- If the service is not running, right-click and select Start .
- Confirm your choice and close the window.
Solution 7 – Make sure the BITS service is running
The Background Intelligent Transfer Service (BITS) is another essential service for getting Windows updates. So you might also want to check that out:
- Press Windows key + R. In the search line for services.msc and press Enter .
- Search for Background Smart Transfer Service (BITS) and double click on it to open its properties.
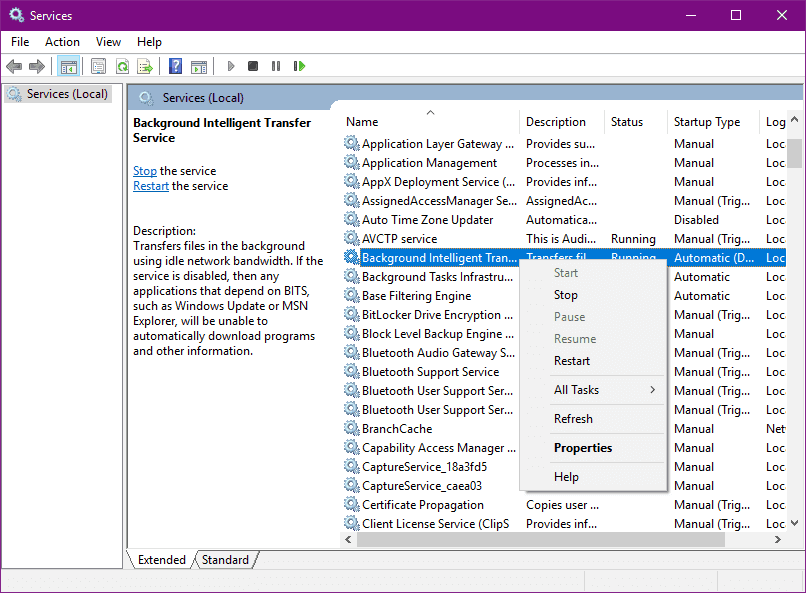
- If the service is not running, click the Start button .
- Select the Recovery tab and make sure First Failure and Second Failure are set to Service Restart .
- Confirm your choice and check for updates.
Solution 8 – Change DNS settings
If none of the previous workarounds resolved the issue, we will try and change the DNS settings. Here’s how to do it:
- Go to Windows Search , type control panel and open Control Panel.
- Go to Network and Sharing Center and click on Change adapter settings from the left pane.
- Select the network you are currently using, right-click on the network and select Properties.
- Scroll down to Internet protocol version 4 (TCP / IPv4) and select Properties.
- Now, select Use the following DNS Server addresses
- Enter the following values: DNS Server – 8.8.8.8 and Alternate DNS Server – 8.8.4.4
- Save changes and restart your computer
Solution 9 – Perform a clean install
Ultimately, if you still can’t solve the problem at hand and Windows 10 just refuses to comply, you should take a different approach. Specifically, if you can’t upgrade your OS through the built-in process, it’s time to move on to the old school approach. Simply download the Media Creation Tool, create bootable installation media, and install the system from scratch. That should be enough to alleviate your problems.
If you are not sure how to do it, you can find a detailed explanation. Just don’t forget to back up your data before the procedure starts.
Conclusion
We hope this article on How to fix WINDOWS 10 UPGRADE ERROR 0XC0000017 – 2021 would be helpful for you. In case you have any questions, feel free to leave your comments below.


