
How to fix this pc can’t run windows 11. With the official announcement of Windows 11 on June 24th and with countless rumors going around, many users have started to check if their system is compatible with Windows 11. However, while testing requires request, many users encounter this Windows 11 installation error – “This PC Can’t Run”
When Microsoft announced the most awaited Windows 11 for its popular platform and the biggest update after Windows 10, the curiosity clearly started. Store, Android app support and more) for the operating system, its launch date is yet to be announced. However, the new operating system will be available to all Windows users later this year.
Microsoft also released the PC Health Checker app for all Windows users, which helps you to scan your PC’s health and let you know if it can run Windows 11. So if you want to check if your system is good qualifies for Windows 11 or not, you encounter This PC Can’t run Windows 11 instead, we will tell you how to deal with it.
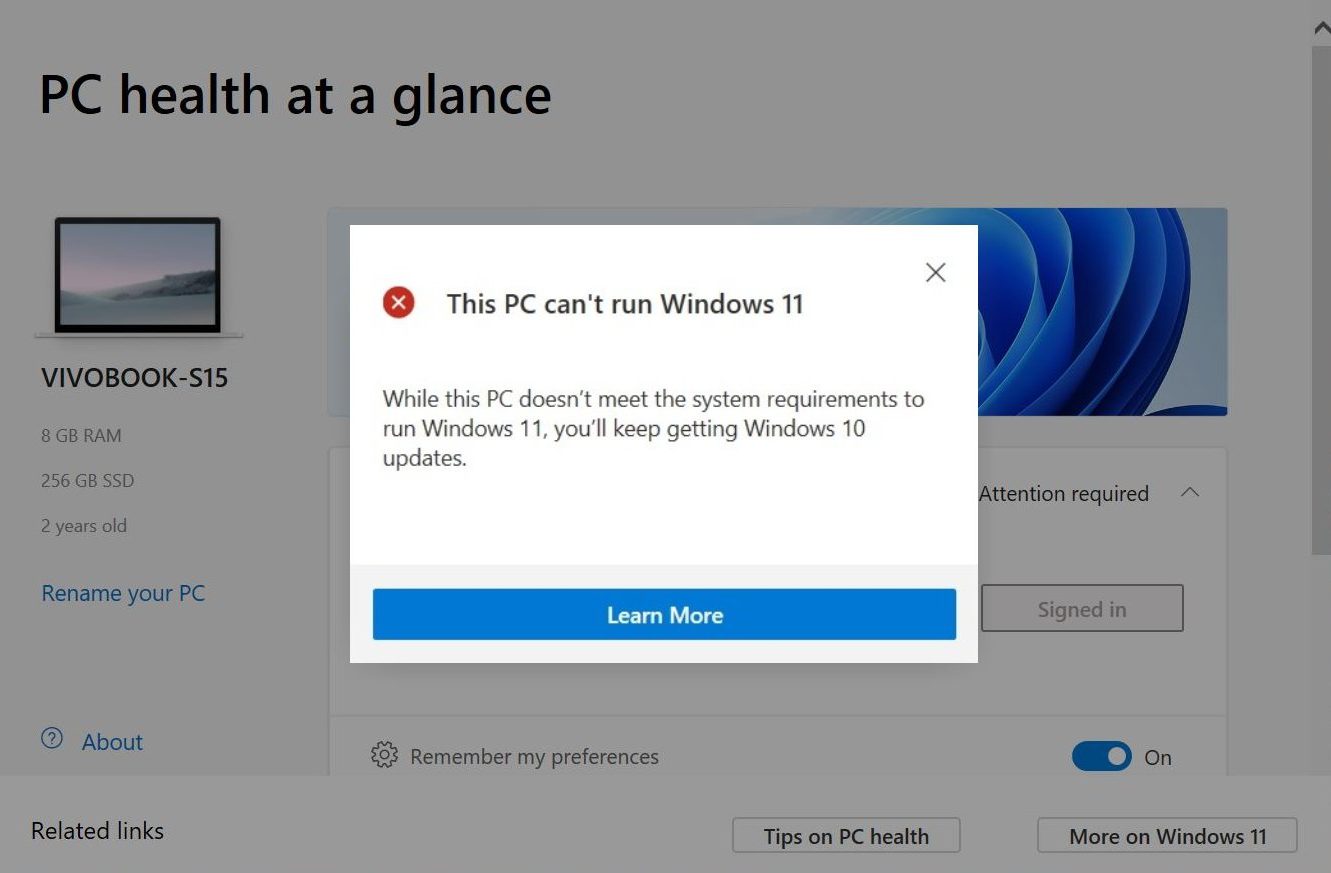
Table of Contents
Why do you see This PC can’t run Windows 11?
The error usually occurs because Secure Boot and TPM 2.0 are disabled on your system. To complete the Windows 10 installation successfully, you must enable both of these features in the BIOS settings and remove This PC can’t run Windows 11. However, before proceeding with the fix, you must check that the PC is is eligible for Windows 11. Here’s how to check:
How to check if your PC is eligible for Windows 11
Step 1: Click the link below to download the PC health check utility:
Step 2: Once downloaded, double-click WindowsPCHealthCheckSetup.msi to open the installer.
Step 3: Now, wait until the setup wizard completes the installation and opens the utility.
Step 4: Next, under PC Health Check, click Check now in blue.
Step 5: In a moment, you will see the results based on your specifications.
If your system is not eligible, you will see a prompt like this:
Step 6: If the system is Windows 11 eligible, you will see a message saying:
This PC can run Windows 11
*Note – If your PC belongs to an organization, you must contact your IT department or system administrator to check the Windows 11 update requirements on your system.
How to fix this pc can’t run windows 11
Method 1: By Enabling TPM and Secure Boot
Before proceeding with the troubleshooting, make sure that you have checked that your PC supports TPM 2.0 and that it is activated. Here’s how to check if TPM is enabled on your PC:
Step 1: Press Win + R keys together on your PC to launch Run command .
Step 2: In the Search Run command , type tpm.msc and hit Enter to open the Trusted Platform Module (TPM) Management on Local Computer .
Step 3: In the Trusted Platform Module (TPM) Management on Local Computer console.
Here, check under Status if TPM is enabled. If enabled, it will say The TPM is ready for use .
Step 4: However, if you see the following message Compatible TPM cannot be found, it means either your motherboard does not have the TPM chip or it may be disabled in BIOS.
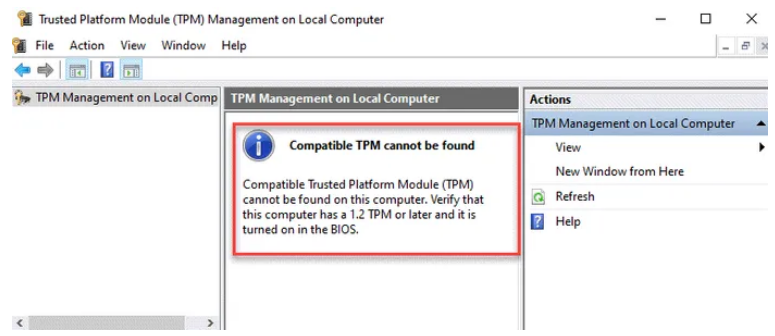
In this case you have to enter the system BIOS settings and check if TPM is available. If it is available, you must Enable it.
How to enable TPM chip in BIOS
Step 1: Press the Win + I keys together on your PC to open Settings.
Step 2: In Settings, click Update & Security.
Step 3: Next, on the left side of the pane, click Recovery.
Step 4: Now, go to the right side of the pane, scroll down and under Advanced start-up, click Restart.
Step 5: Your PC will reboot and take you to Choose an option.
Here, click Troubleshoot.
Step 6: Next, under Troubleshoot, click Advanced options.

Step 7: In Advanced options , select UEFI Firmware Settings.
Step 8: Again, click Restart and your PC will boot into BIOS.
*Note – If you don’t see UEFI Firmware Settings option in Advanced options , then just restart your PC and when it boots up, immediately keep pressing the specified key of your PC brand ( F2, F110, F12 or Del) until you get to the BIOS setup screen.
Step 9: On the left side of the pane, click to expand Security .
Step 10: Under Security, try to locate TPM device.
Check if it is enabled, if not, select TPM device and Enable it.
Click Apply to save the changes and exit to restart the PC.
How to enable secure boot
Step 1: Restart the PC and restart the PC and during the boot time keep pressing the specified key on your keyboard based on your PC manufacturer ( F2, F110, F12 or Del ). It will take you to BIOS settings .
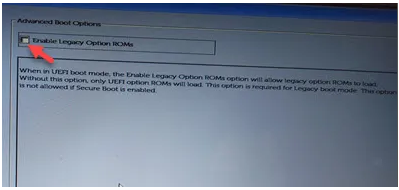
Step 2: When you get to BIOS settings , first click on Advanced Boot Options to check if Legacy Option is enabled. If that’s the case, you won’t be able to enable Security Boot unless you disable Legacy Option .
Once you select Advanced Boot Options, switch to the right side and uncheck the box next to Enable Legacy Option ROMs.
Step 3: Now, navigate to the left side of the pane and click on Secure Boot to expand the section.
Here, select Secure Boot Enable.
Click Apply and exit to restart your PC.
Once you’re done, run the PC Health Check Utility again to check for a confirmation message like “ This PC can run Windows 11: Great news – This PC meets all system requirements for Windows 11, and it’s free. We’ll let you know when it’s ready to install.”
Method 2: By downloading and modifying the Appraiserres.dll file
Step 1: First, download appraiserres.dll below or use Windows 10 ISO:
https://www.dllme.com/dll/files/appraiserres_dll.html
Step 2: Now, connect the Windows 11 ISO and wait until it is extracted.
Next, go to Sources
Step 3: Now search for appraiserres.dll , select it and press Delete.
Step 4: Now, copy appraiserres.dll that you downloaded Step 1 and paste it in Windows 11 ISO.
Now, try to install Windows 11 as before.
Minimum requirements for Windows 11 are expected:
- A single core 1.4 GHz (32-bit) or a single core 1.4 GHz (64-bit);
- 2GB RAM
- 15GB of available memory
- Minimum hardware resolution is 1024 x 768
- Intel processor must be 8th generation or later
Fix This PC Can’t Run Windows 11 on VirtualBox
Yes, creating virtual computers with VirtualBox is too simple, however, that is with old versions of Windows from Windows 10 and below.
And if you want to create a virtual computer running Windows 11, it will be a different story, when the computer hardware cannot meet, the installation of Windows 11 also falls into a deadlock.
So how to install Windows 11 on a virtual computer when reporting an error This PC can’t run Windows 11?
In general, it is simple, if you have previously crossed the line to install Windows 11 on a computer that does not support it, the way to do it is similar, not much different. Now will be the detailed instructions.
1. Use a modified Windows 11 installer
On the network today, there are many modified Windows 11 installers that can be installed on computers that do not meet the hardware requirements. Can you use this installer to install on a virtual machine when you encounter an error This PC can’t run Windows 11?
And in case you are not secure when using shared installers on the network, you can create a USB to install Windows 11 yourself for computers that do not meet the hardware as in the article I instructed the day before.
2. Regedit reset during installation
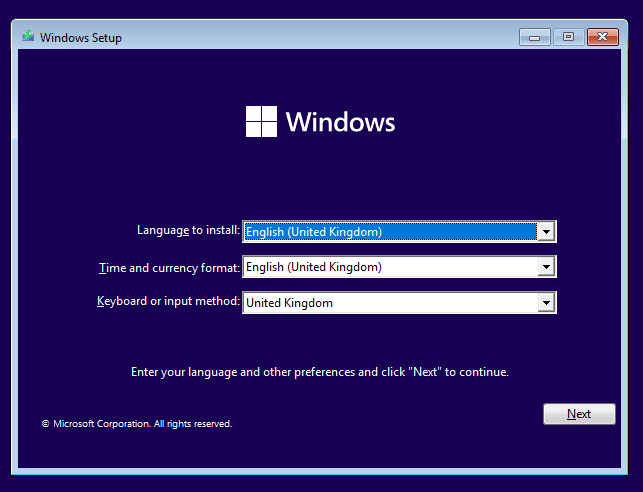
You also go to the settings as usual, until this step:
+ Step 1: At this interface, press the key combination SHIFT + F10or to open the CMDShift +Fn + F10 tool .
+ Step 2: In the CMD window, enter the command regedit=> then click Enterto execute the command.

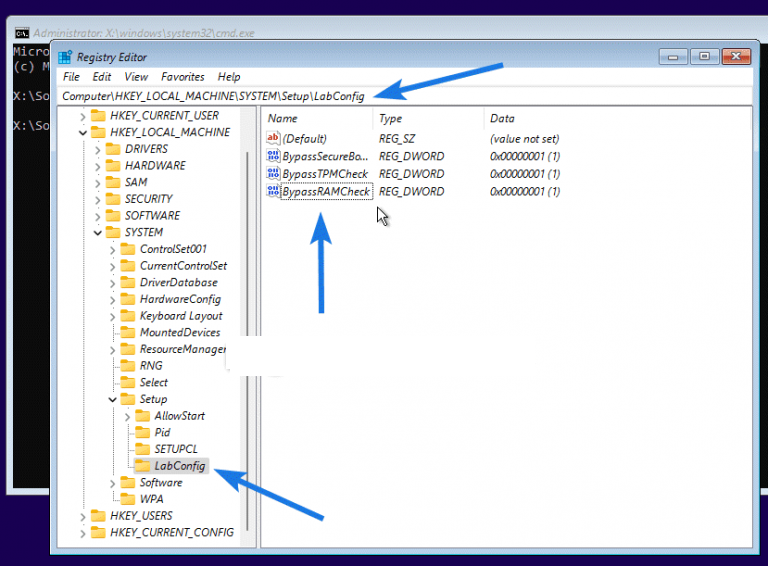
+ Step 3: CMD window appears, follow this path:
HKEY_LOCAL_MACHINE\SYSTEM\Setup
Then you right click on the key Setup=> select New=> Key=> and name itLabConfig
Now in the directory LabConfig, create 2 new DWORDs named BypassSecureBootCheckand BypassTPMCheckwith a value of 1.
Right-click any space in the right column => select DWORD (32-bit) => name it in turn as above => then double click on the 2 newly created values => enter the number 1 in the Value box data is done.
+ Step 4: Then you proceed to install Windows 11 as usual


