
How to fix Install error 0x800f0831 Windows 11. 0x800f0831 An error may occur when receiving cumulative updates or feature updates. Hard to find the real reason behind this code but it might appear when the update you are trying to install requires the manifest of the previous update package. Furthermore, corrupt system files, improperly configured proxy settings, unnecessary running services, and anti-virus programs can lead to this drawback.
Windows Updates are essential to keep your system healthy as they contain new features and bug fixes. But getting it without any errors is a real challenge. Cases of Windows update errors are quite common, and solving them is not difficult at all. Although Microsoft does not provide any official solution or patch to fix error 0x800f0831, we have prepared a series of solutions that are sure to help you.
Table of Contents
How to fix Install error 0x800f0831 Windows 11
1] Update the patch manually
Normally, Microsoft provides automatic cumulative updates when you’re connected to ethernet or Wi-Fi. But due to the metered connection and slow internet speed, the download is hindered. As a result, the system often ends up downloading corrupted as well as corrupted update files resulting in the generation of unexpected error codes. Therefore, you can try to get the file manually to avoid more errors –
- Visit the official Microsoft Update Catalog website .
- Click on the search bar and write the patch ID you’re having issues with.
- Either click Search or press Enter .
- Download the package that matches your system BIT
- Same settings.
2]Run Windows Update debugger to resolve Windows 11/10 update error 0x800f0831
Corrupted files are responsible for creating Windows 11/10 update error 0x800f0831 to a large extent. In such a case, try using the built-in utility Windows update troubleshooter. This tool not only detects related corruptions but also fixes them automatically. To use the utility –
- Press Win+I and continue with Update & Security .
- Select Troubleshoot from the left sidebar.
- Switch to the right pane.
- Locate Windows update and select the same.
- Click Run the troubleshooter from the expansion tray.
- After the utility has finished detecting problems related to error 0x800f0831, click Apply a fix and follow the on-screen instructions.
3]Reset Windows Update components
The update component is damaged or if the related service is stopped, Windows 11/10 update error 0x800f0831 may be displayed. If so, you will have to reset the Windows Update component. This is the way –
- Click the serach icon on the taskbar and type cmd.
- When the results show up, click Run as administrator .
- Click Yes for UAC.
- Insert the latter one at a time and press Enter after each line –
net stop wuauserv
net stop cryptSvc
net stop bits
net stop msiserver
- Execute the following commands in the same way:
ren C:WindowsSoftwareDistribution SoftwareDistribution.old
ren C:WindowsSystem32catroot2 Catroot2.old
- Finally, you need to run the following commands one by one –
net start wuauserv
net start cryptSvc
net start bits
net start msiserver
Once done, go to Settings => Update & Security => Windows Update. From the right pane, click Check for updates and install the recent patch in the usual way.
4]Disable proxy server to fix error 0x800f0831 Windows 11/10 Update
Incorrect proxy settings configuration can generate Windows 11/10 Update Error 0x800f0831. You will therefore have to disable the same to avoid such a stop code. Do like that –
- Press Windows and R s together.
- Type inetcpl.cpl in the command box and press Enter .
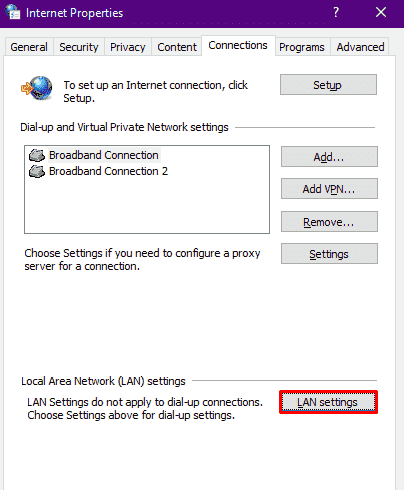
- Proceed to Connections .
- Click LAN settings present at the bottom.
- Check the box against Automatically detect settings .
- And then uncheck the box located next to Use a proxy server for your LAN (These settings will not apply to dial-up or VPN connections) .
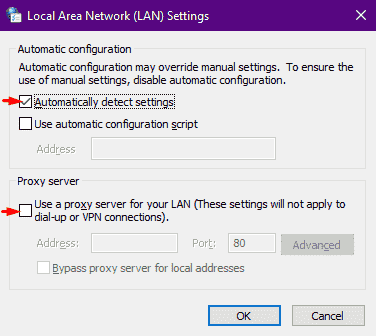
- Click OK to save the modifications you made.
- Finally, restart Windows 10 and try to update the system.
5]Block anti-virus for a while
While anti-virus software is important to keep the system safe from malicious threats, it often prevents Windows from receiving updates. This happens when an anti-malware program mistakes the update file for a threat. However, to check if this is the cause of the 0x800f0831 error, you will have to temporarily disable your existing anti-malware program.
Turn off Built-in Windows Security
- Right-click the Start button and select Settings .
- Click Update & Security .
- Select Windows Security from the left column.
- Click on Virus and threat protection option from the right pane.
- Click the Manage settings link .
- Turn off the Real-time protection toggle .
Turn off third-party anti-virus software
- Click the up arrow icon from the system tray.
- Right click on the icon of the antivirus installed on your device and select Disable .
- Choose to permanently disable the software or choose the length of time after which it will automatically turn on.
Note – The procedure for disabling third-party anti-malware programs can vary depending on the different software, but most of the time it’s similar.
6]Fix corrupted system files
A malware infection or application conflict will remove essential system elements along with critical Windows update-related components. As a result, you encounter Windows 11 or 10 Update Error 0x800f0831 while trying to upgrade or receive a new cumulative or security patch. Follow the instructions to fix the situation –
- Press Win+X and select Run .
- Put in cmd.exe .
- Press Ctrl+Shift+Enter completely.
- When UAC prompts, click Yes .
- Insert the below command after the cursor blinks and press Enter key –
sfc /scannow
- Once done, check if error 0x800f0831 persists while installing updates.
- In case you get the same error again, you will have to execute the below command in an elevated Command Prompt –
dism /online /cleanup-image /restorehealth
7]Clean Boot Windows 11/10
There are a number of services that automatically start and continue to run since the PC is started. A few of them can fiddle with the update component and prevent Windows from receiving new patches. To rescue your PC from such a situation, you will have to perform a clean boot and then try to get new updates. The steps are as follows:
- Open the Run dialog box.
- Put msconfig in the text bar and press Enter key.
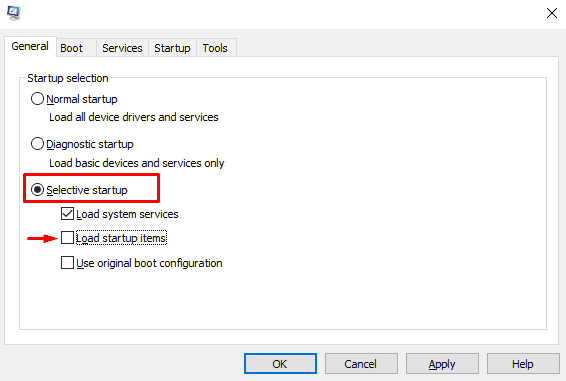
- Click the radio button set aside Selective startup.
- Check the box before Load startup items .
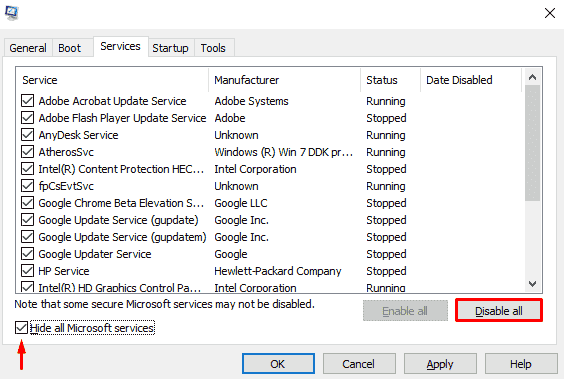
- Go through Services.
- Click the checkbox against Hide all Microsoft services.
- Then press Disable all.
- Go to Startup Next.
- Click the link that says Open Task Manager.
- When it appears, right-click each program listed in this panel in turn and select Disable for all.
- Return to the System Configuration wizard and click Apply via OK.
Ngolongtech hope you find this article helpful and wish you success!!!


