How to fix Install error 0x80070643 in Windows 11. Windows 11 users recently reported that they encountered update error 0x80070643 when installing new patch updates through Settings. If that’s the case, fix it in one of the ways below.
Table of Contents
Causes of Install error 0x80070643 in Windows 11
Before resolving update error 0x80070643, you should consider the possible causes of this problem:
- Third-party antivirus software conflicts: Anti-virus software may conflict with the Windows Update service.
- Install Missing, Outdated, or Corrupt .NET Framework: Updates cannot be installed because the .NET Framework is damaged, missing, or a newer version may need to be installed.
- Corrupt system files: You may have to repair corrupted system files that are causing the problem.
- Corrupted Windows Update components : Some Windows Update components may be damaged or configured incorrectly
- Windows Defender database is corrupted: Error 0x80070643 can also arise because Windows Defender’s database of viruses and malware is corrupted.
To solve error 0x80070643 on Windows 11 , you have to apply different solutions based on the above causes to solve it in the most effective way.
How to fix Install error 0x80070643 in Windows 11
Run the Windows Update troubleshooter
Step 1. Access the Start menu > Settings.
Step 2. Select the System option in the left pane, then click the Troubleshoot option in the right pane.
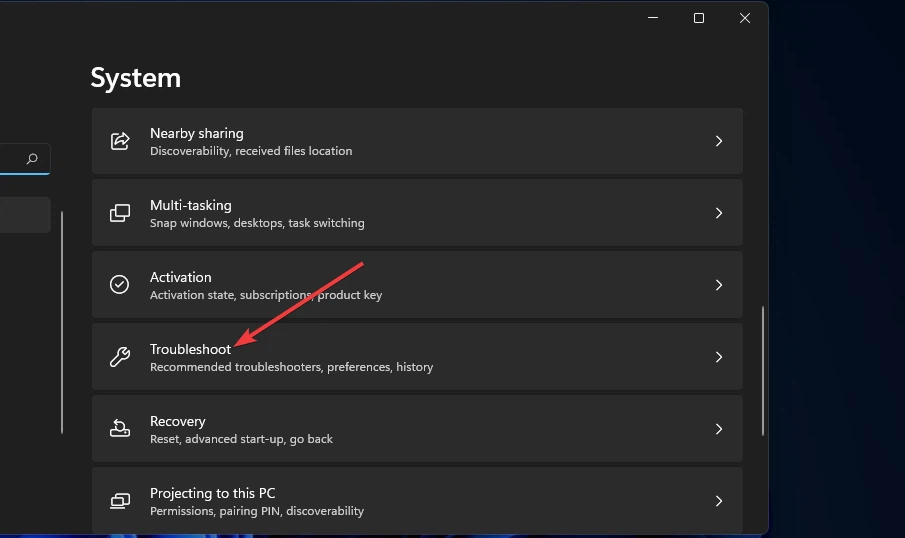
Step 3. Go to the next step, select Other trouble-shooters to display a list of other troubleshooters in Settings.

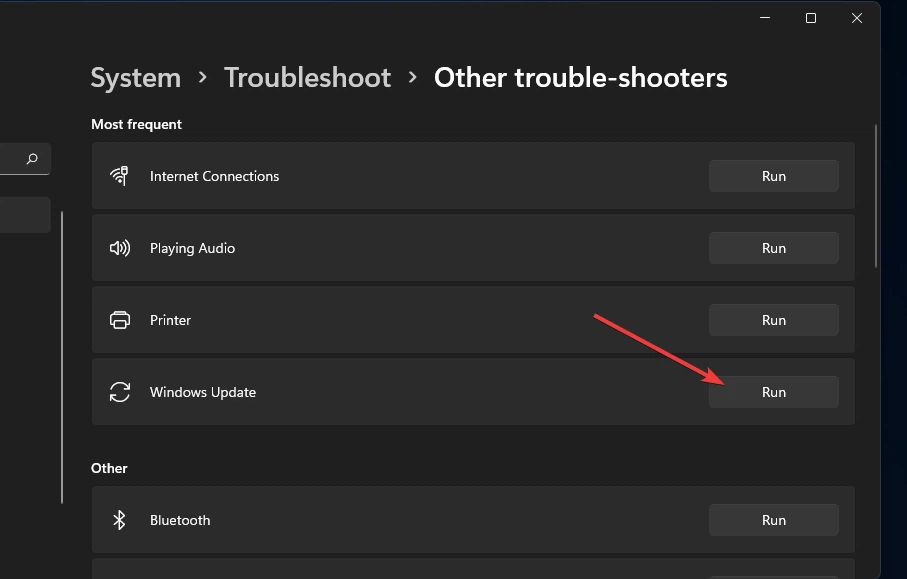
Step 4. Click the Run button on the right side of the Windows Update troubleshooter . Then apply any potential fixes suggested by the troubleshooter.
Run a file system scan
Step 1. Access the Start menu, enter cmd in the search box at the top to find Command Prompt.
Step 2. Click the Command Prompt option in the corresponding displayed results, and then click the Run as administrator button on the right side of the search engine.
Step 3. In the displayed command line window, enter the command below and end with the Enter key.

Step 4. Wait for the system file scan to reach 100% and display the results in the Command Prompt. Then you restart the system to apply the change.
Install the latest .Net Framework 4.8
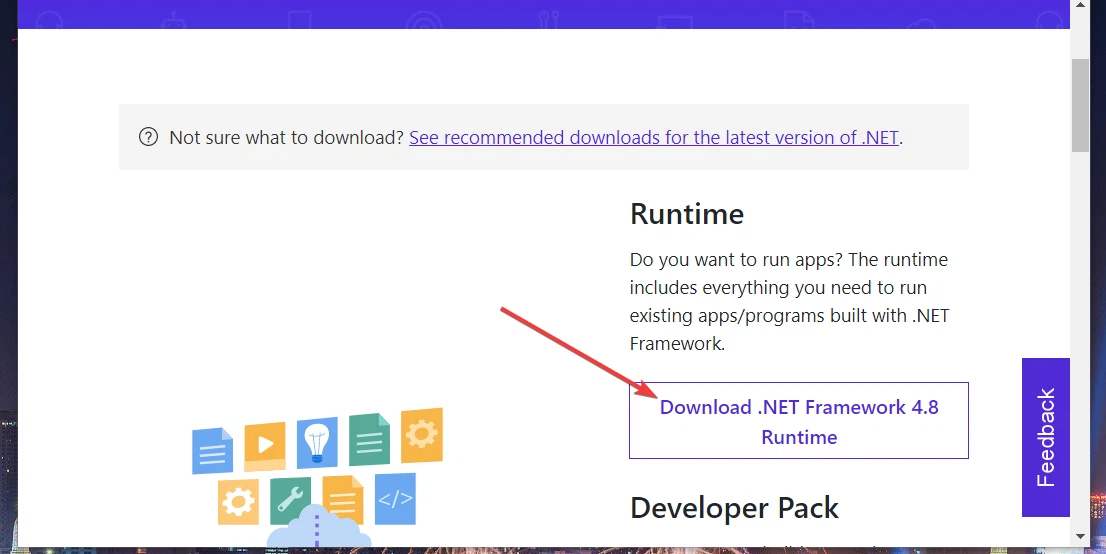
Step 1. Fire up a web browser and visit Microsoft’s NET Framework 4.8 website.
Step 2. Click the Download .NET Framework 4.8 Runtime button on the main interface of the page to download the .NET Framework 4.8 to your computer.
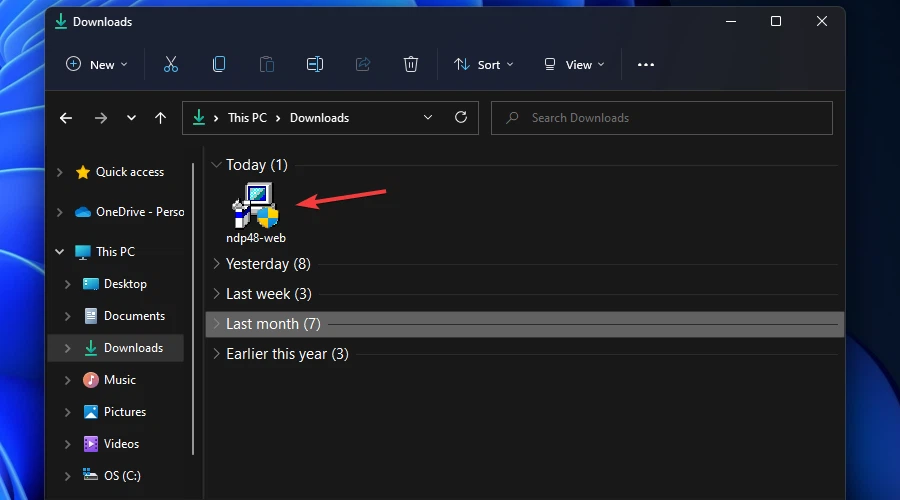
Step 3. Next, press Windows + E key combination to display File Explorer and browse to the folder you just downloaded the .NET Framework 4.8 installer to your computer.
Step 4. Double -click the ndp48-web.exe file to launch the installer. Follow the on-screen instructions to complete the .NET Framework 4.8 installation.
Repairing .NET Framework
This workaround is recommended if the latest version of .NET Framework is already installed on your computer.
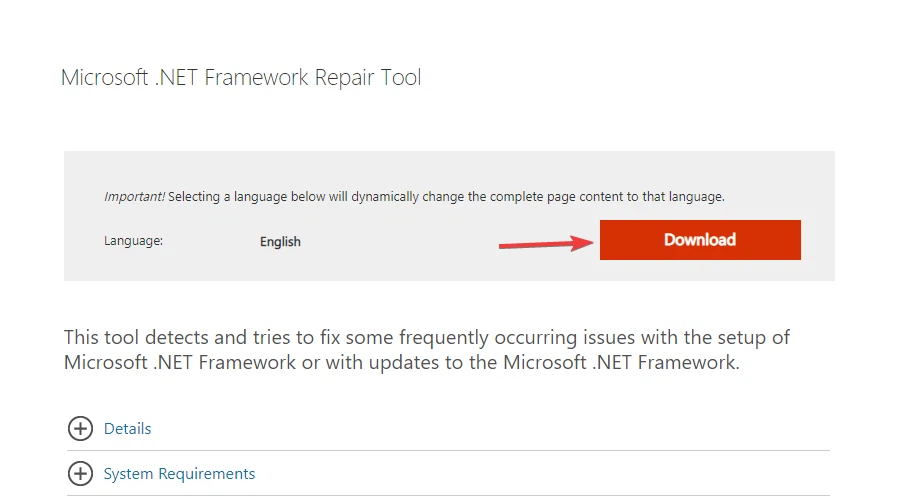
Step 1. Fire up a web browser and visit the Microsoft .NET Framework Repair Tool website .
Step 2. Click the red Download button below the Microsoft .NET Framework Repair Tool to download this tool to your computer.
Step 3. Activate File Explorer, go to the folder you just downloaded Microsoft .NET Framework Repair Tool from, double-click on the NetFxRepairTool.exe file to start.
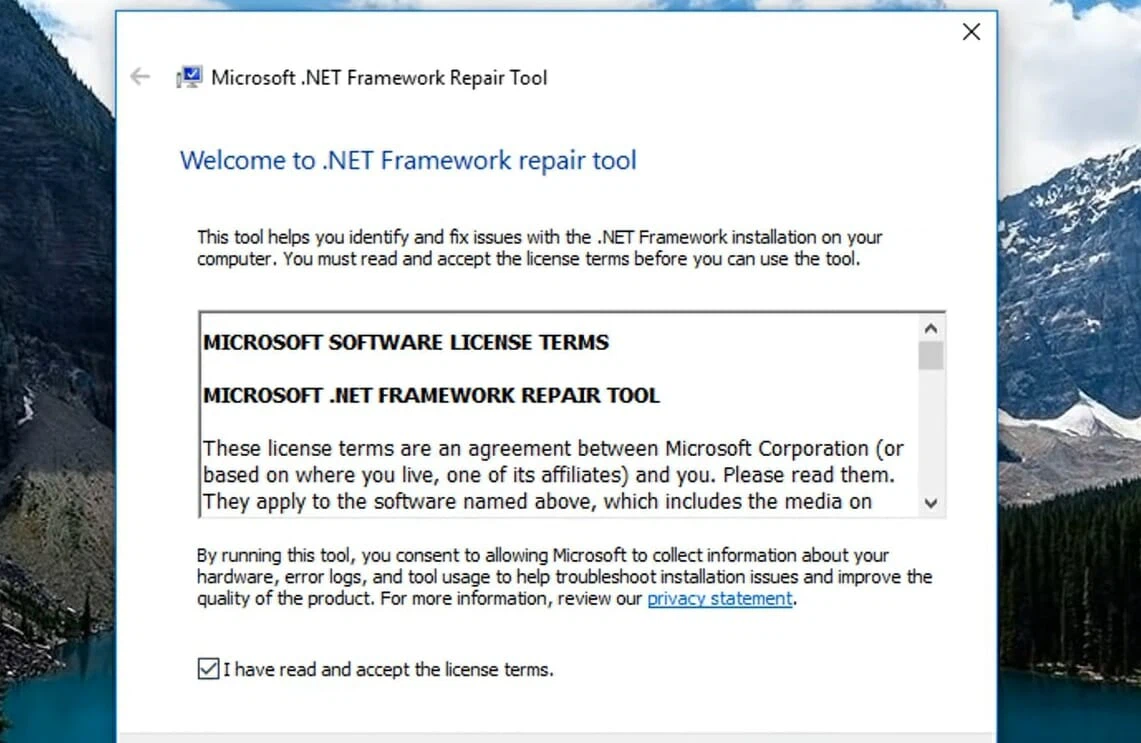
Step 4. In the new dialog box, select the option I have read and accept the license terms , and then click the Next button to let the tool start scanning and fixing the problem.
Turn off third-party antivirus software temporarily
Turn off third-party anti-virus software installed on your computer before attempting to install the latest Windows updates in the Settings app.
The simplest and fastest way that we usually do is right-click the system tray icon of the anti-virus utility and select the Disable option on the displayed menu, or you can choose to disable it for at least 1 hour.
Change the SoftwareDistribution subfolder name
Step 1. Activate the Command Prompt command line window with administrative rights similar to the way above.
Step 2. To turn off some services, type the commands below in turn and press Enter to apply.
net stop bits
Step 3. Enter the command below into the command window and press Enter to execute
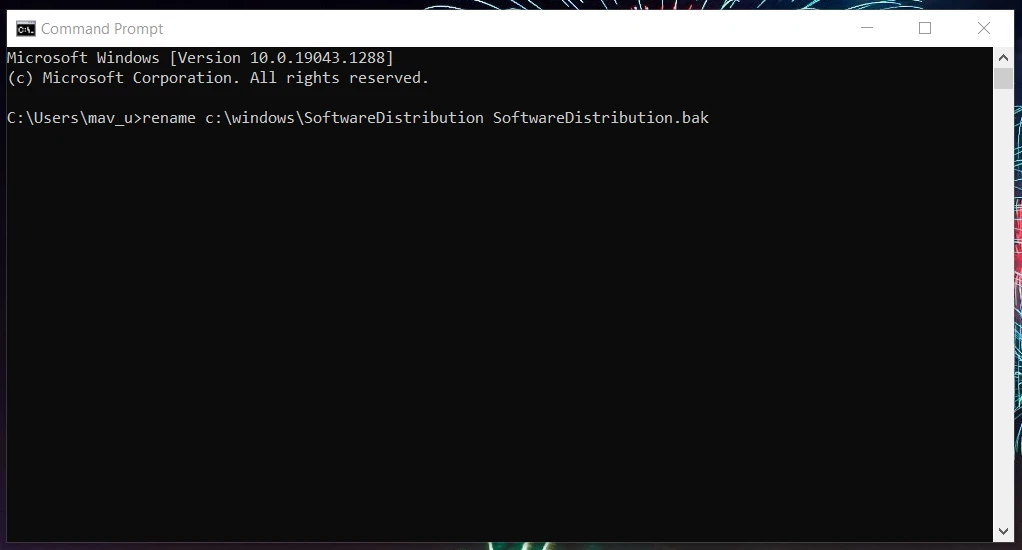
Step 4. To restart the above disabled services, type the commands below and end each command with the Enter key.
net start bits
Reset folder Catroot2
Step 1. Activate the Command Prompt command line window with administrative rights similar to the way above.
Step 2. In the command line window, type the commands below and press Enter after each command to apply.
md %systemroot%\system32\catroot2.old
xcopy %systemroot%\system32\catroot2 %systemroot%\system32\catroot2.old /s
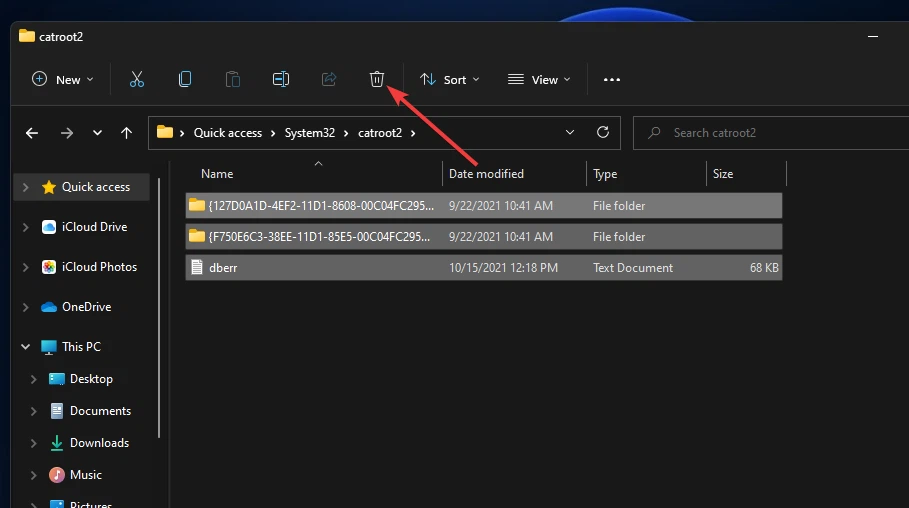
Step 3. Next, open File Explorer (press Windows + E key combination ) and open the catroot2 folder at the following path:
Step 4. Press Ctrl + A to select all content in the catroot2 folder. Then press the Delete button on the toolbar to delete the selected items.
Step 5. Then, reopen the Command Prompt window with administrator rights. To restart the disabled service, type the command below and press Enter.
Windows Defender Database Update
This solution is especially recommended when error 0x8007064 occurs for Windows Defender updates.
Step 1. Activate the Command Prompt command line window with administrative rights.
Step 2. Enter the command below and press Enter to execute
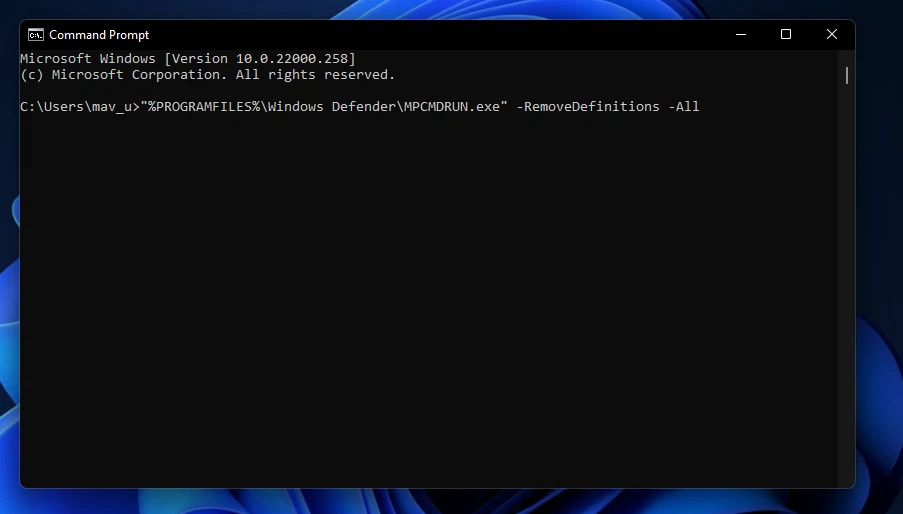
Step 3. To update the Windows Defender database , type the following two commands and press Enter at the end of each command.
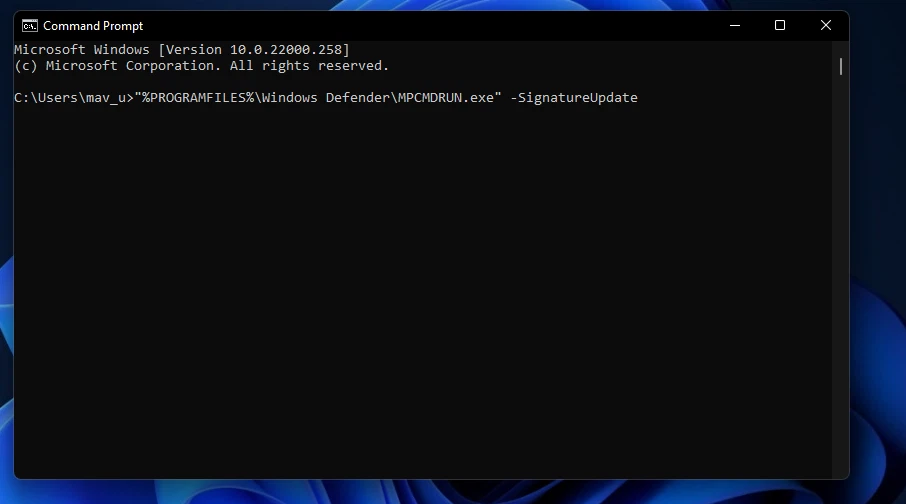
“%ProgramFiles%\Windows Defender\MPCMDRUN.exe” -SignatureUpdate -MMPC
Step 4. Then, close Command Prompt and restart Windows 11 to apply the change.
Clean Boot on Windows 11
Step 1. Press the Windows + R key combination to activate the Run dialog box.
Step 2. Enter msconfig in the blank box and click OK button to access the System Configuration panel.
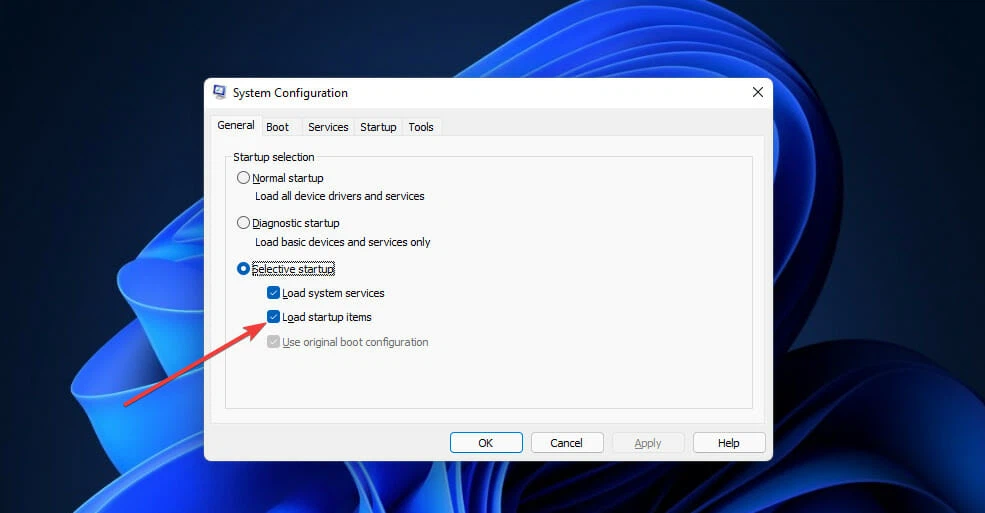
Step 3. Next, select the General tab , then click the Selective startup option and then uncheck the Load startup items option.
Step 4. Then select the option Load system services and Use original boot configuration .
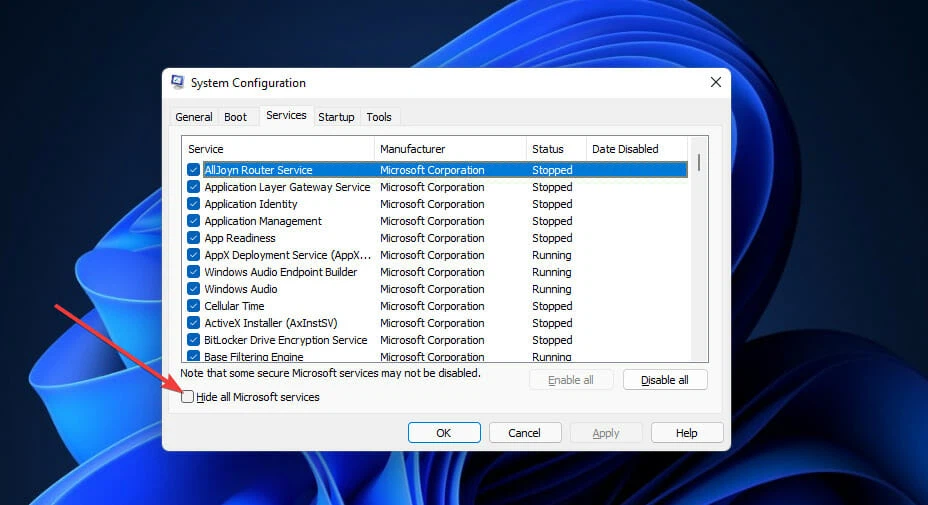
Step 5. Switch to the Services tab , and then click the Hide all Microsoft services option .
Step 6. Click the Disable all button to deselect all options from unnecessary third-party services.
Step 7. To save the settings, click Apply > OK button to close the System Configuration dialog box.
Step 8. A dialog box is displayed, click the Restart button to restart the system. After the computer restarts, try to apply the updates after a clean boot of Windows 11.
Note: To restore the initial startup settings, simply select the Load startup items option in the General tab of the System Configuration dialog box. You can restore third-party services by clicking the Enable all button of the Server tab . Then click Apply button to save the restored boot configuration.
Manually install fix update 0x80070643
You can manually install those updates from the Microsoft Update Catalog website. This website includes an archive of Windows updates from which users can manually download and install updates.
Step 1. Fire up your web browser and visit the Microsoft Update Catalog page .
Step 2. Enter the KB + serial number behind the Windows fix update 0x80070643 in the search box on the website and press Enter.
Step 3. Click the Download button on the right side of the update package door. Of course the update must be compatible with the Windows 11 platform .
Step 4. Next right-click the download link on the Windows Update Catalog window that opens and select the Save link as option.
Step 5. Select a folder to download the update from on the Save As window . Then click the Save button.
Step 6. Next fire up File Explorer ( Windows + E ) and open the folder where you saved the Windows update MSU file.
Step 7. Double-click the MSU file to install the Windows update.
Step 8. After the update is complete, restart the system to apply the changes and fix errors.
Let us know in the comments section below if this guide helped you fix Install error 0x80070643 on Windows 11.

