
Fix Ctfmon.exe not starting automatically in Windows 11. Some Windows users don’t understand what is ctfmon.exe in Windows 11 and in this tutorial we will take a closer look at this file. Many people want to remove ctfmon.exe believing that it is malware, but you can be sure that it is a genuine file from Microsoft and is completely safe to use. The file should start automatically with Windows, but not always, so let’s see how we can fix this problem.
Table of Contents
How to automatically enable ctfmon.exe in Windows 11?
1. Use the shortcut ctfmon.exe
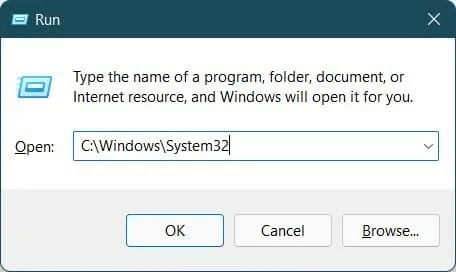
- Press the Windows+ keys R to open ‘ run ‘.
- Now you need to enter the path of Ctfmon.exe in the input box. Path:
C:\Windows\System32
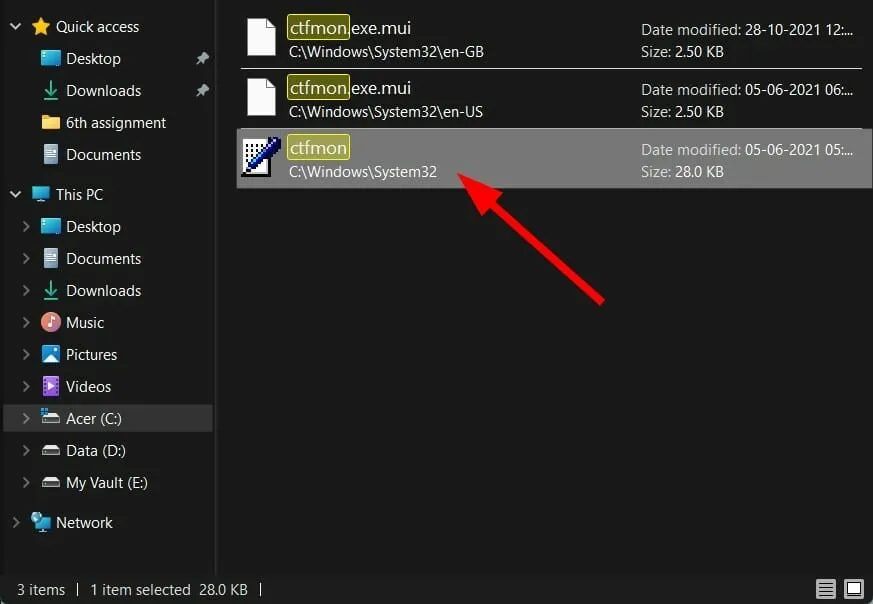
- Find the ctfmon.exe file and right click on it.
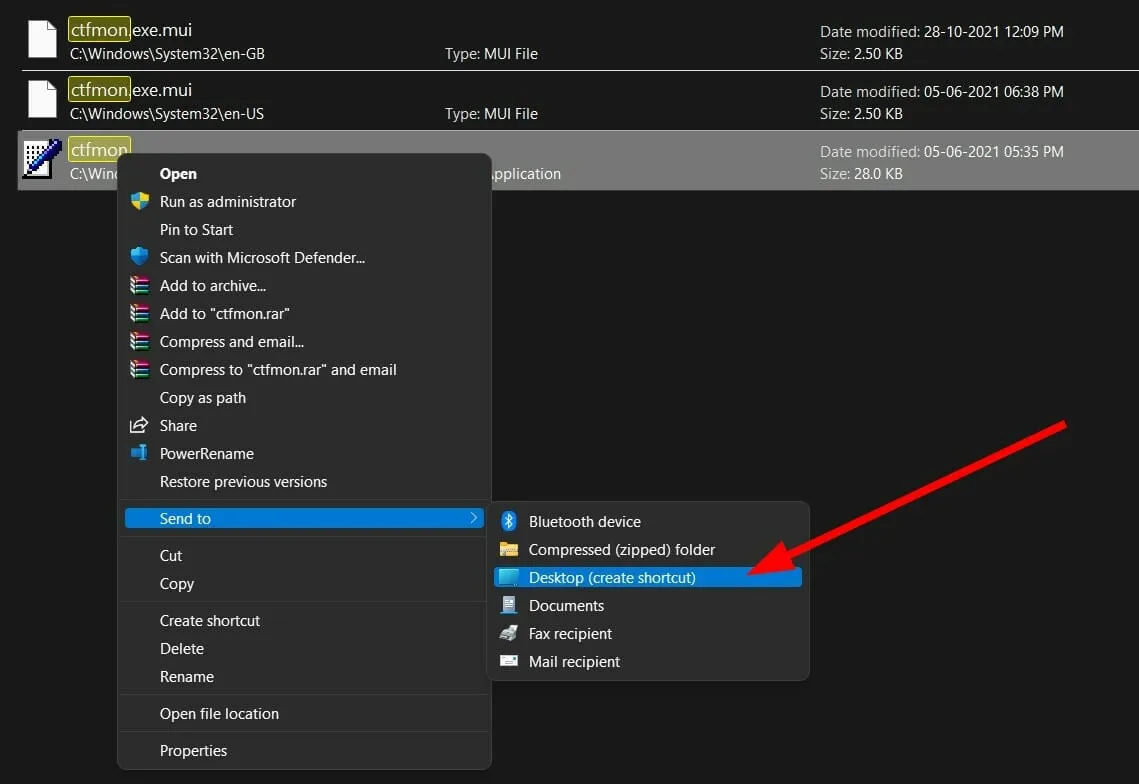
- Select ” Send”, and then select “Desktop” (create shortcut) .
- Reopen the Execution dialog.
- Run the command below.
shell:common startup
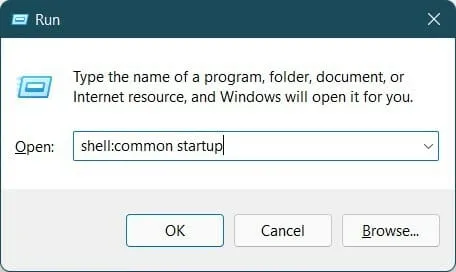
- You will be redirected to the startup folder below.
C:\ ProgramData \ Microsoft \ Windows \ Start Menu \ Programs \ StartUp - Copy the ctfmon.exe file from your desktop and paste it into the startup folder opened in the previous step.
- Restart and check if ctfmon.exe starts automatically in Windows 11.
2. Use Registry Editor
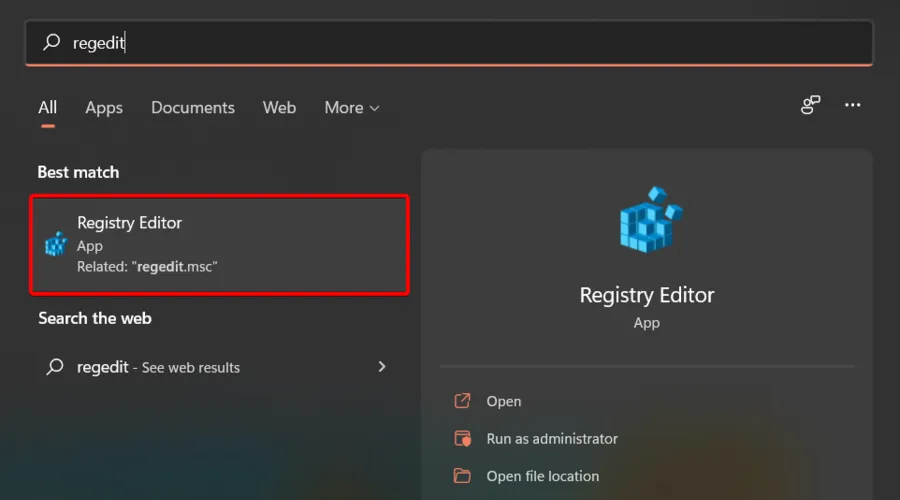
- Open the ‘ Start ‘ menu.
- Find the registered editor and open it.
- Follow the path below:
HKEY_LOCAL_MACHINE\ SOFTWARE\ Microsoft\ Windows\ CurrentVersion\ Run - In the empty space on the right, right click and select ‘New’, then ‘ String Value ‘.
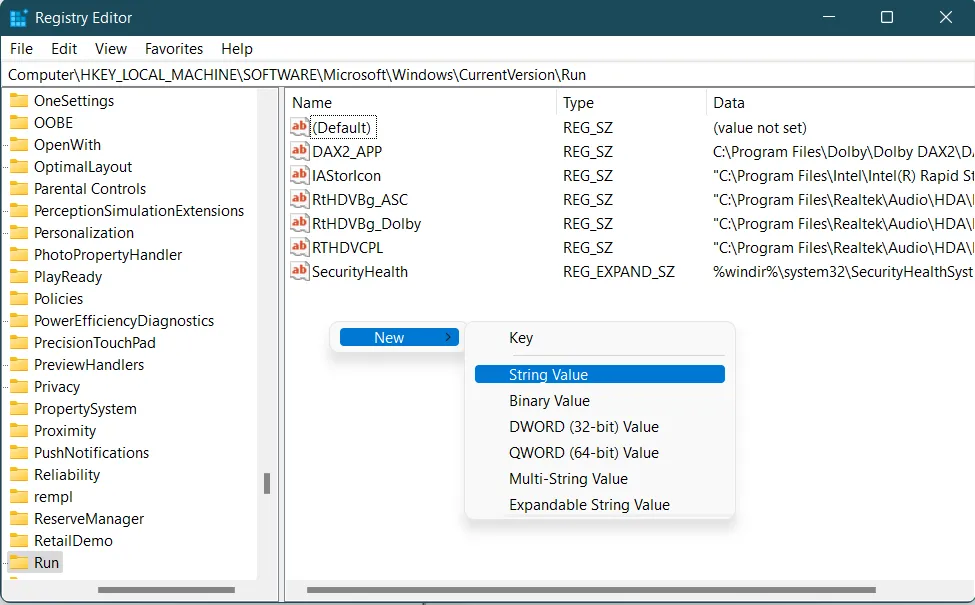
- Name the new line ctmon .
- Double click on it and set the value to
C:\Windows\System32\ctfmon.exe - Restart your computer and this should solve your problem.
3. Use the task scheduler
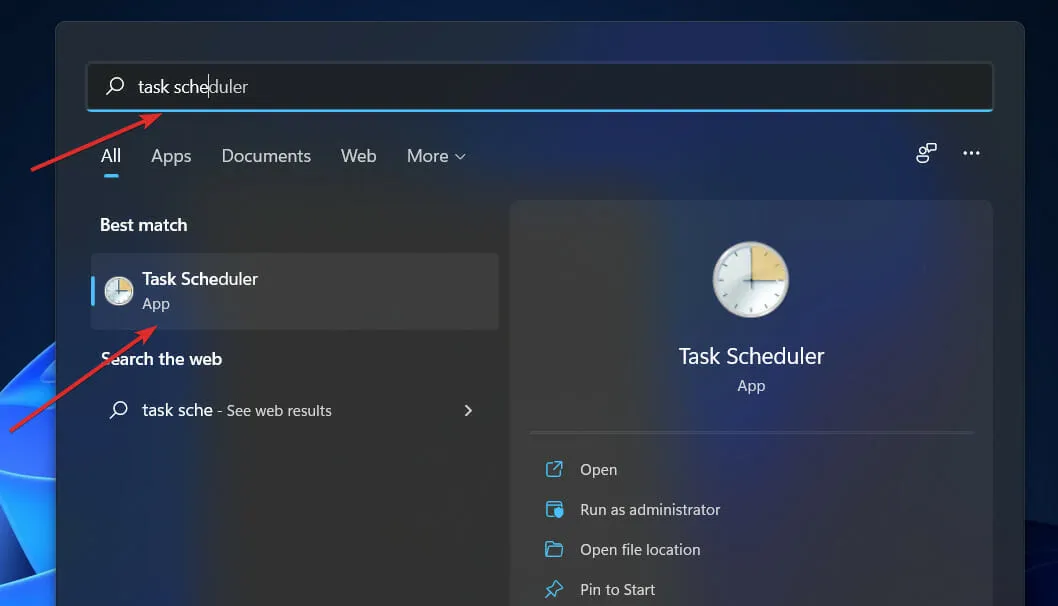
- Open the ‘ Start ‘ menu.
- Find the planner and open it.
- Expand Microsoft.
- Expand window .
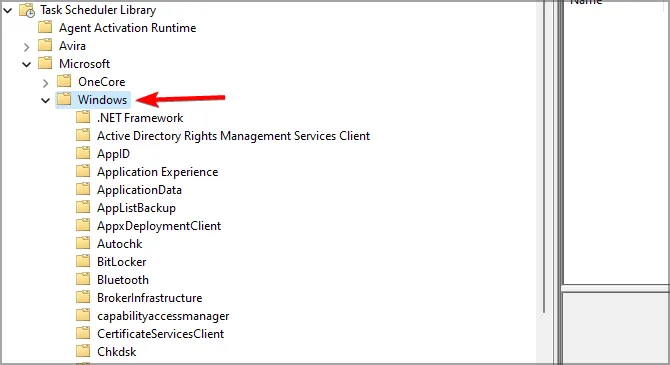
- Select in TextServicesFramework .
- On the right, right click on MsCtfMonitor and select ‘ Enable ‘.
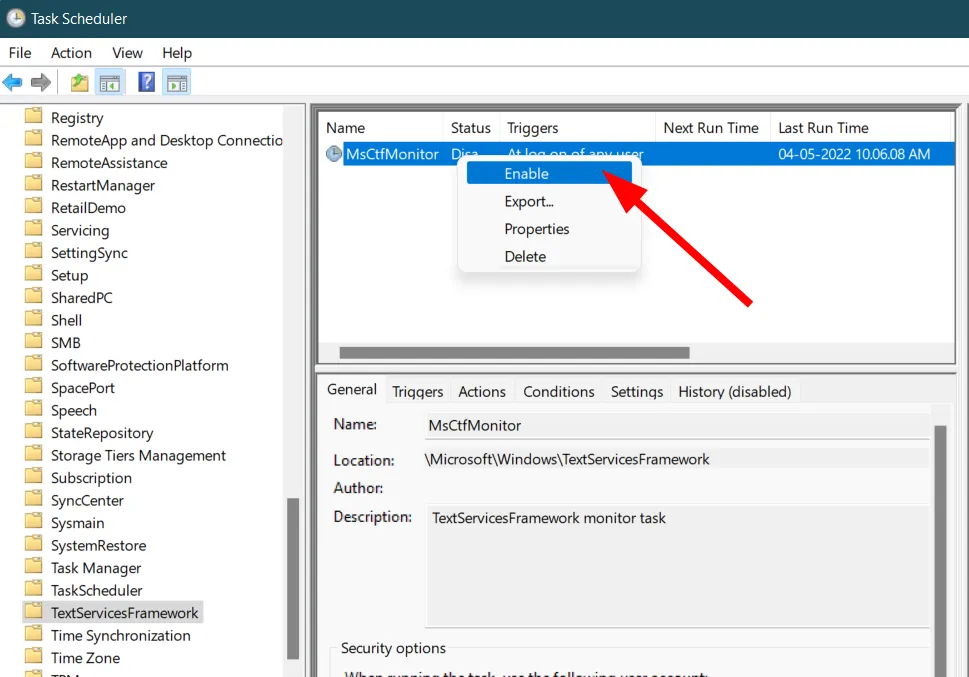
- Restart your computer and check if ctfmon.exe starts automatically on startup.
How to fix the error ctfmon.exe does not start automatically?
1. Run an SFC . scan
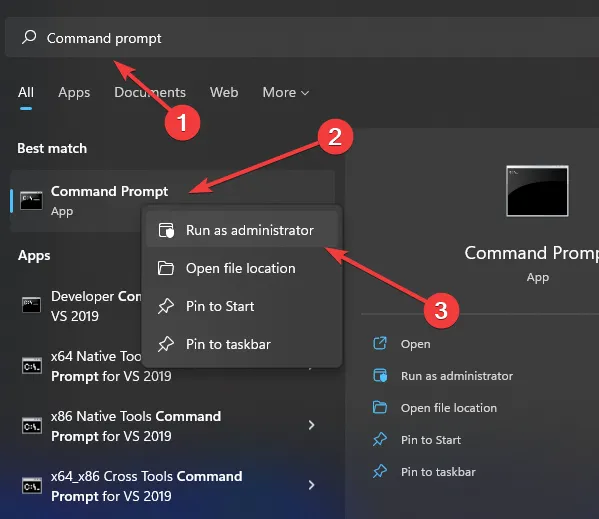
- Open the ‘ Start ‘ menu.
- Found ” Command Line “, Right click on it and select “Run as administrator”.
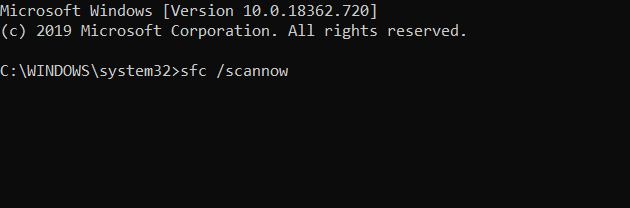
- Enter the command below and
sfc /scanow
- Your computer will start scanning and may fix the problem.
- Restart the computer
In addition, you have a more efficient and automatic method to scan your entire PC and repair corrupted system files quickly.
2. Check for Windows Updates
- Press Windows + I , open Settings .
- select Windows Update on the left pane.
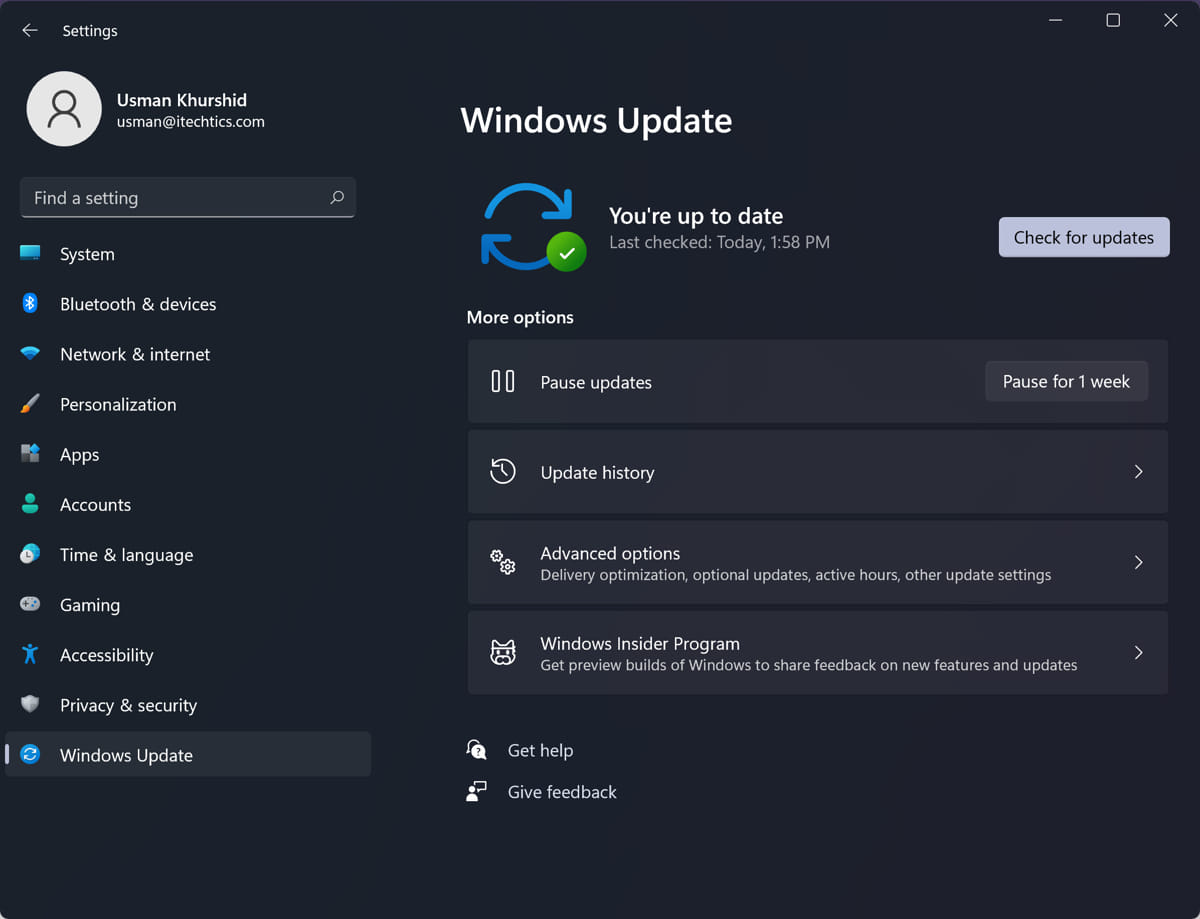
- Click the Check for Updates button .
- Your system will now check for the latest available updates and, if found, install them automatically.
Then check if ctfmon.exe is running.
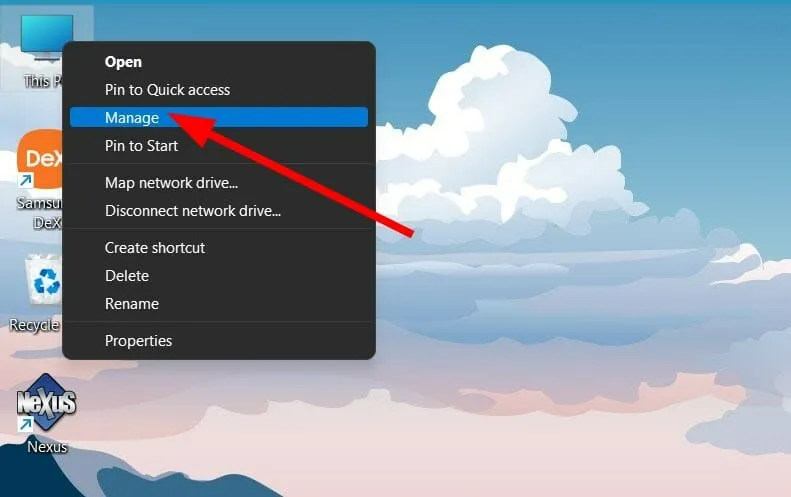
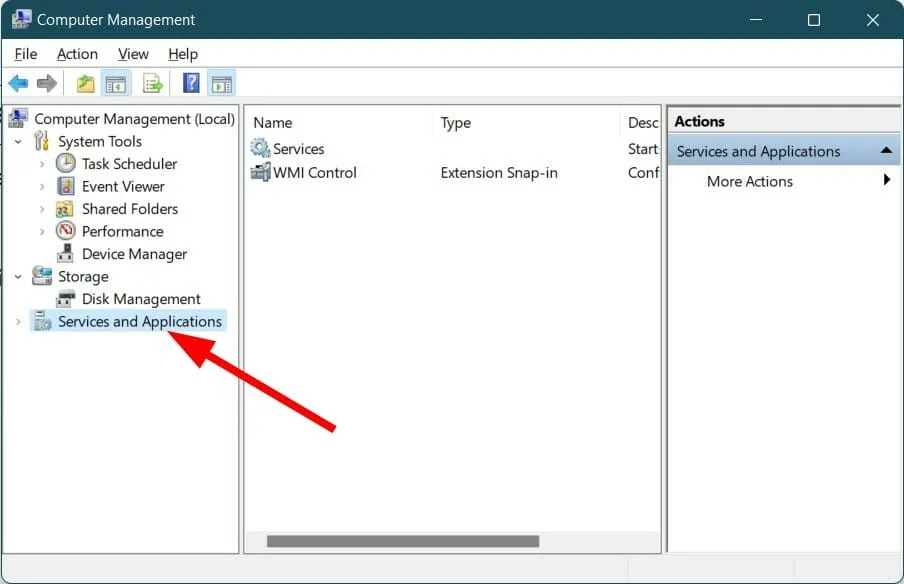
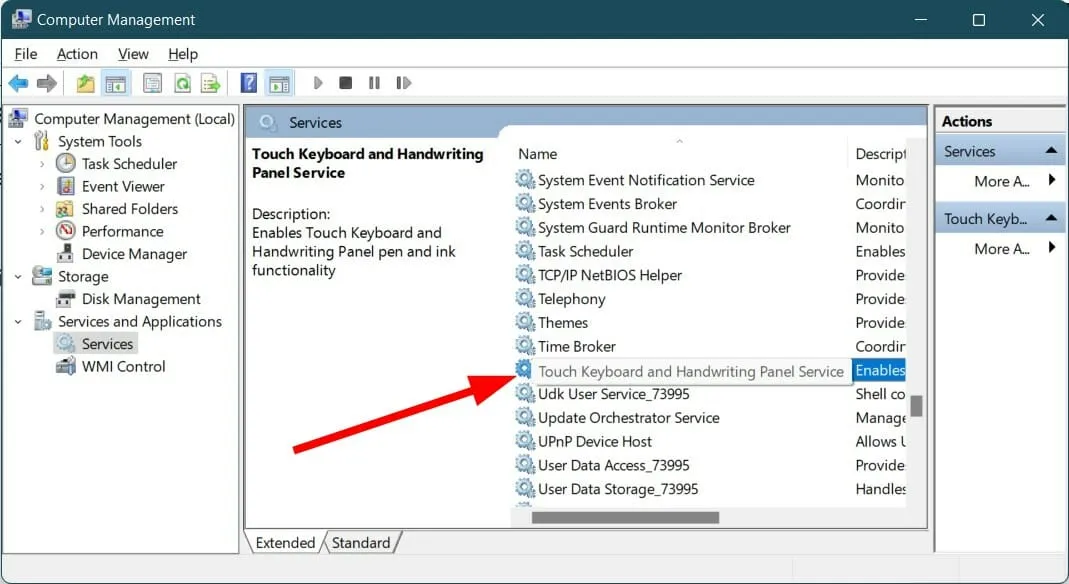
3. Re-enable the CTF Loader Service
- Right click on “This PC” and select “Management‘.
- select Services and Applications .
- Double-click Services .
- Find the touch keyboard and handwriting panel service .
- Right click on it and select ‘ Properties ‘.
- Select “Startup Type” as “Disabled”.
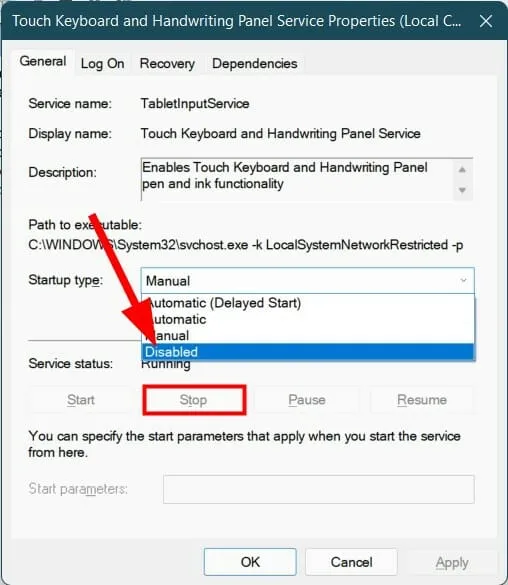
- select Stop .
- Click Apply and FIRE.
- Restart the computer.
- After your PC restarts, repeat the steps above but this time enable the service.
If none of the above solutions help you to fix the problem, as a last resort, you can choose to reset your Windows 11 PC.
But before you do that, you need to back up all your data because restarting your PC can erase all your data.
Let us know in the comments section below if this guide helped you fix the ctfmon.exe error on Windows 10 and 11.


