
How to fix Bad Pool Header Windows 10. Do you see windows 10 after updating the blue screen error bad pool header stop code 0x00000019? Due to this BSOD error, Windows 10 crashes and restarts frequently? But don’t worry here in this article we have different solutions to fix this problem. Done, before starting, understand the problem, What causes group headers to fail on Windows 10.
The most common reasons for this Windows 10 Blue Screen error are driver errors, drive-related problems, software conflicts, and hardware failures. Whatever the reason is here, we have different solutions applicable to fix the BAD POOL HEADER error in Windows 10, 8.1, and 7.
Bad pool header windows 10
Note: The solutions below are also applicable on Windows 8.1 and Windows 7.
Erase external device
If you notice this Blue Screen issue start right after installing Hard Ware device (eg new printer, Scanner etc) Then just Remove the device and check the error is resolved not yet? If so, check the device with another computer or contact the manufacturer. Also, remove all external devices (printers, scanners, additional graphics cards) and start windows normally to find out any external devices causing the problem.
Boot your system into Safe Mode
If this Blue Screen frequently occurs on startup and you can’t start windows normally to do the troubleshooting steps then we need to boot into safe mode. Where windows starts with minimal system resources so we can easily perform troubleshooting steps.
Note: If you often get blue screen error then boot into safe mode, Otherwise you can directly apply below solutions to fix bad pool header blue screen error .
Boot in Safe mode
On a Windows 7 computer, you can easily Boot into safe mode. Just restart your PC and press the f8 key before the Windows Logo appears. The next screen you are likely to see will be the Advance Boot option.
Now Use the arrow keys on your keyboard to highlight the Save mode option . Press Enter and log in to your user account.
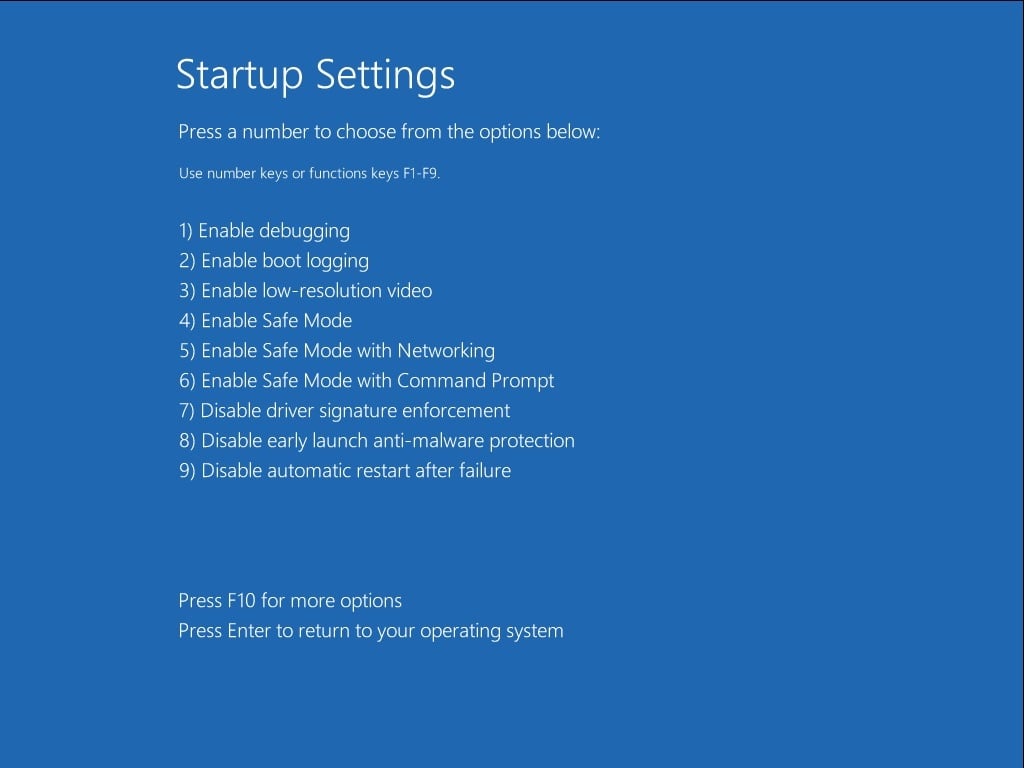
But with Windows 10 and 8.1, the Safe Mode Boot Process is changed, you need to boot from the installation media. Skip the first screen and click repair this computer, then navigate to Troubleshoot > Advance Options > Startup Settings. Now, Simply Enable Save Mode with network by pressing F5 key. You can check out different ways to boot into Save mode and how to enable F8 save mode on Windows 10.
Turn off Fast Startup
If you see this BSOD on after upgrading to Windows 10, the first thing you need to do is disable fast startup. With Windows 10, Microsoft Adds Fast Startup (Hybrid Shutdown) to Reduce Boot Time and Make Windows Start Faster. But some users report by disabling Fast startup feature they fix most of the blue screen / Startup errors
To disable fast startup:
- open power option from Control Panel
- Now on the left side Click on “ Choose what the power buttons do”
- Click Change Settings that are Currently Unavailable from the pop-up window.
- Now scroll down and uncheck Turn on Fast Startup under Shutdown Settings .
- Restart and see if you still get the Bad_Pool_Header Blue screen on your Windows 10.

Undo recent changes
As mentioned above, you may get the Bad_Pool_Header Error Screen due to recent changes on your PC. Uninstall any Recently Installed Software that you installed before getting this error. Most users report after installing a new game, pirated apps like crack, Activator they face various blue screen errors. We recommend uninstalling them from Control panel -> programs and features -> Select recently installed apps and uninstall them . Now restart windows and check BSOD Error is gone.
Check for virus/malware infection
Also, most of the cases ‘Virus/malware infection Cause various problems (system resource lockout, freezes, high resource usage, various BSOD errors, etc.) Windows computer. We strongly recommend download and Install the latest Antivirus / Anti-malware , Perform a full system scan. Also, install a third-party system optimizer like Ccleaner to clean up unnecessary junk files, caches, system errors, and repair corrupted registry errors. Then After restart windows and check No more BSOD errors on your Windows 10.
Make sure your system has the latest updates
Make sure your Windows system is packed with the latest service packs and other updates. Necessary patches and service packs are regularly released by Microsoft for their operating systems to fix bugs and other types of problems. These updates and patches are also useful for resolving BSOD issues. Windows 10 is set to install updates automatically when it connects to Microsoft servers. But you can also manually check for updates from Settings -> Update & Security -> Check for updates.
Therefore, make sure that your hardware’s drivers are up to date:
Sometimes outdated or corrupted system drivers can produce a Blue Screen of Death error. This error is directly hardware or driver related so updating the system driver can fix the cause of the STOP error.
Install the latest device drivers
To check if the error is caused by a faulty drive, run automatic driver update or manually update the driver to the latest version available. Install the latest drivers for any newly installed hardware devices. If no new hardware is installed, make sure you have the latest drivers for the devices below.
- Video card
- Adapters
- Any removable or external drive
To update the driver manually, follow these steps:
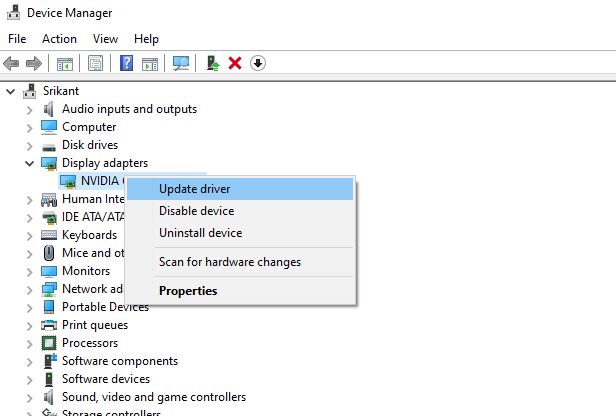
- Right-click on Windows 10’s Start menu and select Device Manager.
- This will display all the installed Device Drivers list.
- Find any driver with a yellow mark Right click on it, select Update Driver Software.
- Then follow the on-screen instructions to install the latest driver version.
If you find any driver with yellow chirping, just go to your device manufacturer’s website, download the latest available driver for the same driver. Now on device manager right click on that problematic driver click uninstall. Restart windows and install the latest driver you downloaded from the manufacturer’s website.
Turn off Microsoft’s indexing service
Also, some times the Indexing Service is down causing excessive use of System Resources causing various blue screen errors. We recommend temporarily disabling the Indexing service and testing this will help to fix the Invalid Group Head BSOD Error.
To disable the indexing service,
- Press Win + R then type services.msc and press enter key .
- Here on the Windows Services control panel , scroll down and find indexing service
- Double click on it, Change startup type to Disable or manual and select stop in service status .
- click Apply to make save changes, Close the service window and Restart your PC, check if the blue screen disappears or not.
Check for Corrupt System Files
As discussed Before Corrupt System Files Cause Most Problems on Windows PCs. We recommend you to check for corrupted/Missing system files using the available system file checker ( sfc utility ). Helps to scan and recover missing system files.
- To run System File Checker, open command prompt as administrator
- Type SFC / Scannow , Then press enter key to execute the command.
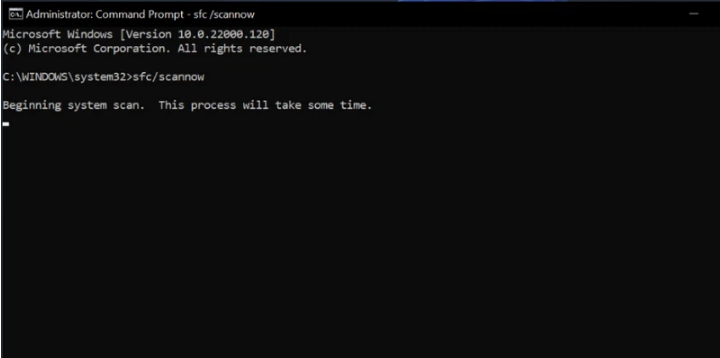
This will start scanning windows for corrupted/Missing system files. If any SFC utilities are found, they will be restored from a special cache directory located on %WinDir%System32 dllcache . You just have to wait until the scan is 100% complete then restart windows. Then after checking the BAD_POOL_HEADER blue screen error was resolved.
Check the drive for errors
It’s also possible that the bad pool header error could be related to bad hardware (e.g. bad memory or damaged hard drive). Before assuming that either of these is bad, we recommend that you run a hard drive and RAM diagnostic check to check if either is at fault.
- Open Command Prompt as Administrator.
- Then type chkdsk c: /f /r and press Enter.
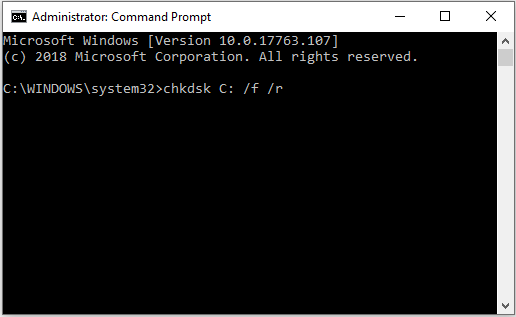
Command Explained: The command here chkdsk is to check for drive errors. /F Fix disk errors and /r Locate bad sectors and restore readable information.
You may be asked to restart your PC. Then press Y and press Enter . When the Pc restarts, this will scan your computer for Hard Disk Error and It will fix the problem automatically. Now on Next Start check there will be no more Blue Screen Error.
Run the memory diagnostic tool
If this problem started happening after a recent memory upgrade, we suggest you remove the new installed RAM and have it checked. Or If you haven’t added any, it means your old RAM is broken. You should run a diagnostic test on your computer’s available memory. This check will look for memory errors and interrupt errors, which can cause BSOD errors.
Run the memory diagnostic tool:
On the Start Menu, type “memory diagnostic”, and select the Windows Memory Diagnostic application.
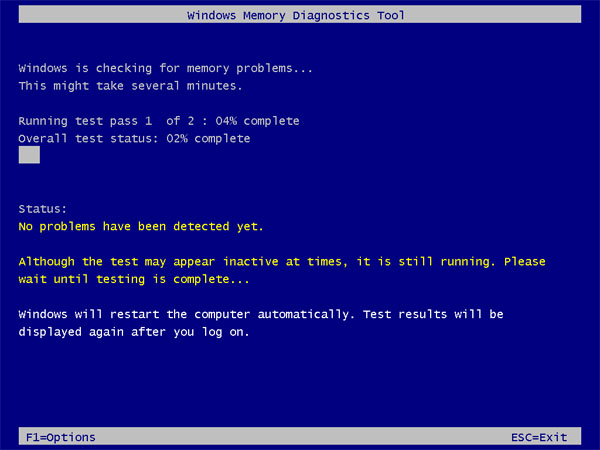
Now click Restart now and check for problems. Your PC will be restarted and your memory problems checked. It may take some time to complete the scan, wait until the process is 100% complete Then after windows will restart windows. You can check the memory diagnostic tool test results from here.
Perform a system restore
If all the above methods did not fix the Bad Pool Header Blue Screen Error for you. Then it’s time to use Windows system restore feature, This feature will revert your system to its previous working state. Check out how to perform System Restore on Windows 10, 8.1 and Windows 7.
Tips to avoid bad group titles
You may get this error again even if you fixed it once. but there are some Precautions and Steps you can take to avoid these mistakes again in the Future.
- Always avoid using cracked/no-code software.
- Keep your computer’s registry clean and organized with Optimization Tools.
- Install the best latest Antivirus/Antimalware and Avoid more than one Anti-Virus/Anti-Malware if not needed.
- Always keep your device drivers up to date.
These are some of the best solutions to fix bad pool headers permanently. Ngolongtech hopes After applying these solutions your problem of Invalid BSOD Error pool headers will be fixed. However, have any questions, suggestions please comment below. Don’t forget, click Like and Share if you find this content useful.


