
How to disable Superfetch Windows 11. Superfetch is designed to improve performance and reduce application load time but can do the opposite by slowing down Windows. This usually happens on PCs with lower-spec settings and hard drives. In this article, we will introduce you to Superfetch and how to disable Superfetch in Windows 11.

Table of Contents
What is Superfetch?
Superfetch is also known as SysMain. The official description of Superfetch is that it is designed to maintain and improve system performance over time.
This feature saves time by preloading applications into memory based on the mode in which you open them. That is, Superfetch will automatically load a specific program that you open at a specific time every day. Usually it will only take up unused portion of memory.
However, some users experience poor PC performance when Superfetch is enabled, in this case users want to disable Superfetch in Windows 11.
How to disable Superfetch Windows 11
1. Use the service application
The first is the easiest way to disable Superfetch in Windows 11.
- Press Windows + S to launch the search menu, search and open services.
- Find and right-click the SysMain entry, select Properties.
- Click the Startup Type drop-down menu and select Disabled from the list of options.
- Next, if it’s running, click the Stop button under Service Status, then OK at the bottom.
Restart your computer for the changes to take effect.
2. Turn off Superfetch with Command Prompt
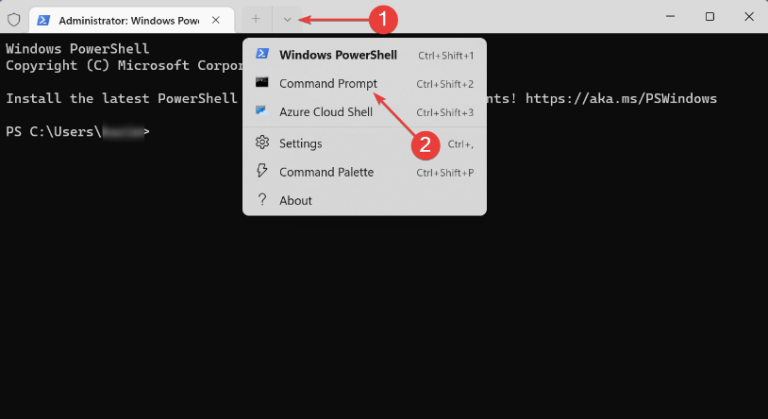
Press Windows + S to launch the search menu, search for Terminal, right-click the relevant search result and select Run as administrator.
Click Yes on the UAC window.
Click the down arrow at the top and select Command Prompt.
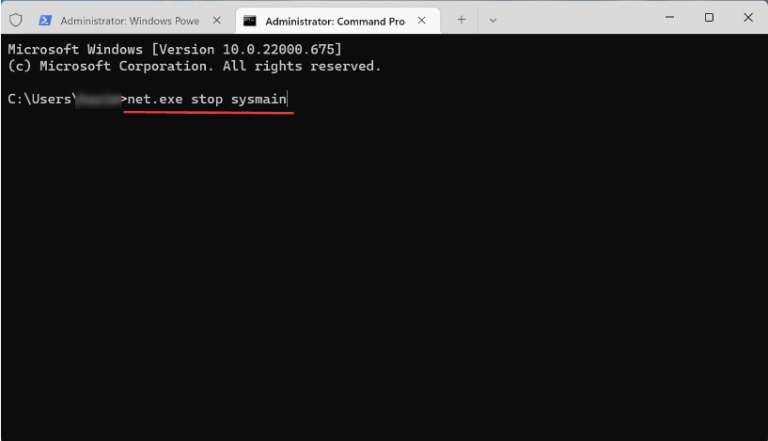
Execute the following command to stop the service:
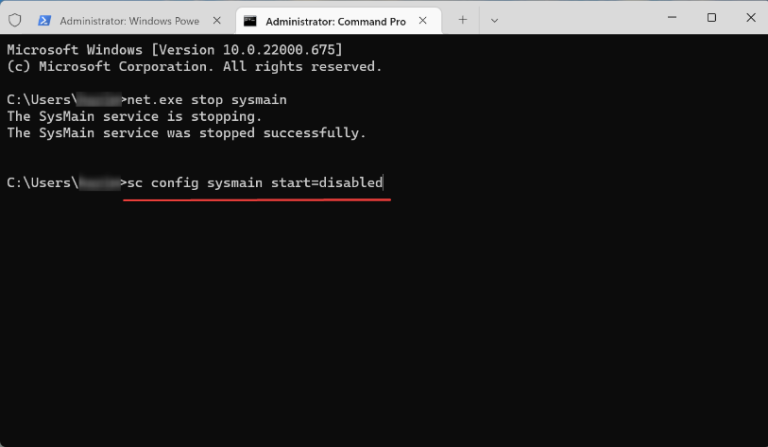
net.exe stop sysmain
Execute the following command to disable Superfetch loading at startup:
sc config sysmain start = disable
3. Use Registry Editor
Press Windows + R to start the run command, type regedit and click OK.
Click the Yes button on the UAC window.
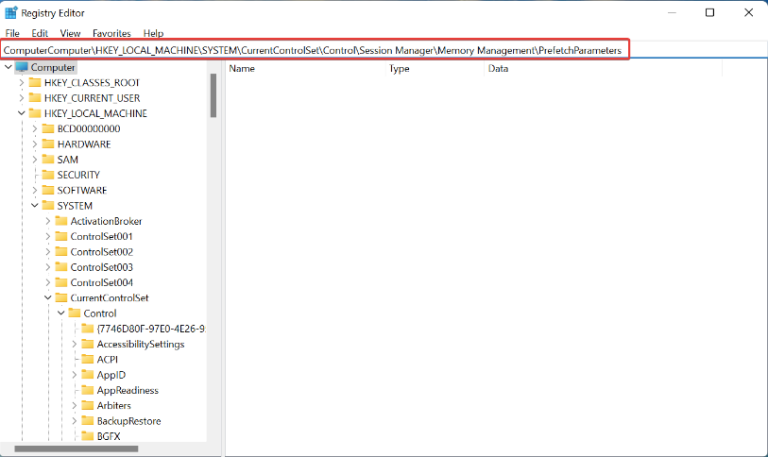
Type the path in the address bar and press Enter
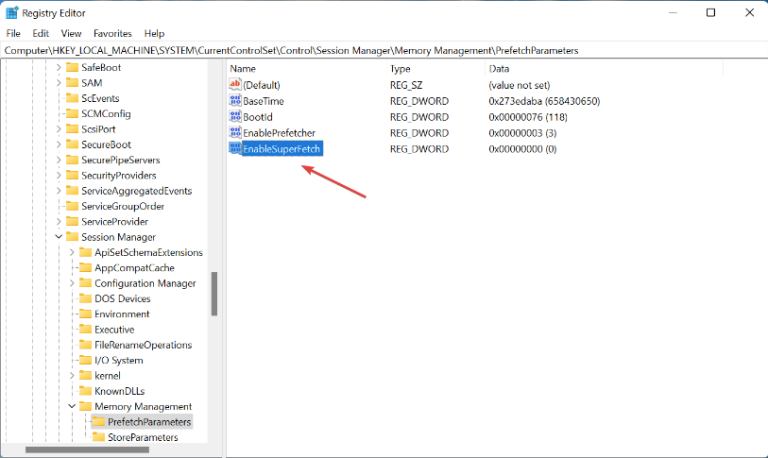
Computer\HKEY_LOCAL_MACHINE\SYSTEM\CurrentControlSet\Control\Session Manager\Memory Management\PrefetchParameters
Right-click an empty space, hover over New, and select DWORD (32-bit) Value.

Name the entry EnableSuperfetch and double-click it to modify the properties.
Enter 0 in the text field below Value data and click.
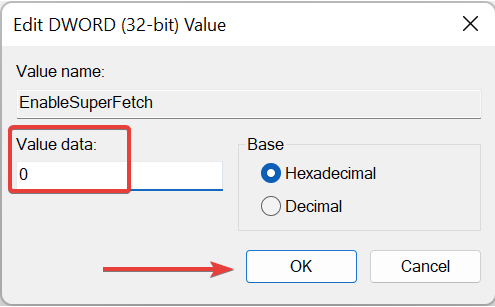
Restart your computer.
Should Superfetch be disabled in Windows 11?
Disabling Superfetch can often improve the performance of Windows 11. However, this is not recommended in some cases. For example, if you’re hosting Windows 11 on an SSD, Superfetch won’t do much here because the load times themselves are too short.
However, if RAM is always running full or disk usage is high, disabling Superfetch may improve.
Overall, if your PC is running slow, you can try disabling Superfetch in Windows 11 as described in the article to improve performance.
Hopefully, Ngolongtech has helped you with the problem you are facing. If you find the article useful, please like and share to support us. If you have any questions or comments, let us know in the comments section below.


