
How to delete windows.old in windows 11. In this article, Ngolongtech will guide you through all the different ways to delete the Windows.old folder on Windows 11 when needed. This is a folder that is automatically created after users upgrade to another version of Windows.
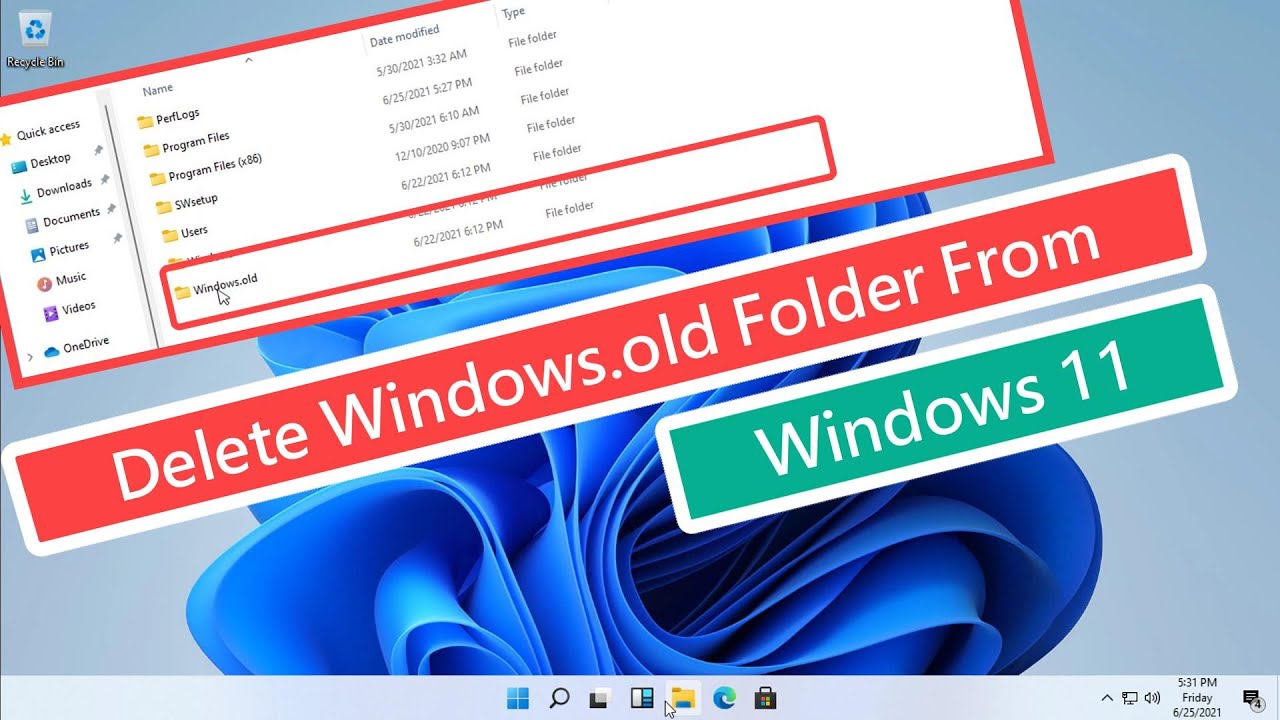
Table of Contents
How to delete windows.old in windows 11
Manually delete the Windows.old folder
Windows will automatically create the Windows.old folder after users successfully upgrade to another version, and this folder often takes up a lot of hard drive space, causing waste. If you have upgraded to Windows 11, you can use the steps below to delete that folder manually.
Step 1. First, open File Explorer and browse to the Windows.old folder.
Step 2. In the File Explorer window that appears, browse to the Local Disk (C:) drive in the left pane.
Step 3. Observe the right pane, you will see the Windows.old folder along with the standard Windows 11 folders.
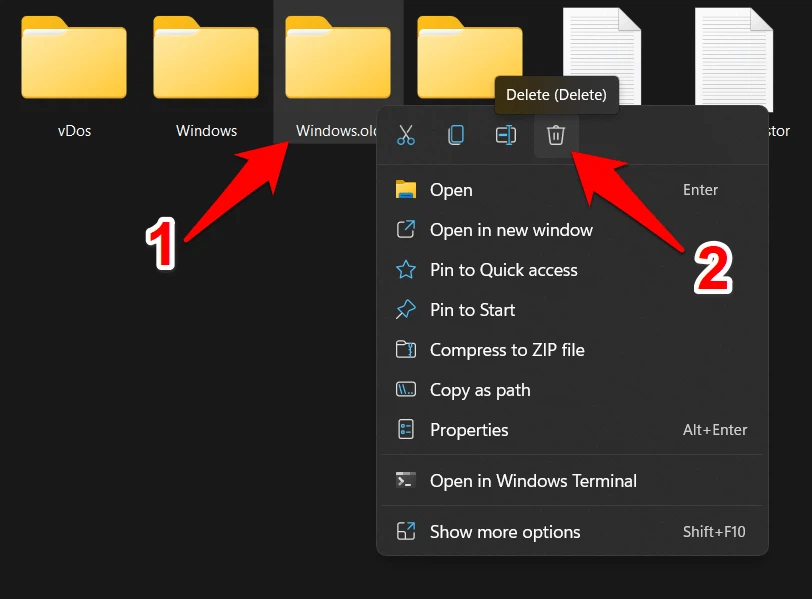
Step 4. Right-click the Windows.old folder in File Explorer and select Delete.
Step 5. Windows will display a warning dialog box that you will need administrator privileges to delete this folder. If you are already logged in as an administrator or a member of the admin group, simply click the Continue button to continue.
Step 6. The Windows.old folder will be deleted from your computer.
Using Disk Cleanup
You can also immediately delete the Windows.old folder using the Disk Cleanup tool in Windows 11.
Step 1. First, access the Start menu, then enter Disk Cleanup in the search box and click on the Disk Cleanup result under the Best match item as shown below.
Step 2. In the Disk Cleanup window that appears, click the Clean up system files button at the bottom. The Disk Cleanup tool can take a few minutes to scan your computer for unused files depending on the speed and capacity of your hard drive.
Step 3. When the disk scan is complete, Disk Cleanup will show items you can safely delete from the drive to free up space.
In the list, you will see a very large Previous Windows installation(s) option, this is the content of the Windows.old folder.
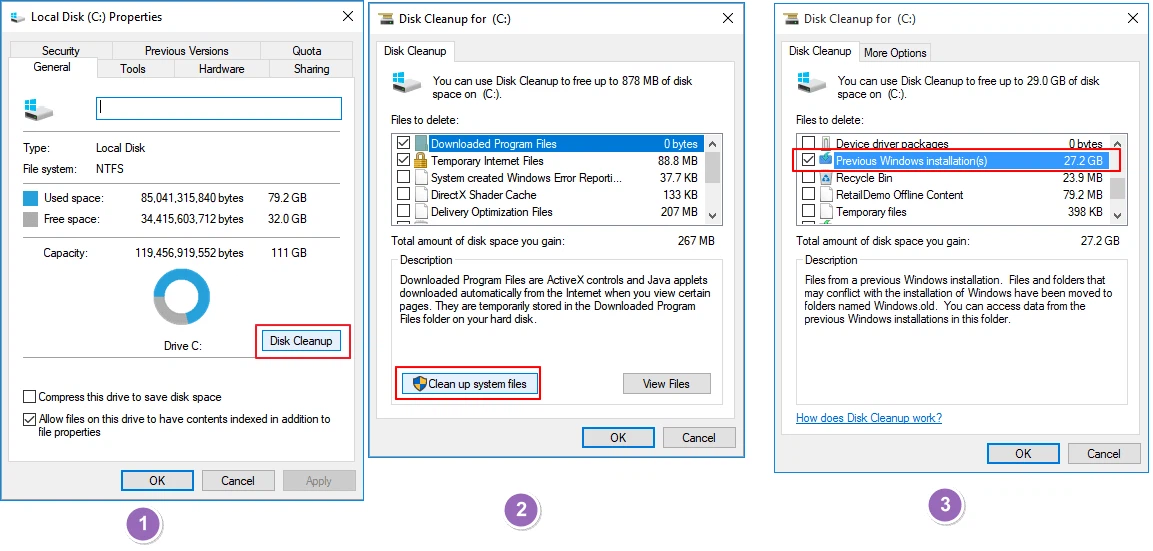
You can select all the items you want to remove from the system under Files to delete. Then click the OK button, in the confirmation dialog to delete the files, click the Delete Files button.
Step 5. Another dialog box displays to confirm that you want to delete the Windows installation file or the temporary installation file. Click the Yes button and Windows 11 will do the rest.
Using Windows Storage Cleaner
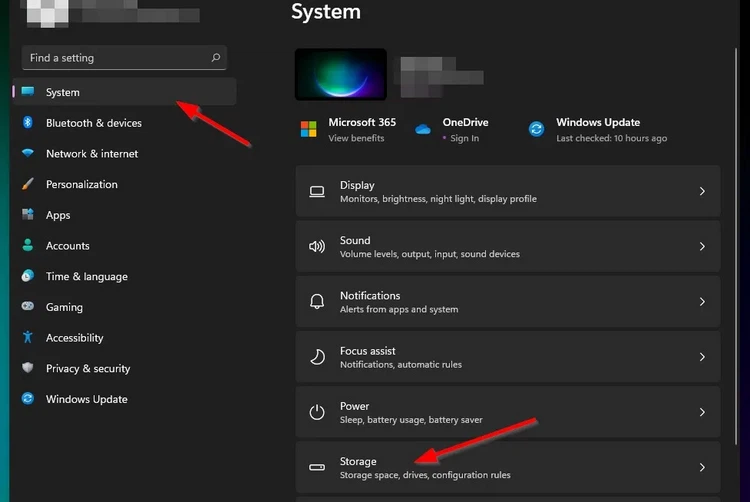
Step 1. Access the Start menu > Settings.
Step 2. Select the option Syste m in the left pane, then select the Storage item in the right pane.
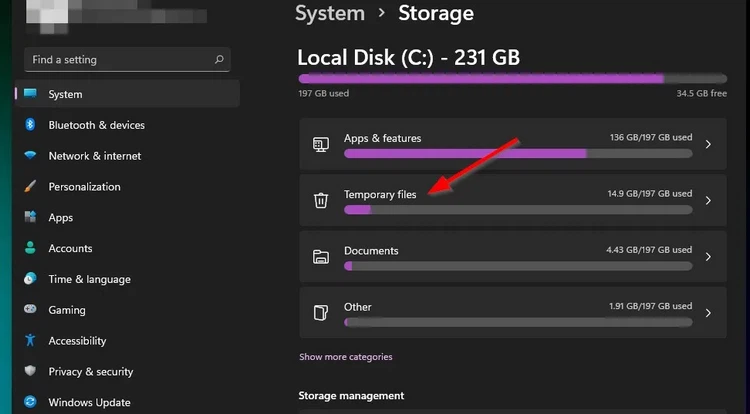
Step 3. Next select the option Temporary Files.
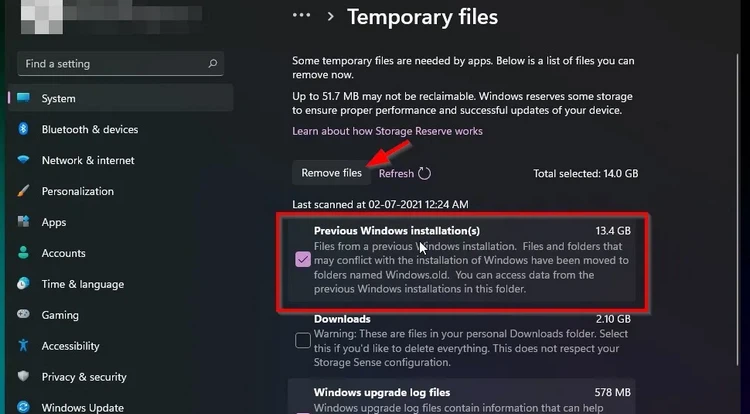
Step 4. Click the Previous Windows Installation option and click the Remove Files button.
Now you just have to wait for the process to complete. When the process is complete, the Windows.old folder will be deleted from the system.
Using Storage Sense
Windows 11 is similar to Windows 10 that comes with a built-in tool called Storage Sense. When this tool is enabled, Windows will automatically perform the above steps for you by freeing up space, deleting unnecessary files, emptying the recycle bin, and more based on how often you have chosen to run. Storage sense.
To set up Storage Sense on Windows 11, follow these steps:
Step 1. Access the Start menu > Settings.
Step 2. Select the System option in the left pane, then select the Storage item in the right pane.
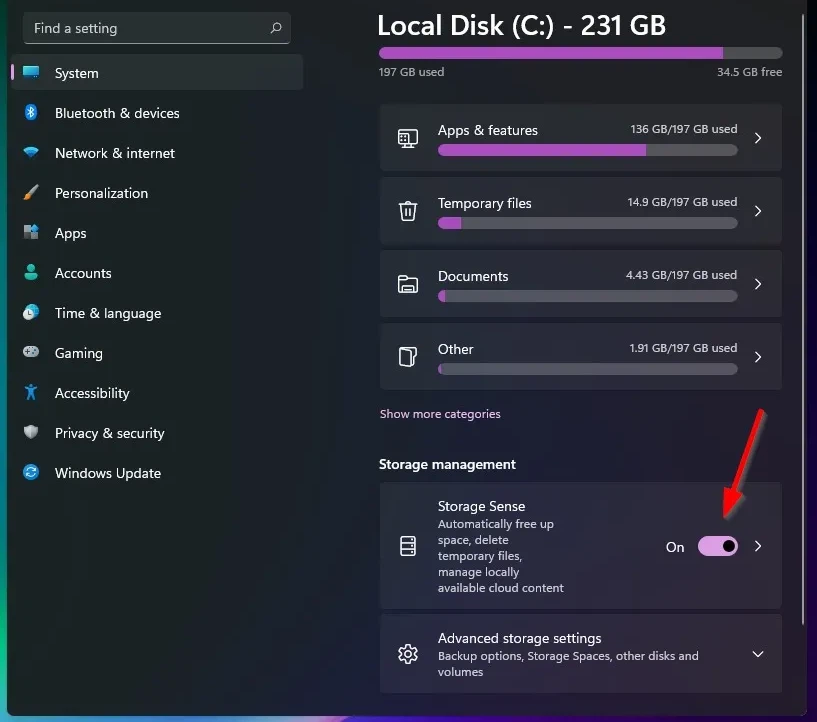
Next, turn on the Storage sense feature under Storage management . Then select the Automatic user Content Cleanup option.
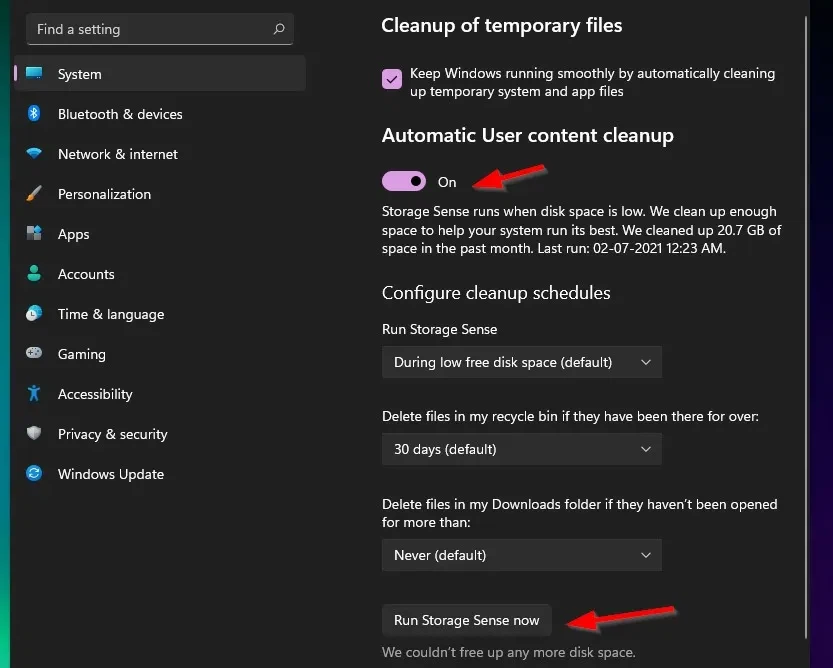
Step 3. Finally click the Run Storage Sense Now button.
In case you want to access more detailed settings, click the arrow to the right of Storage sense to select. Windows will automatically clean up temporary files based on your configuration.
Using Command Prompt
Step 1. First, press the Windows key and enter cmd in the Search box.
Step 2. Then, right-click on the displayed Command Prompt result and select the Run as administrator option in the displayed menu to activate the command window with administrative rights.
Step 3. In the displayed command line window, enter the command below and press Enter to run the command.
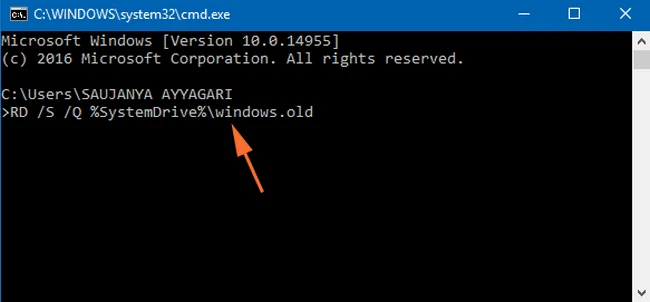
Or also in the command line window, enter the corresponding commands below in turn, press Enter at the end of each command to execute.
cacls C:\Windows.old\*.* /T /grant administrators:F
rmdir /S /QC:\Windows.old\
After finishing the above commands, wait for the system process to completely delete the Windows.old folder, then close the command window to complete.
Use the free utility TakeOwnershipPro
If you do not want to use the complicated lengthy steps above to delete the Windows.old folder from the system. Then just use the free utility TakeOwnershipPro, which allows you to delete this folder with just two mouse clicks.
Step 1. Download and install the free software TakeOwnershipPro for computers running Windows 10/11.
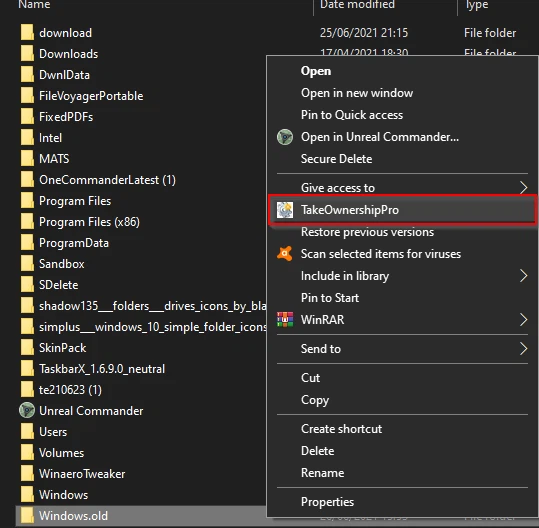
Step 2. After the installation is complete, the utility will integrate the right-click menu. Now you just need to browse to the location where the Windows.old folder is located and then right-click on this folder and select TakeOwnershipPro from the drop-down menu.
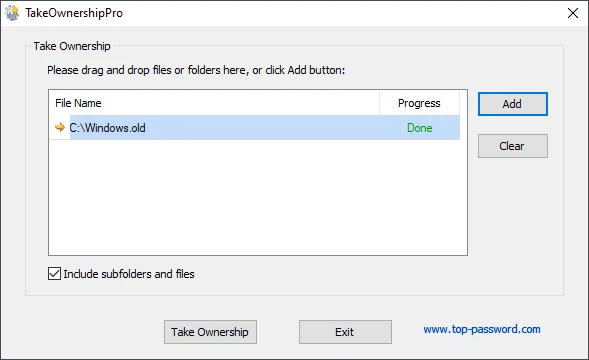
Step 3. In the TakeOwnershipPro application window that opens, you will see that the Windows.old folder has been added to the list.
Step 4. Click the Take Ownership button at the bottom and the software will begin to have access to and control over all files and subfolders in the Windows.old folder. Depending on the number of files/folders and computer speed, the software may take from one to several minutes to delete this folder.
When doing the above steps, ownership is granted to your current user account and then you can delete the Windows.old folder without any problem.


