How to create a VPN on Windows 10. Nowadays, creating a virtual private VPN network on computers is no longer complicated when you do not need to use software like Hotspot Shield anymore. We can set up a VPN right on the computer with a very simple way.
The easiest way to start and run your favorite virtual private network on Windows 10 is to download the VPN app from the Windows Store and install it, just like you did on the previous version of Windows. Using a VPN app is also the best way to take advantage of the features that VPN offers – from ad blocking to automatically selecting the fastest connections. For tech savvy people, another option is to try Windows 10’s built-in VPN client.
On Windows 10, VPN settings will need to be done from the Control Panel or from the Settings interface. By creating a VPN on Windows 10, we can access blocked sites without the need for fake IP software with other VPN services. The following article will guide you how to set up a VPN on Windows 10.
Table of Contents
Things to have

The service you choose will determine which provider will run the servers you are about to connect to
VPN service: Although you are using Windows 10 to manage your connection to the VPN, you still need to choose which VPN service to connect. The service you choose will determine which provider will run the servers you are about to connect to.
Protocol selection : During setup, you will be asked to select a protocol from the list. In the simplest terms, the protocol you choose will determine the strength of encryption.
There are several types of protocols used by VPNs, and whichever VPN you choose will use one of those protocols. The 4 most popular protocols are: PPTP, L2TP / IPSec, SSTP and OpenVPN. During setup, you will tell Windows what type of protocol your VPN uses by selecting it from the list and the VPN provider will tell you which protocol to use.
How to set up VPN on Windows 10
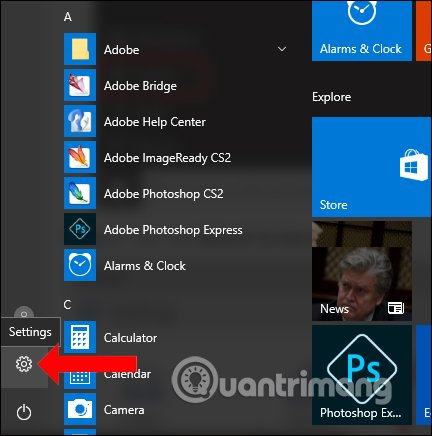
Step 1:
Click the Start button on the interface and then select Settings .
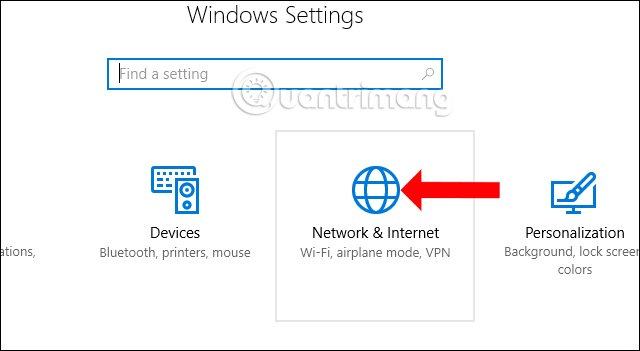
Step 2:
In Windows Setting interface, click on Network & Internet .
Step 3:
Switch to the new interface. At the left list, click VPN item .

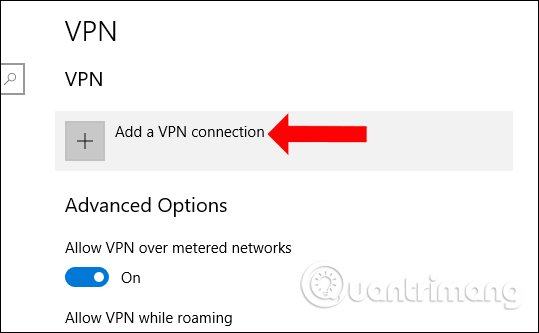
Then look to the right content to see some settings to create a VPN, select Add a VPN connection .
Step 4:
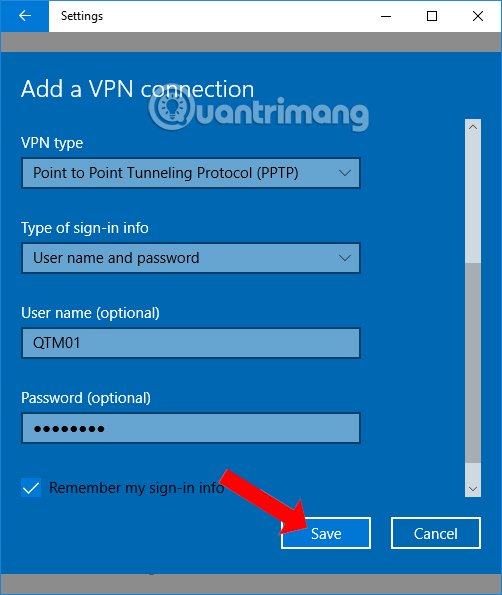
Add a VPN connection interface appears. Here we will need to fill in some information including:
VPN provider: click on Windows (built-in).
Connection name: choose the connection name you want.
Server name or address: enter the server name or IP address of that server.
VPN Type: choose Point to Point Tunneling Protocol (PPTP) or L2TP / IPsec with pre-shared key.
Type of sign-in info: choose Username and password.
User name: username
Password: password.
Finally click Save to save. In the case of using a personal computer, to remember the login ID and password each time you connect, select the Remember my sign in information. If the public computer is in the office, uncheck the box to ensure privacy.
Step 5:
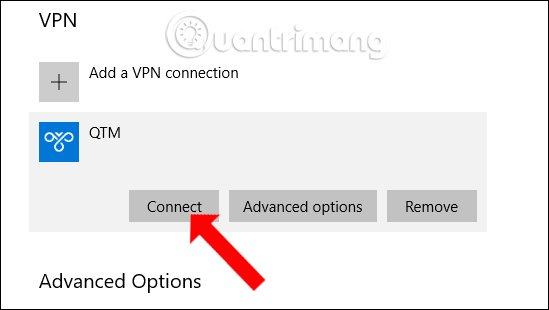
Return to the VPN interface on Setting and you’ll see the newly created VPN network. To connect to this network just click and then click Connect .
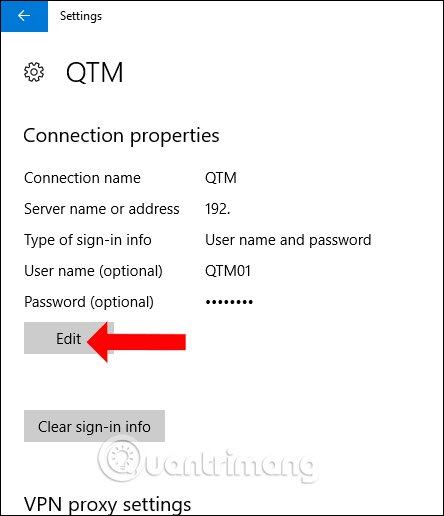
In case you want to change the information of this VPN network, click Advanced options , then click the Edit button to edit.
So you can create a virtual private VPN network right on Windows 10 by editing some settings on Settings. However, the use of this VPN should not be done too much, as it may be related to security issues.