How to change audio Output in Premiere Pro Windows. If you are having trouble with sound while working on Premiere, read the article below. Let’s find out the best solutions for audio editing in Adobe Premiere with Ngolongtech.
Table of Contents
How to change audio Output in Premiere Pro Windows
Sound is one of the important elements of a movie or any video. If the images and footage are “weighed and measured” but the sound quality is poor and inappropriate, the film will not be able to have a good impression in the hearts of viewers. To adjust the sound in Adobe Premiere, the software has been installed with an adjustment tool called Essential Sound Panel – to help video editors mix audio or add various effects.
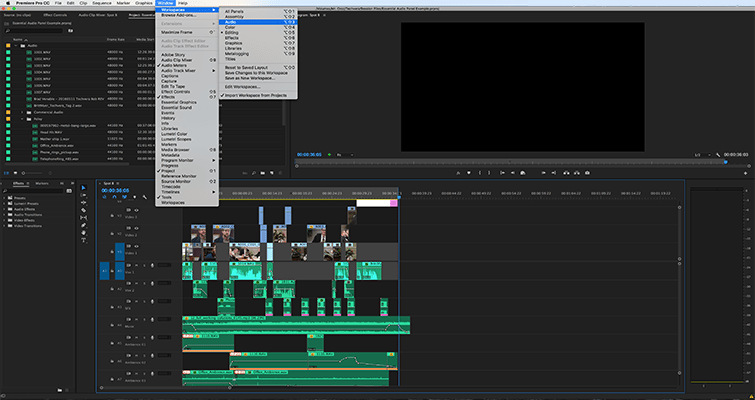
In the Essential Sound Panel control, there are four types of sounds:
- Dialogue (voice, commentary, dialogue, …)
- Sound effects (sound effects)
- Music
- Ambience (overall ambient music space)
Note: In each genre, many different music tracks can be used.
Here are the most detailed ways to adjust the sound in Adobe Premiere:
1. Dialog
To adjust the sound in Adobe Premiere , first go to the Essential Sound Panel in Window and select the audio type as Dialogue. Now you can edit the preset, loudness, control, repair, clarity, creativity and volume.
- Preset: when you select a preset, you will see the parameters from the Essential Sound Panel are automatically adjusted, for the audio track to be perfect, you need to adjust the parameters on this panel according to the sound you want. would like. When you do this, the box next to it will turn into a “custom” button and you can save it as you wish.
- Loudness: This tab is under Preset. When auto-match is selected, the audio parameter will be set to -23 LUFS. In case you don’t want to change specific parameters, simply select the aimo-match mode and you will have broadcast standard volume levels.
- Clarity: is a mode that improves audio clarity with the same Dynamics, EQ and Speech Enhancement.
- Dynamics: allows users to compress or expand the dynamic range of conversation records. You can move the slider to make the dialogue more natural.
- EQ: allows you to increase or decrease specific frequencies from the list of EQ presets.
- Enhance Speech: The Essential Sound panel directly applies a “vocal enhancer” effect to the audio track to enhance male (85 – 180 hz) and female (165 – 255 hz) vocal frequencies.
- Creative: creates an atmosphere for dialogue that makes it feel like the scene is happening in a particular environment. After checking the box next to Reverb, the Studio Reverb effect will be added. Then there will be a list of Reverb presets for you to choose from such as thicken voice or auditorium.
- Volume: adjust the volume up or down with the slider at the bottom. Hard Limiter is an effect that increases or decreases the volume of an entire audio clip without distortion.
*LUFS: stands for volume units versus full scale, standard for TV sound levels, etc.
2. Music
Music has very few adjustment parameters compared to Dialogue. The most important mode is Loudness – making sure your sound doesn’t overwhelm the dialogue in the audio. When auto-match is selected under Loudness, the music will be set to the standard level of -25 LUFS
3. Sound Effects
Sound Effects helps you improve and change sound effects such as keystrokes, bells, etc. Place a Sound FX clip in the Premiere timeline, select the audio clip then select the SFX body type in the Essential Sound panel. and adjust according to the following parameters:
- Loudness: select auto-match – sound level will be -21 LUFS
- Creative: allows users to add levels of reverb to create a video atmosphere
- Pan: change audio listening position in stereo field
4. Ambience
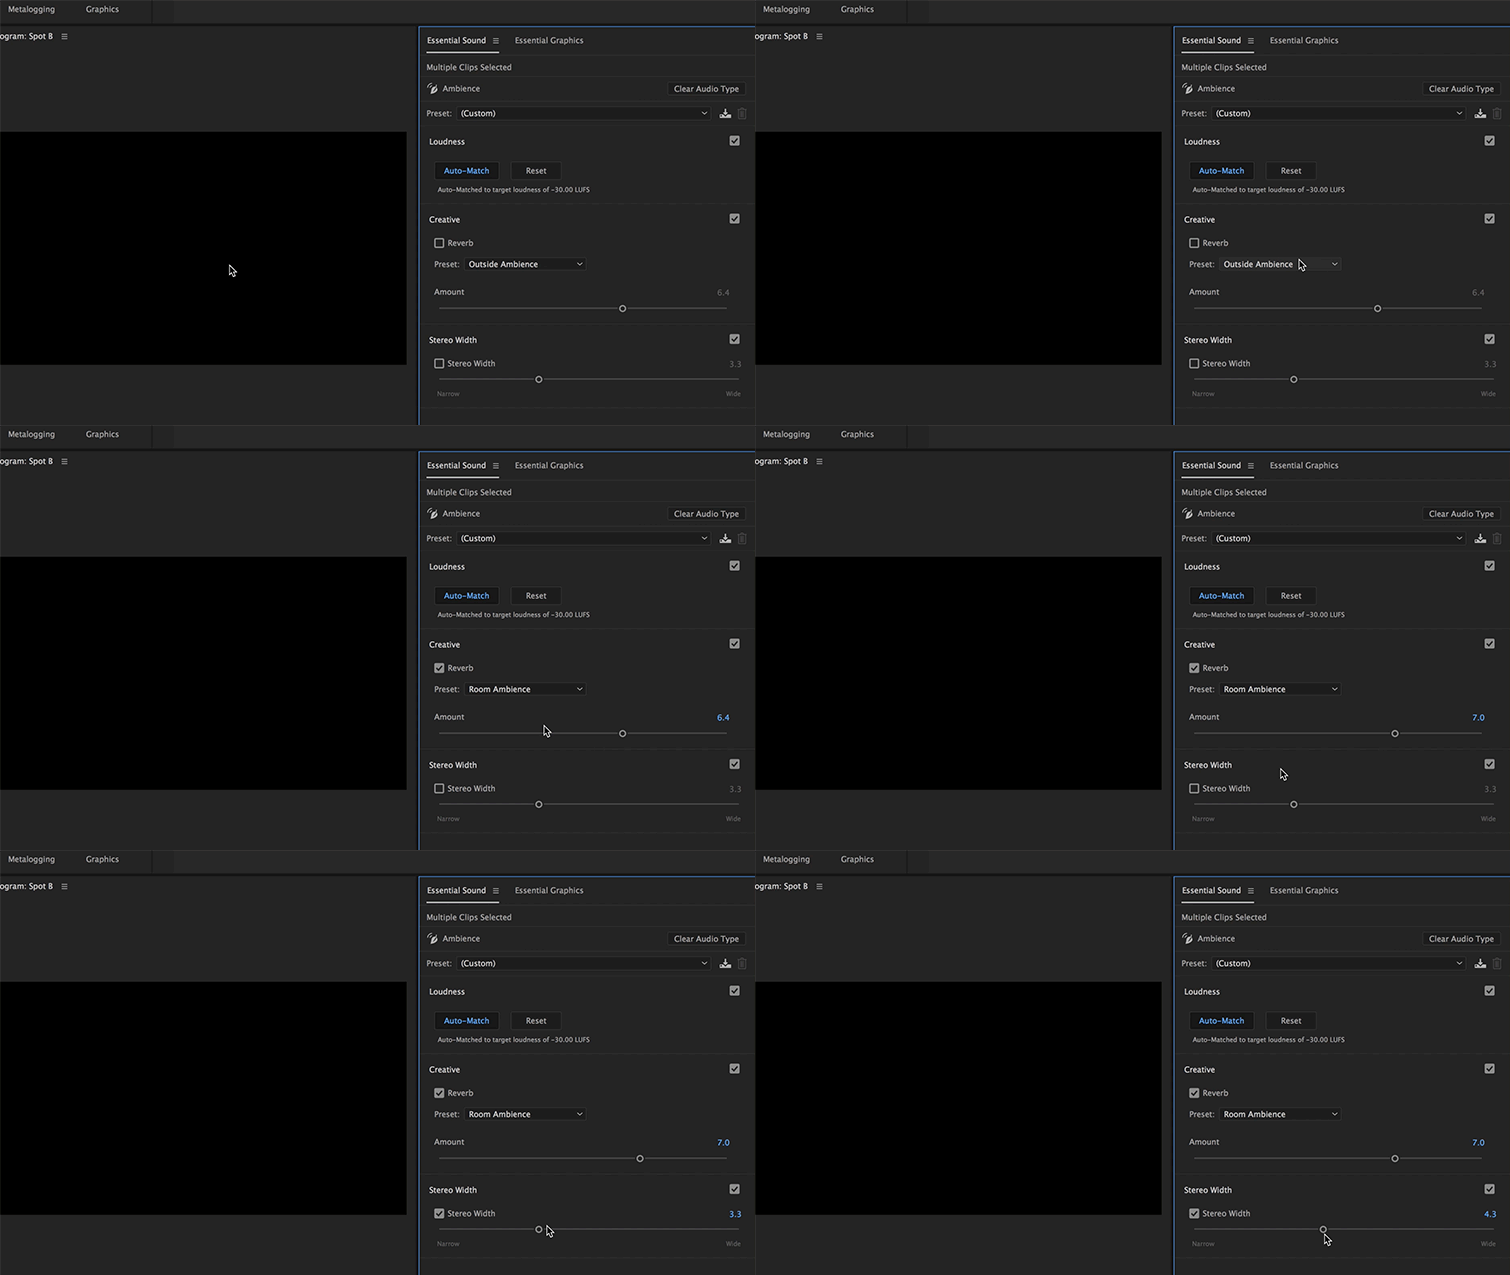
Is a sound that reflects the atmosphere of a space and is more subtle. Similar to the above sounds, you also choose auto-match so that the system automatically adjusts to the standard number. However in Ambience there is a Stereo Width effect to create a more prominent sound effect perception.
Stereo Width: you can increase or decrease the presence of background noise. For example, if you want to make a sound with a lot of people around, you can adjust the slider towards Width.
Configure audio inputs and outputs
When you configure inputs and outputs for recording and playback, Adobe Premiere Pro can use these kinds of sound card drivers:
In Windows, ASIO drivers support professional cards and MME drivers typically support standard cards.
In Mac OS, CoreAudio drivers support both professional and standard cards.
ASIO and CoreAudio drivers are preferable because they provide better performance and lower latency. You can also monitor audio as you record it and instantly hear volume, pan, and effects changes during playback.
- Choose Edit > Preferences > Audio Hardware (Windows) or Preferences > Audio Hardware (Mac OS).
- From the Device Class menu, choose the driver for the sound card you want to use.
- Choose a Default Input and Output from the card. See Assign audio inputs and outputs to tracks in Adobe Audition Help.
- (MME and CoreAudio) For Master Clock, choose the input or output to which you want other digital audio hardware to synchronize (ensuring accurate alignment of samples).
- For I/O Buffer Size (ASIO and CoreAudio) or Latency (MME), specify the lowest setting possible without audio dropouts. The ideal setting depends on the speed of your system, so some experimentation is necessary.
- Choose a Sample Rate for the audio hardware. (For common rates for different output mediums, see Understanding sample rate in Adobe Audition Help.)
- (Optional) To optimize the performance of ASIO and CoreAudio cards, click Settings. For more information, consult the documentation for the sound card.
- Under Output Mapping, you can specify the target speaker in your computer sound system for each supported audio channel.
The above article are detailed instructions for adjusting audio in Adobe Premiere to help you learn without difficulty in the process of creating movies and videos.


