9 ways for Windows 11 taskbar customization. One of the very interesting new features of Windows 11 is that users can change the Windows 11 Taskbar to their liking and usage needs. Customizing the Taskbar will make the process of using your computer every day much more convenient. If you are bored with the normal interface of Windows 11, let’s take a look at 9 ways to customize your Windows 11 taskbar!
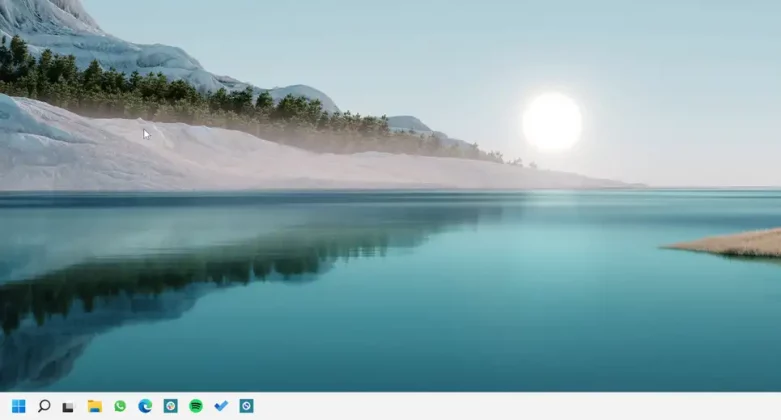
Table of Contents
9 ways for Windows 11 taskbar customization
1. Remove unnecessary features from Taskbar windows 11
The Windows 11 taskbar comes preloaded with buttons and extra features that you will sometimes never need.
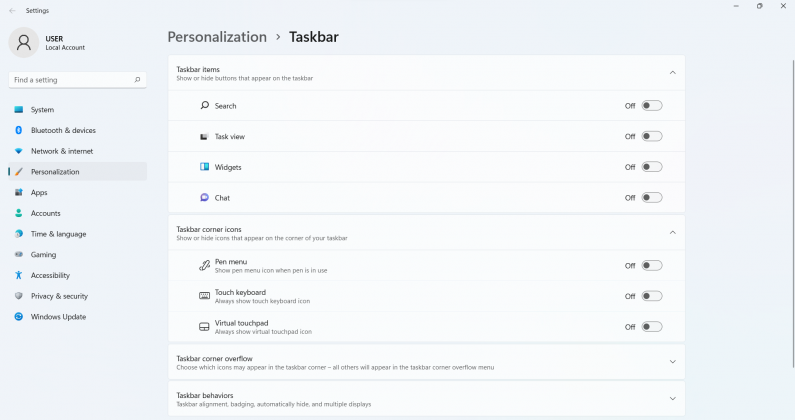
To remove anything you don’t want from the taskbar, right-click on an empty part of the taskbar and select Taskbar settings => Go to Taskbar Items.
The “Search,” “Task view,” “Widgets,” and “Chat” features will be enabled by default. Uncheck the ones you don’t need to remove them from the taskbar.
2. Pin any app to taskbar
Windows 11 does not yet support the taskbar drag and drop feature like Windows 10.
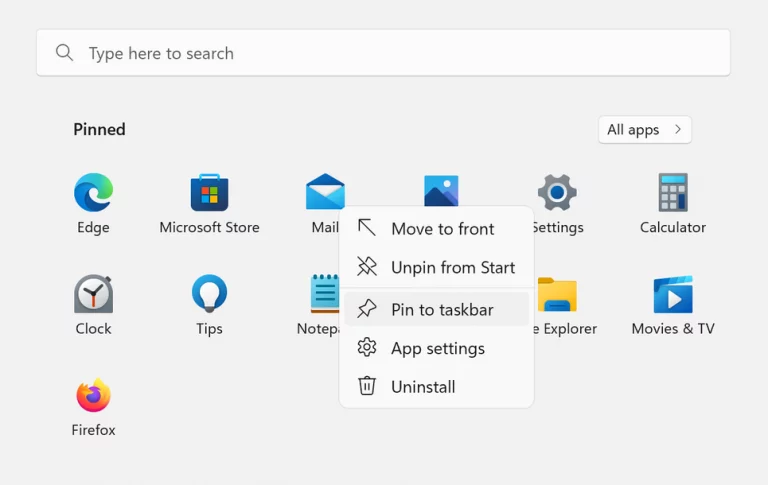
To get around this, go to the Start menu, right-click the app of your choice, and click the “Pin to taskbar” button. You can also pin any currently open app by right-clicking on the app icon and selecting the “Pin to taskbar” option.
3. Align the icons on the Taskbar to the left
If you don’t like the default Windows 11 taskbar layout in the middle, Microsoft allows you to change the alignment of icons by right-clicking on the taskbar.
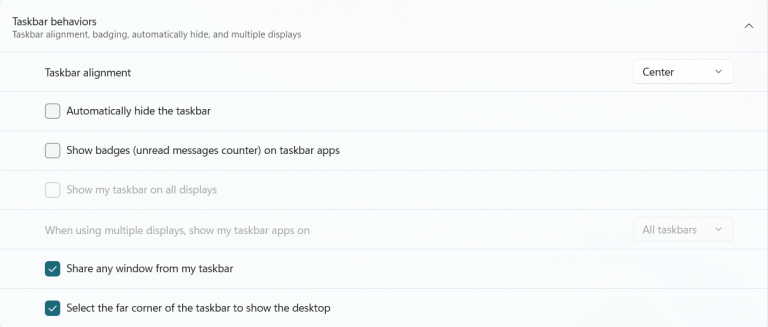
Go to Taskbar Settings and from Taskbar Behaviors, select Left option under Taskbar alignment feature.

4. Auto Hide Taskbar
Windows 11 allows you to customize the taskbar to fit your screen.
For example, if you use a laptop with a small screen, you will want to save space and we can solve it by hiding the taskbar by:
Right click on the Taskbar => go to Taskbar Settings => go to Taskbar Behaviors => select Automatically hide the taskbar. Taskbar will only appear when you hover or drag up with the touch screen.
Similarly, you can turn off taskbar app notifications by using the “Show badges on taskbar apps” feature. If you don’t like when the icons are blinking on the taskbar, disable the “Show flashing on taskbar apps” feature.
If you use multiple monitors, select the “Show my taskbar on all displays” feature to enable or disable the taskbar on all your monitors.
5. Change color in taskbar
You can change the color of the taskbar with the following:
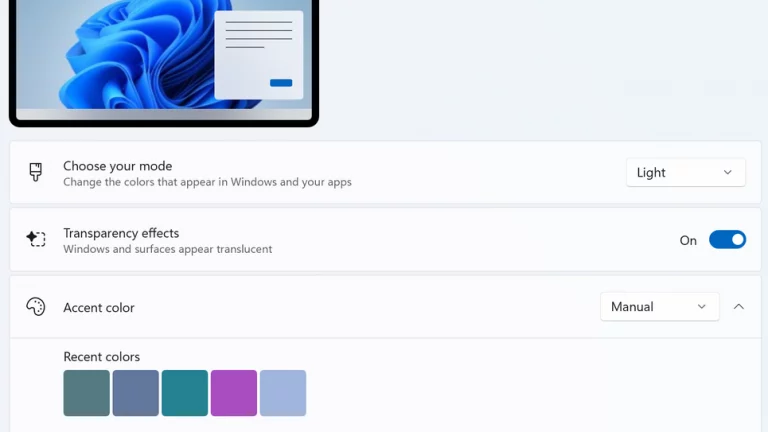
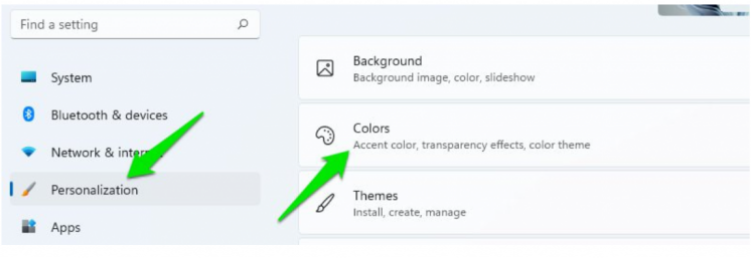
Go to Settings => Personalization => Colors and choose a favorite color. Then, scroll down and enable the “Show accent color on Start and taskbar” feature.
6. Make the Taskbar transparent
You can also make the taskbar change its color according to the background and make it look transparent. You have to do it from the Windows 11 installation, here’s how:
Right click on the taskbar and select settings
Here select Personalization in the left panel and then click Colors.
Now enable Transparency option and it will make the taskbar transparent.

7. Place the taskbar at the top of the screen
To do this is more difficult than putting the Taskbar to the left because Microsoft does not directly have this mode. Instead, you can do the following:
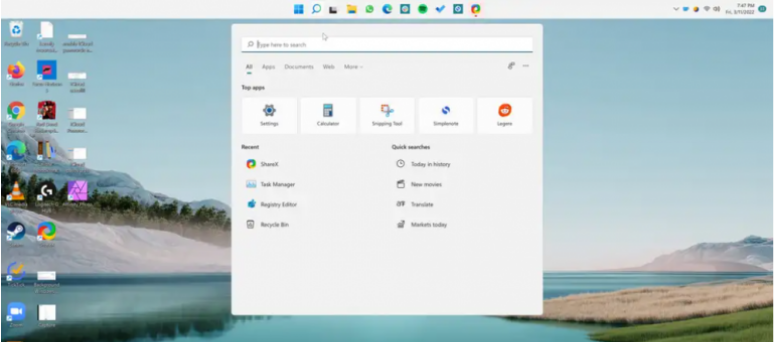
- Open Start => go to Registry Editor and enter the following line in the top bar:
HKEY_CURRENT_USERSoftwareMicrosoftWindowsCurrentVersionExplorerStuckRects3 - In the StuckRects3 folder , double-click the Settings file . This will open the “ Edit Binary Value ” window, you will see a table filled with values.

- Go to the second row and find the fifth value from the left. By default it is 03 .
- Place the cursor to the right (end) of this value, press Backspace once and change the value to 01 .
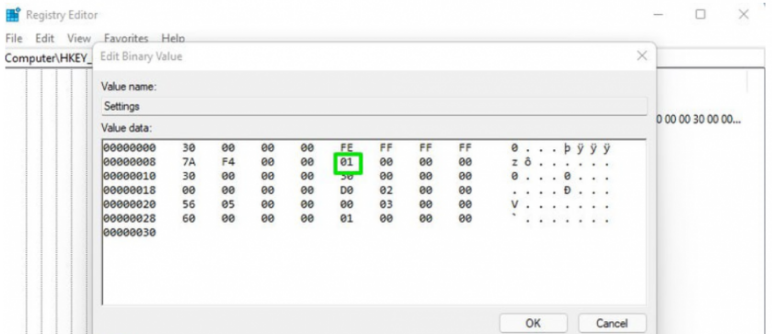
- Click the OK button and exit the Registry Editor application.
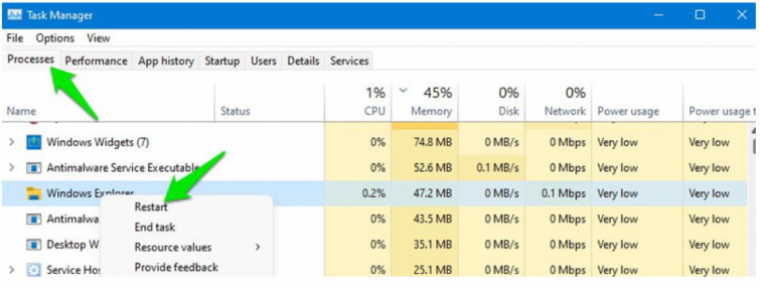
You need to restart Windows Explorer to see the changes. Just press Ctrl + Shift + Esc to open taskbar manager and here right click on Windows Explorer process and select Restart . If you want, you can also restart your PC and the changes will take effect.
8. Make the taskbar smaller or larger
To change the Windows 11 Taskbar in terms of size, there is no direct way, but we need to “take a detour as follows:
- Go to Start => Registry Editor and enter the following line:
HKEY_CURRENT_USERSoftwareMicrosoftWindowsCurrentVersionExplorerAdvanced - Right click in the empty space and select New => DWORD (32-bit) Value . A new entry will be added at the end of the Advanced folder .
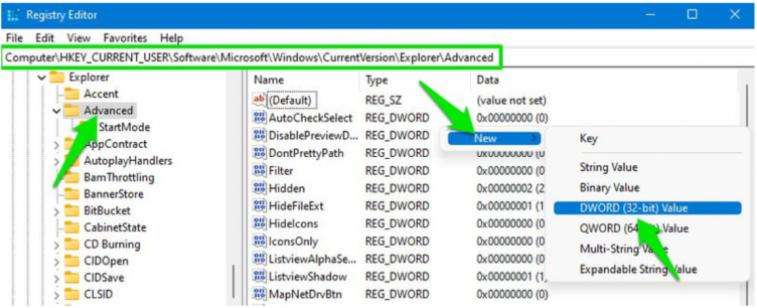
- Rename it to TaskbarSi.
- Then double click on the TaskbarSi file .
- In the Value Data field , enter 0 if you want the taskbar to be smaller and 2 if you want the taskbar to be larger ( 1 is the default option).
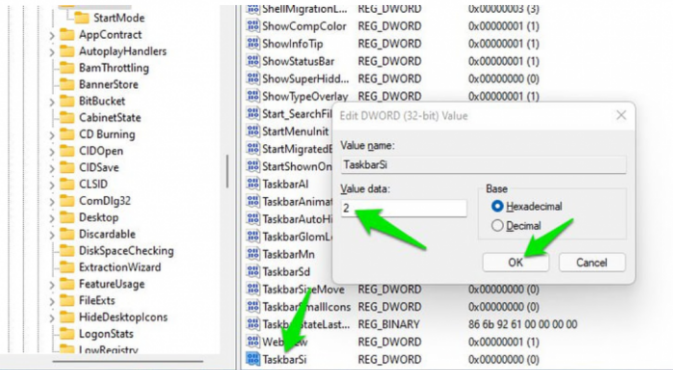
- Click the OK button then reboot the machine for the changes to take effect.
9. Round the Taskbar
The taskbar on Windows 11 is still an angular style. If you prefer something softer, like on a Mac, try tweaking it. To do so, we need to find a 3rd party app, specifically the most popular at the moment is RoundedTB.
RoundedTB allows you to easily add custom rounded corners and borders to your taskbar. Here’s how:
Open RoundedTB, right-click the application icon in the system tray> select Open RTB. In the window that opens, enter a size value for:
- Taskbar size at Margin.
- Roundness of taskbar corners at Corner Radius.
- Then, click Apply to apply.
- With Margin, try entering 2 (reduce 2 mm from the top and bottom edges) and Corner Radius enter 6 according to the developer’s words to see the best effect.
10. Use 3rd party applications to change the Windows 11 Taskbar
There are still many more ways for you to customize your Taskbar, even if Microsoft doesn’t have direct tweaks yet. There are already a few 3rd party apps like TaskbarXI that can turn your Windows 11 taskbar into a toolbar or make it completely transparent.
The tips to change the Windows 11 Taskbar above are easy to follow and does not take much time. Ngolongtech hopes you find this article useful! Wishing you success!

