
Windows cannot find C:Program FilesWindowsApps. Recently, some PC users when they try to open or launch any application, including Office, Adobe, applications, on their Windows 10 installation, they get the error Windows cannot find C: Program Files error message. If you encounter this issue, then this post is intended to help you. In this post, Ngolongtech will share you with the possible causes, as well as provide appropriate solutions that you can try to resolve the issue.
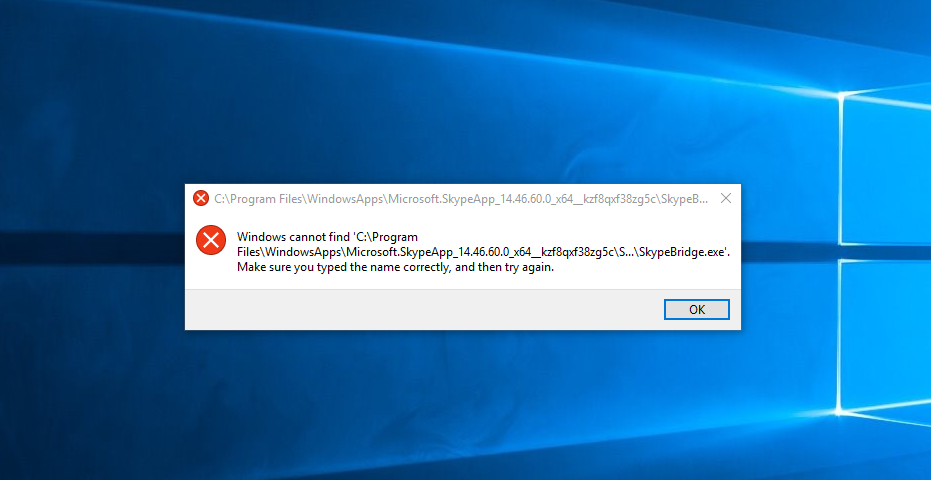
Table of Contents
What causes the error?
This Windows cannot find the program files error happens because the debugger or incorrect filter was created for these programs in the Registry Image File Execution Options. The IFEO registry key allows developers to attach a debugger to a specific program when it is launched.
It can also be used to launch another program when you execute one.
Fix: Windows cannot find C:Program FilesWindowsApps
If you encounter this problem, you can try our suggested solutions below to resolve the issue.
- Manually update/reinstall Avast products (if available)
- Remove the image file debugger executable option registry value
- Remove the IFEO filter in the registry
See the description of the procedure involved in each of the solutions listed.
1] Update/reinstall Avast product manually (if applicable)
If you don’t want to wait for automatic updates, you can manually download the installation package and reinstall the Avast/AVG product to get the latest version available including the fixes.
If this solution doesn’t apply to you, because you don’t have Avast installed on your system but you face Windows can’t find program files , then you can try the following suggestions:
2]Delete the debug image file execution option registry value
To remove the IFEO debugger, do the following:
Since this is a registry operation, it is recommended that you back up the registry or create a system restore point in case the procedure goes wrong. Once you have taken the necessary precautions, you can proceed as follows:
- press the Windows key + R to call the Run dialog box.
- In the Run dialog box, type regedit and press Enter to open the Registry Editor.
- Navigate or go to the below path registry key:
HKEY_LOCAL_MACHINESOFTWAREMicrosoftWindows NTCurrentVersionImage File Execution Options
- Now, on the left pane, scroll through the list of executables under the IFEO key until you find the app or program that won’t open.
- Next, click on the application executable item.
- On the right pane, right-click any import debugger and select Remove . You can do the same steps for any other apps that won’t launch.
- Restart your computer.
The problem will be solved now. If not, try the next solution.
3]Delete the IFEO filter in the registry
To remove an IFEO filter that may have been installed by AVAST or another program, perform the following steps:
- Open Registry Editor.
- Navigate or go to the registry key path below:
HKEY_LOCAL_MACHINESOFTWAREMicrosoftWindows NTCurrentVersionImage File Execution Options
- Now, on the left pane, scroll through the list of executables under the IFEO key until you find the app or program that won’t open.
- Next, click on the application executable item.
- On the right pane, right-click any Imported UseFilter and select Delete . You can do the same steps for any other apps that won’t launch.
- Restart your computer.
How to assign folder permissions “C:\Program Files\WindowsApps”?
By default, the folder “C:\Program Files\WindowsApps\” is hidden, so the first step you will have to enable is to see hidden folders and files. To do this thing:
1. Right-click the Start button and select Control Panel.
2. On the Control Panel window, set the View by item to Small icons.
3. Open the File Explorer Options window (on Windows 7 and 8 is Folder Options).
4. On the File Explorer Options window, at the View tab, tick Show hidden files, folders and drives and then click OK .
Before performing the steps to change the permissions to allow access to the default WindowsApps folder, you will first have to back up the permissions to allow access to the default folder to avoid bad situations.
To backup folder permissions “C:\Program Files\WindowsApps\”:
1. Right-click the Start button , then select Command Prompt (Admin).
2. On the Control Panel window, type the following command and press Enter:
icacls “%ProgramFiles%\WindowsApps” /save WindowsApps.acl
The above command will save all permissions of the folder ” C:\ProgramsFiles\WindowsApps ” and the file named “WindowsApps.acl” will be stored in the folder C:\Windows\System32\ .
Note:
If an error occurs after changing the folder permission, you can restore the original permission by entering the following command into the Command Prompt window:
icacls “%ProgramFiles%” /restore WindowsApps.acl
In the instructions below, the network administrator will guide you how to assign Read Only permission and how to assign Full Access permission to the WindowsApps folder.
Part 1: Assign Read Only permission on the WindowsApps folder
1. Open Windows Explorer, then double click to open the “C:\Program Files” folder .
2. Next, double-click the WindowsApps folder and then click Continue.
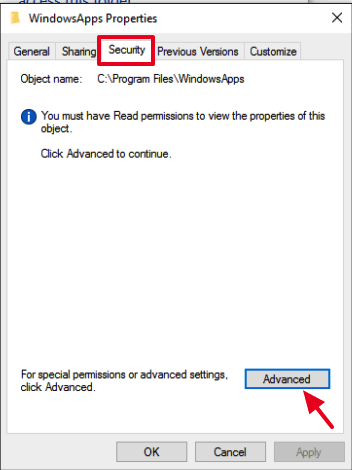
3. On the next window, click the link security tab.
4. Select the Security tab, then click Advanced.
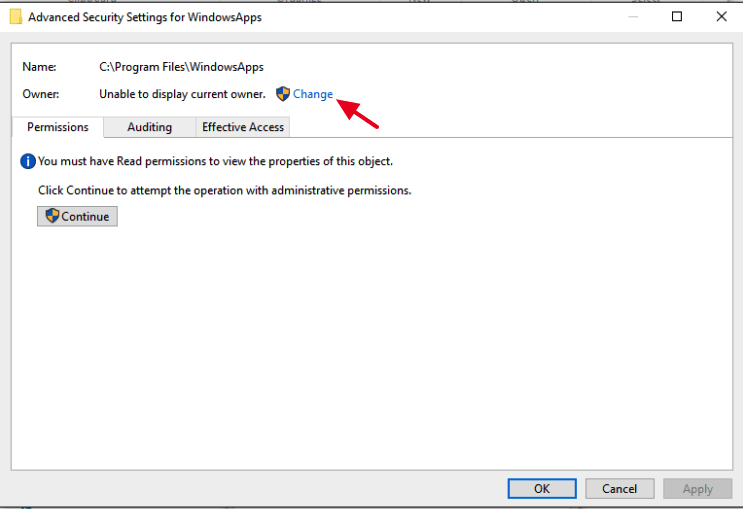
5. In the Owner section, click the Change link.
6. Add your user account (username) (such as Admin) or Microsoft account (such as yourusername@hotmail.com) into the Enter the object name to select box and then click OK.
7. Click OK => OK to exit the Security settings window.
8. From now on you can access the WindowsApps folder, next time you click Continue when prompted.
Part 2: Assign Full Access permissions to the folder C:\Program Files\WindowsApps
1. Right-click the Start button => Command Prompt (Admin).
2. On the Command Prompt window enter the command below and then press Enter:
takeown /F “%ProgramFiles%\WindowsApps”
Note:
The above command will assign ownership of the “C:\ProgramFiles\WindowsApps” folder to the current logged on user account.
3. Next enter the command below:
icacls “%ProgramFiles%\WindowsApps” /grant “%username%”:F
Note:
The above command will assign Full Control permissions to the “C:\ProgramFiles\WindowsApps” folder for the current logged on user account.
4. Finally, assign WindowsApps folder ownership, back to the TrustedInstaller account using the command:
icacls “%ProgramFiles%\WindowsApps” /setowner “NT Service\TrustedInstaller”
5. From now on you can have full access to the WindowsApps folder.
Above are some suggestions for solutions to fix Windows cannot find C:Program FilesWindowsApps. Hope this will be useful information you can refer to in the process of using. Thanks for reading!
Visit Macwintips.com to update the most practical and useful tips for Mac and Windows!
Good luck!


