
Remove the System Requirements Not Met reminder in Windows 11. How to delete the System Requirements Not Met message on Windows 11 is the question that many people are most interested in today, a watermark appearing in the bottom right corner annoys you? Please follow this article to remove the System Requirements Not Met message on Windows 11. Recently, Microsoft has added a warning feature for Windows 11 users, specifically if your system does not meet the minimum configuration requirements or does not support TPM 2.0, the System Requirements Not Met message will appear. A user prompt appears.

Table of Contents
What Are System Requirements Not Met Windows 11?
– New notice from Microsoft on Windows 11 version 22000 and above
– Notice that the machine is not configured to install Windows 11 or does not support TPM 2.0
– Appears in the lower right corner of the screen when the machine does not meet the system requirements
How To Remove System Requirements Not Met Message On Windows 11
If you see System Requirements Not Met messages on your Windows 11 computer, you can remove them by modifying the DWORD value in Registry Editor. Follow these steps to remove System Requirements Not Met on Windows 11.
Step 1: Press the Win + R key combination to open the Run dialog box .
Step 2: Type regedit and click OK to open Registry Editor .
Step 3: In Registry Editor , navigate to the link below or copy paste it in the Registry Editor address bar to get there faster.
- HKEY_CURRENT_USER\Control Panel\UnsupportedHardwareNotificationCache
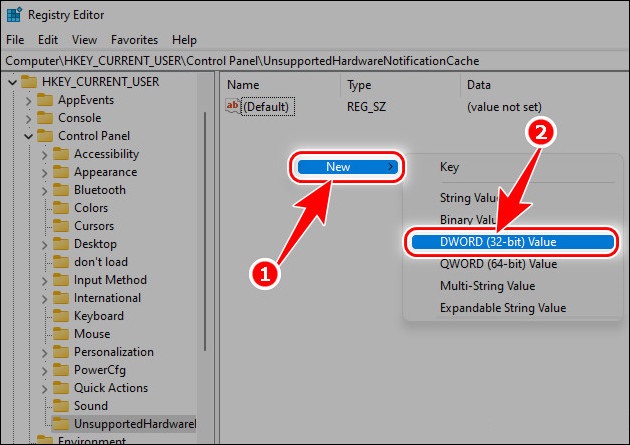
– In case if you do not have the UnsupportedHardwareNotificationCache folder , you need to create a new one by right -clicking on the Control Panel (HKEY_CURRENT_USER\Control Panel) => select New => Key and name it UnsupportedHardwareNotificationCache.

+ In the UnsupportedHardwareNotificationCache folder, right-click on the right space, select DWORD (32-bit) and name it SV2.
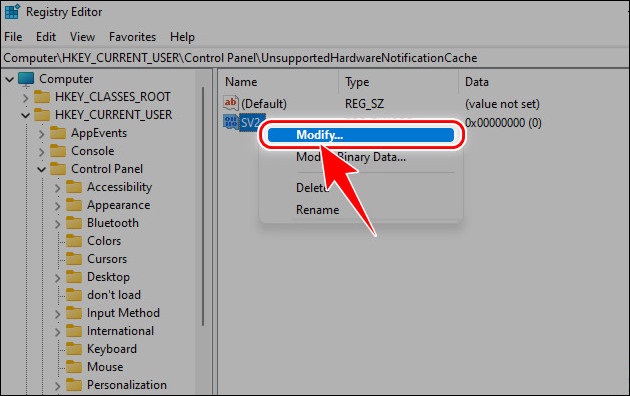
Step 4: Next, right -click on SV2 and select Modify.
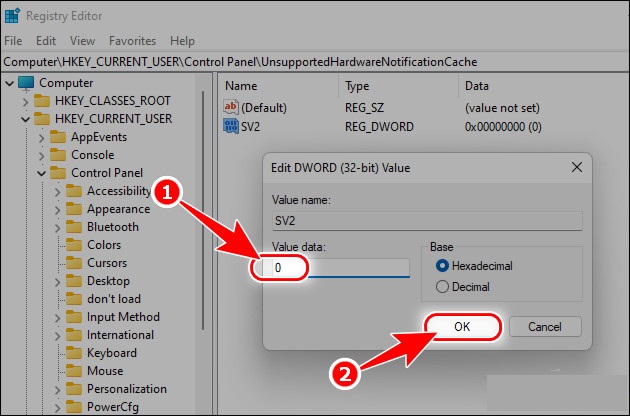
Step 5: Set Value data value to 0, click OK and close the whole program. Then restart the computer, the System Requirements Not Met message on Windows 11 will no longer appear.
Removing the System Requirements Not Met message on Windows 11 is only a temporary method, when If you update the operating system to the new version, they will appear again. So you need to repeat the above steps to remove System Requirements Not Met from Windows 11.


