Remove background Photoshop 2022: 2 simple methods. If you have been and are looking to learn about design, you cannot ignore this software. Photoshop cs6 offers you useful features. Help you design and edit photos become more professional. However, learning how to use photoshop has never been easy. Today Ngolongtech will help you learn how to remove the background using photoshop. This article is really suitable for those who are just starting to use Photoshop.
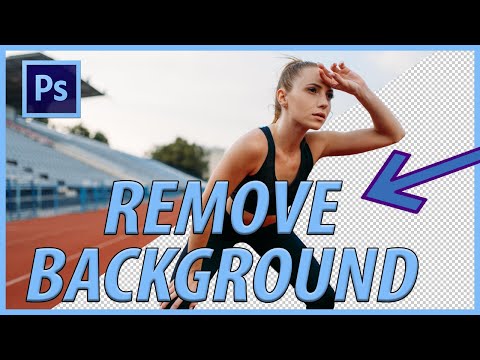
Table of Contents
What is a background in Photoshop?
Remove background Photoshop 2022: 2 simple methods
I. Lasso tool
1. Quick Guide
- At the main screen, select Open to add an image > Select the image you want to separate the background from > Click Open > Select the area you want to split
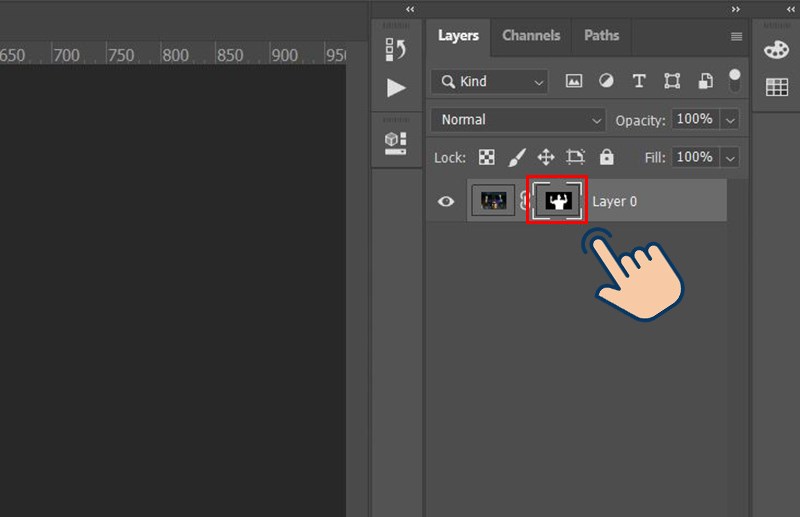
- Select Add a mask below the Layers panel > Double click on the mask image on the Layers panel
- A new tool panel appears, customize the Radius parameter on the slider > This tool to remove redundant details on the image
- Adjust other parameters with the slider > Click Ok below to save the option again > Go to File and select Save to save the image to your device.
2. Detailed instructions
Step 1: At the main screen select Open to add photos.
Step 2: Select the photo you want to separate the background, then click Open to add.
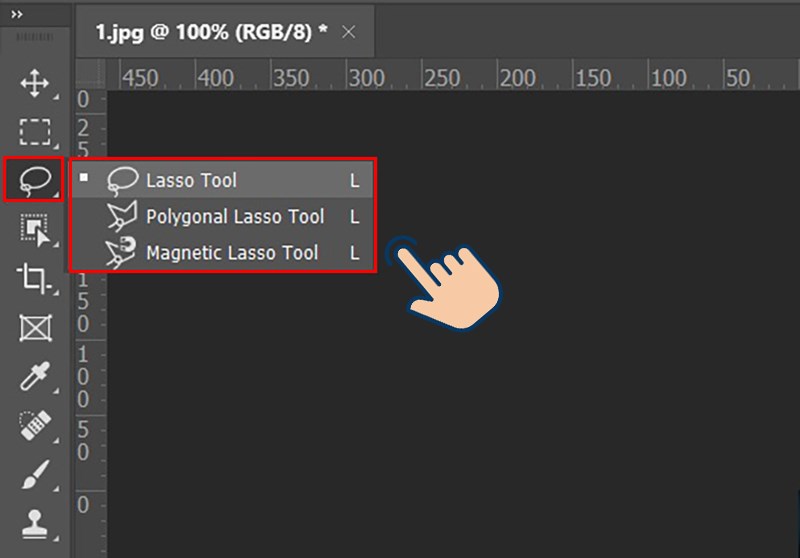
Step 3: After the image has been added, select the selection you want to remove or separate the image background. To select the area you can right-click on the ellipse icon. Now 3 tools will be displayed: Lasso tool, Polygonal Lasso Tool and Magnetic Lasso Tool. Choose 1 of 3 to use.
- Lasso tool: You just need to drag and hold the mouse around the object or area you want to select .
- Polygonal Lasso Tool: With this mode you will draw around the position or object you want to select with many consecutive lines, to complete the selection, you need to click again on the starting point. This is easier to do when the objects are curved lines .
- Magnetic Lasso Tool: You proceed to select the tool, next you proceed to click on the boundary of the object . Then you just need to move the mouse along the border, so that the border of the object is in the affected area. To end this work, move the mouse back to the starting point. Now you click again on the starting point, immediately the contour will turn into a selection.
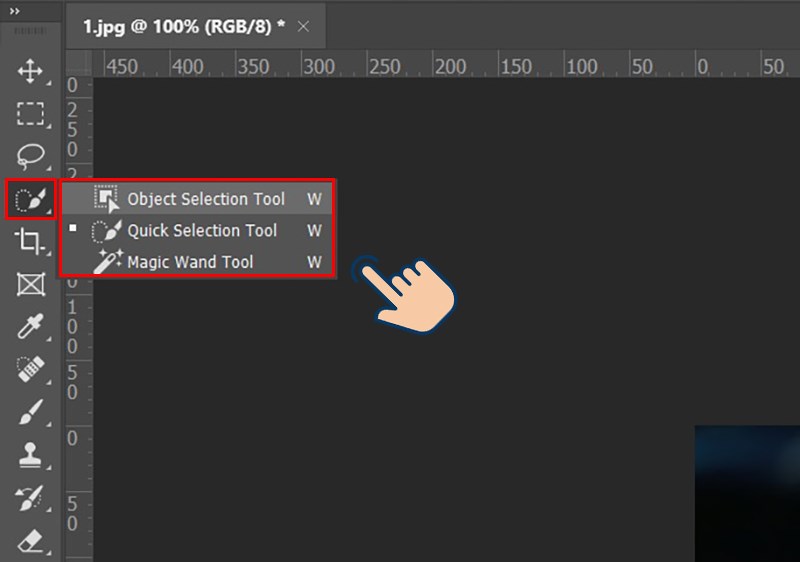
Step 4: Instead of selecting the ellipse icon in Step 3. You can also right -click the pen icon to select an area. Similarly, now the toolbar will show you 3 tools: Object Selection Tool, Quick Selection Tool, Magic Wand Tool. And you have to choose 1 out of 3 to select the region.
- Object Selection Tool: The mode allows you to drag an area around the object and Photoshop will automatically create a selection of the subject object.
- Quick Selection Tool: You just need to hover over the areas to be selected, Photoshop will automatically calculate the color and object structure to give the most suitable selection. This tool is very suitable for selecting areas with complex colors such as clothes and objects.
- Magic Wand Tool: This mode allows you to select areas with similar colors, just click on areas with similar colors, the system will automatically scan and select those areas. You combine the Shift key (Add selection) and Alt key (Delete selection) to select the right area you want.
Object Selection Tool mode has just been added on Adobe Photoshop 2020 version . If you use earlier versions, this mode will not be available in the software.
Step 5: Select the area where you want to separate or remove the image background.
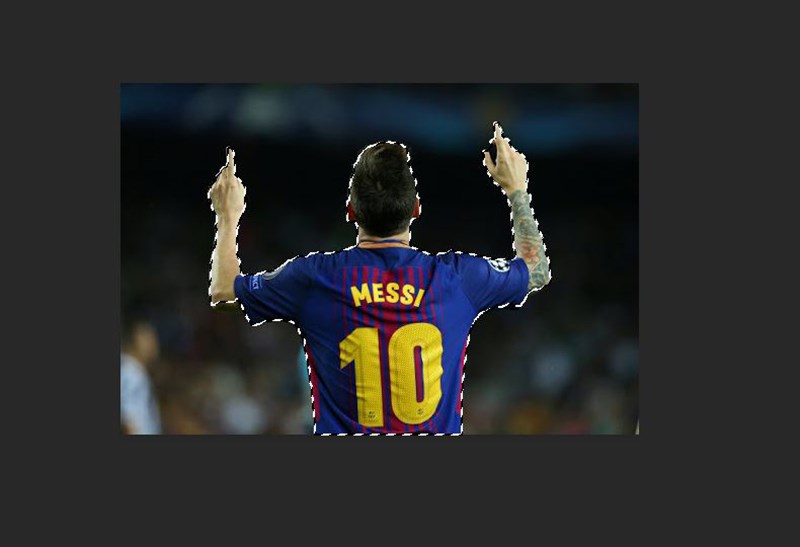
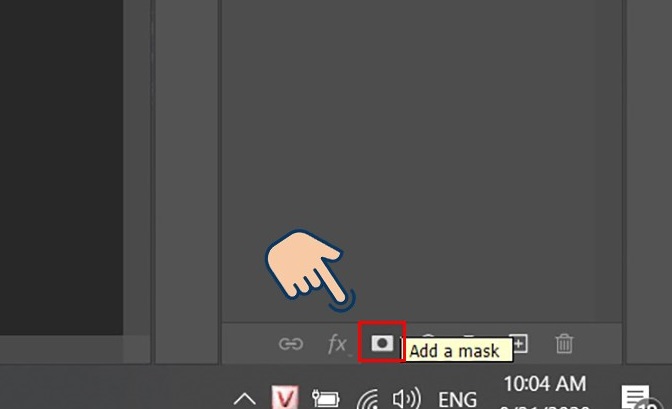
Step 6: Select Add a mask below the Layers panel (the rectangular icon with a black circle in the middle).
Step 7: At this point, only the selected area will remain on your image.

Step 8: Double click on the mask image (the black and white image next to the preview image) on the Layers panel.
Step 9: A new tool panel will appear for you, now find and customize the Radius parameter on the slider. When hovering around the image, you will see a circle with a small plus sign inside. Use this tool to remove excess details from the image.
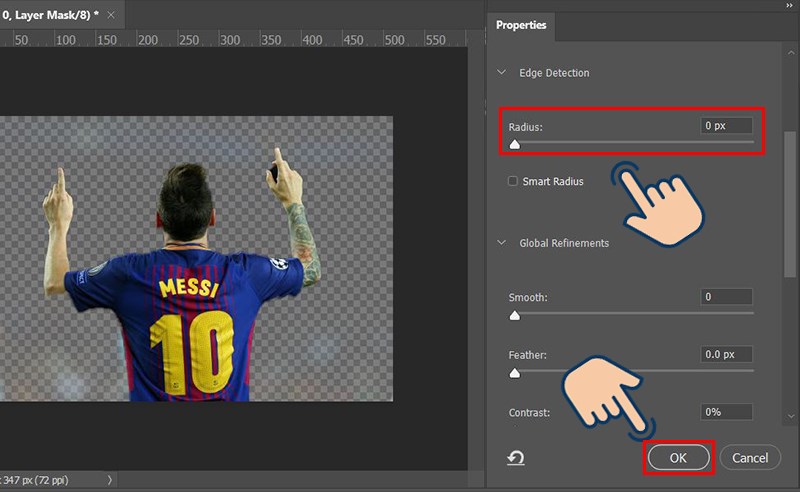
Step 10: Adjust other parameters with the slider until you get the desired result. And click Ok below to save the option.
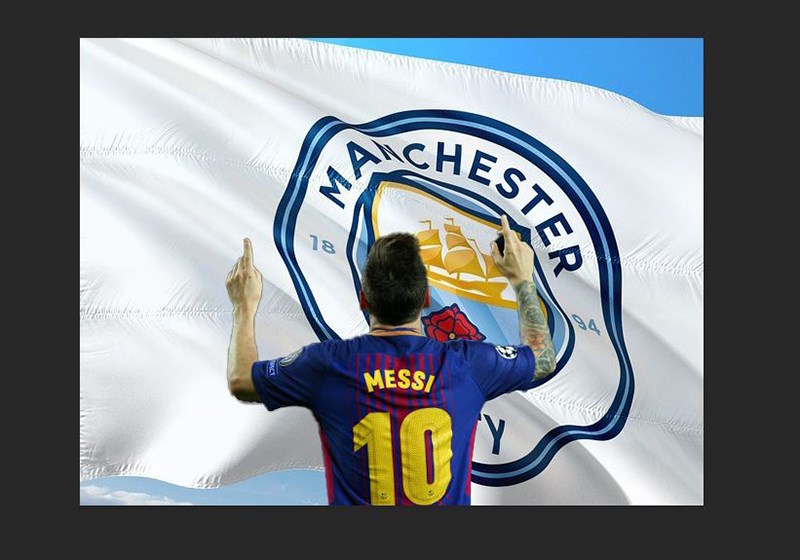
Step 11: Now you can use this image to add any new background by opening the background image and dragging and dropping this background separated image layer.
Step 12: Finally, click on File and select Save to save the image to your device.
II. Magic Eraser Tool
This method applies to images with a single color background, simple font.
1. Quick Guide
At the main screen, select File > Open or the key combination Ctr + O to add an image > Select Magic Eraser Tool > Adjust the erase intensity of the tool > Click on the area to be deleted.
2. Detailed instructions
Step 1: At the main screen, select File > Open or the key combination Ctr + O to add the image you want to remove the background.
At the main screen, select File > Open or the key combination Ctr + O to add the image you want to remove the background from.
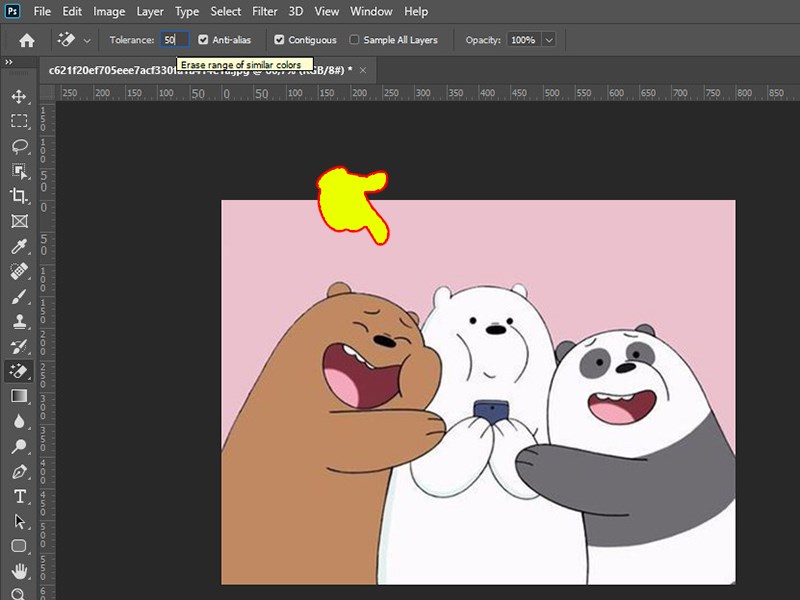
Step 2: Select the Magic Eraser Tool.

Select the Magic Eraser Tool.
Step 3: Adjust the eraser strength of the tool.
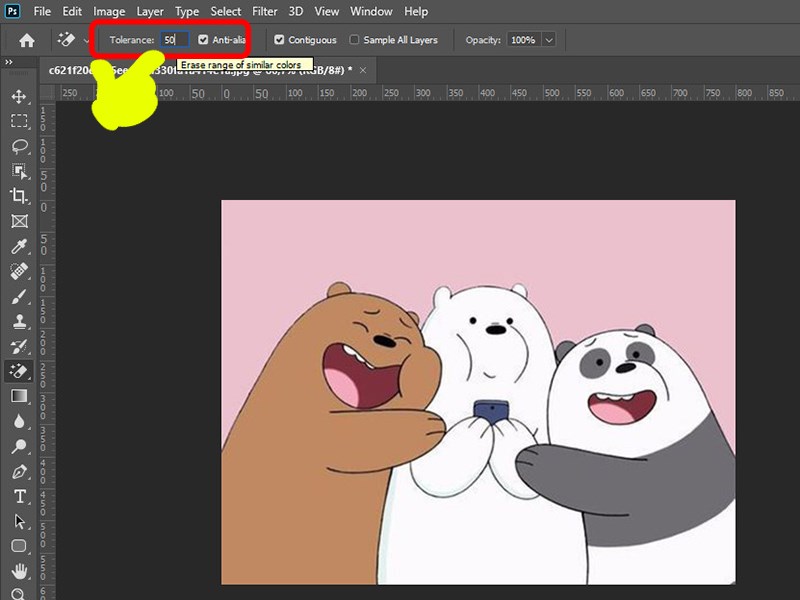
Adjust the eraser strength of the tool.
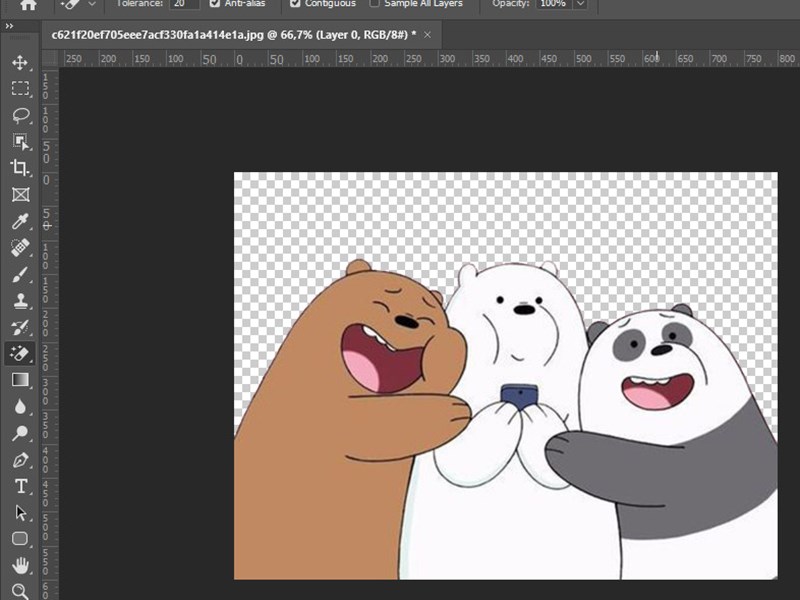
Step 4: Click on the area to be deleted.
The photo has been removed from the background
Step 5: You can insert a new background by opening the image and dragging and dropping the layer containing this image.
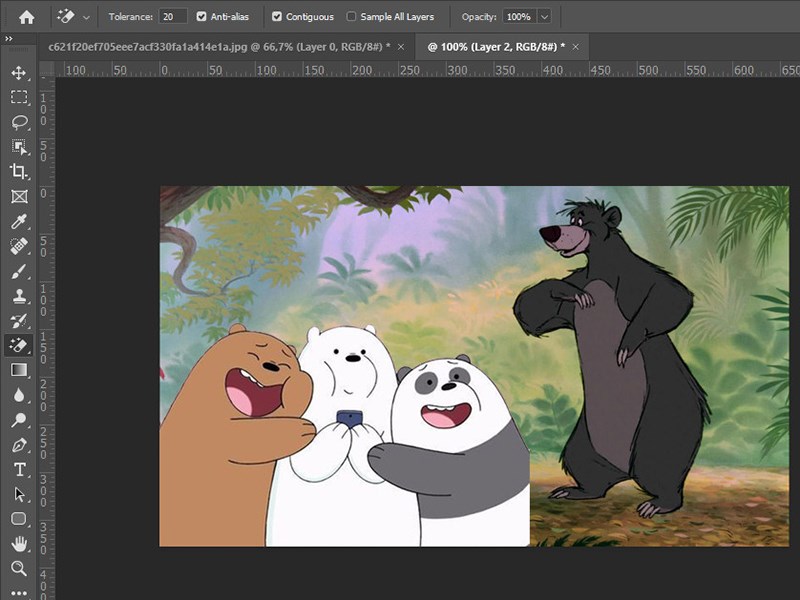
You can insert an image into a new background by opening the image and dragging and dropping the layer containing the image.