Fix error you might not have permission to use this network resource win 10, you might not have permission to use this network resource win xp, you might not have permission to access contact your network administrator windows 10, share is not accessible. you might not have permission to use this network resource, you do not have permission to access contact your network administrator to request access, is not accessible. you might not have permission to use this network resource windows 7, mengatasi you might not have permission to use this network resource, you might not have permission to use this network resource. Self-correction guide \\computer is not accessible. You might not have permission to use this network resource.
For print shops or data sharing in the home LAN is essential. But for some reason, I can’t access it after sharing and here I will guide you to fix it by following a few basic steps below.
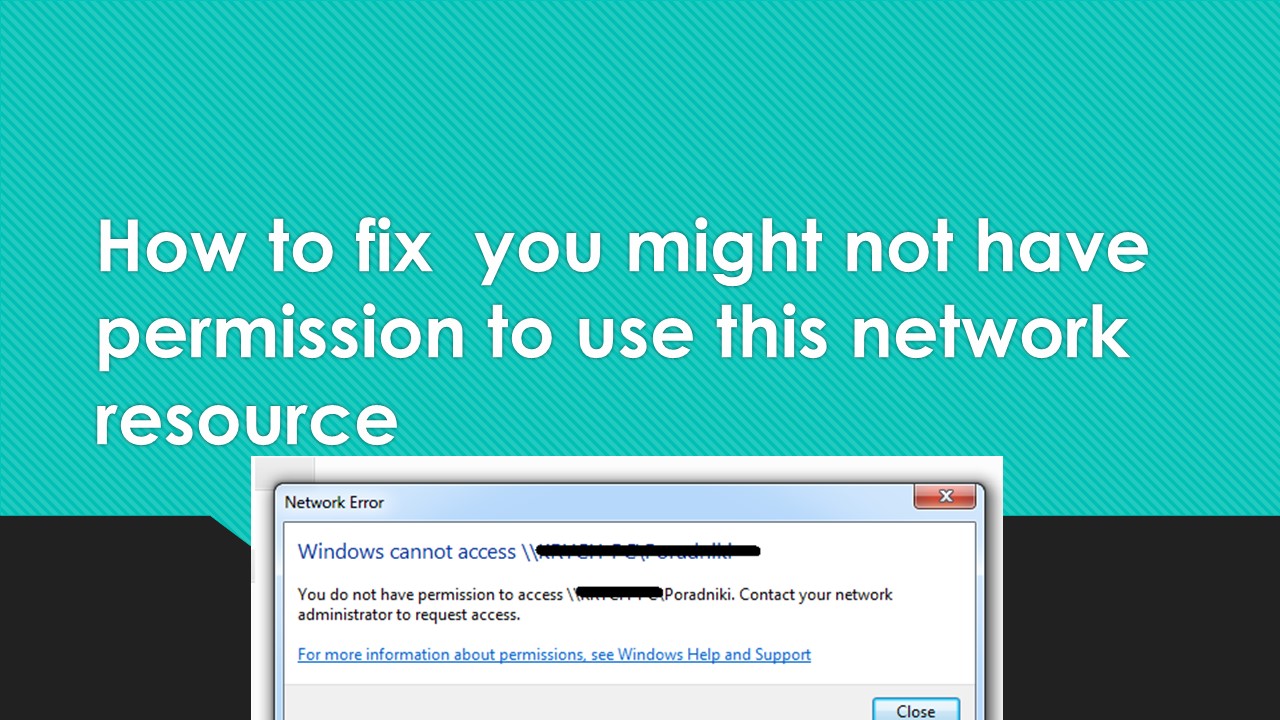
Table of Contents
Network Error “Windows Can Not Access” Fix
Network error
Windows cannot access \\ Computer Name
You do not have permission to access \\ Computer Name contact your network administrator to request access.
If you have this problem on your Local Area Network now I don’t think you really have to worry about it because with the help of this guide I will definitely help you by showing you how you can allow the computer to read or write files and folders on the shared drive on your Windows Network Place location.
So let’s see How to fix this error;
1 # Solution To Fix – Invalid LAN Connection and Settings Sharing
2 # Solution To Fix – Folder Security Settings or Access Security Settings
Step 1 – Allow Sharing with Everyone
- First, you must right-click on that drive or the folder that you want to share.
Then, in the properties of the folder or drive, select the tab “Sharing” and click the button “Advanced Sharing…”.
Then, tick the “Share this folder” button.
Then, click the “Permission” button.
Now add the user everyone then check the full permission item permission.

Step 2 – Add Username “Everyone” In Security To make that shared drive accessible from any computer.
- Now you will have to go back to the properties window of the drive or folder and this time select the Security tab from the top menu and click the ”Edit…” button.
Then, click the button “Add…”.

- Then, click the button “Advanced…” to find the username.
Now, click the button “Find Now” to have your computer show you a list of all available users.
Now find the username called “Everyone” from that list, and select it and click “OK”.
At this point, you will see the username “Everyone” shown in the list of settings. So now you just need to click “OK” to add this user in the main security list.

Step 3 – Allow Allow Full “Permission” for Username “Everyone” To perform granting this access permission for that drive or folder is complete.
- Now click on the username “Everyone” and then tick the Full Control option and then click on “Apply”.

Error cannot access shared folder

Fix is not accessible. you might not have permission to use this network resource windows
Could you please help me with the below questions:
-
Which version of Windows you are using on all the computers? (To check, type : winver in start menu and hit enter.)
-
As you have mentioned about File server, is it a Server or a normal Windows 10 build installed on it?
Meanwhile, please follow the troubleshooting steps as mentioned below:
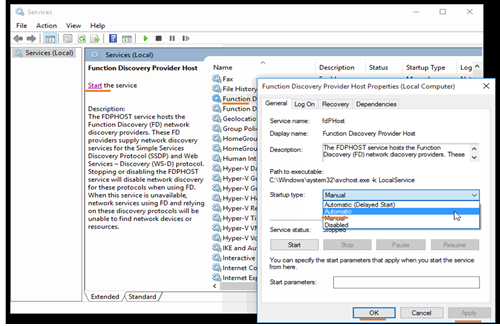
Method 1: Start the Network related services.
-
Press Windows and R key together on your Keyboard.
-
Type Services.msc and it enter.
-
Search for the following services.
-
Function Discovery Provider Host (FDPHost)
-
Function Discovery Resource Publication (FDResPub)
-
Network Connections (NetMan)
-
UPnP Device Host (UPnPHost)
-
Peer Name Resolution Protocol (PNRPSvc)
-
Peer Networking Grouping (P2PSvc)
-
Peer Networking Identity Manager (P2PIMSvc)
4. Reboot the device and check the Network tab again.
Method 2: Provide permissions through settings.
-
Go to Control panel > Click on network and internet > Click on Network and sharing.
-
Click on Change advance sharing settings on the left pane.
-
Select the options
-
Turn on network discovery.
-
Turn on file and printer sharing.
-
Allow windows to manage home group connection(recommended).
-
Turn on sharing so anyone with network access can read and write files in the public folders.
-
Use 128-bit encryption to help protect files sharing connections (recommended).
-
Turn off password protected sharing.
4. Click on Save changes.
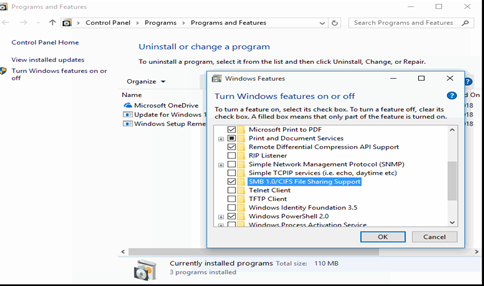
Method 3: Turn on SMB feature.
- Press Windows and R key together on your Keyboard.
- Type appwiz.cpl and hit enter.
- Click on ‘Turn Windows Features On or Off’ (upper left side of pane).
- In the popup scroll down to SMB 1.0/CIFS File Sharing Support.
- Check the option and click on Ok.
Now restart both the machines and check if it is working now.

