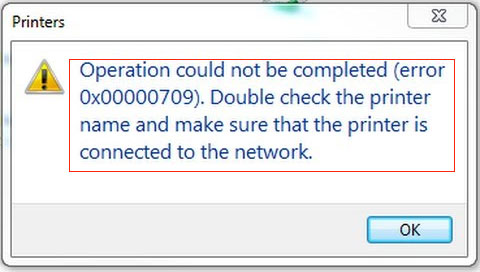
How to fix Windows 11 Time zone sync failed. Making sure your computer always runs on the correct date and time is very important to avoid any problems while browsing or using applications on Windows 11. Here are solutions to fix errors when the computer time is not properly synchronized.

Table of Contents
How to fix Windows 11 Time zone sync failed
Check date and time settings
You can start by verifying the date and time settings on Windows to make sure they are updated automatically. Here’s how.
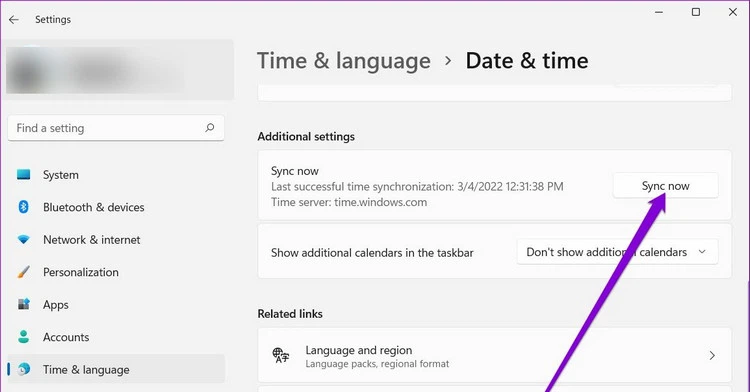
Step 1: Press Windows key + I to launch the Settings application. Then navigate to the Time & language section in the left pane and click the Date & time option in the right pane.
Step 2: Enable both options to the right of Set time automatically and Set time zone automatically.
Step 3: Next, go down to the Additional settings section, click the Sync now button as shown below.
Restart the Windows Time service
Windows Time is a small service that needs to run in the background to ensure the system’s ability to synchronize time with the standard time zone. So this service will automatically run when the computer starts. But if the service crashes on startup, then restarting the service might solve the problem.
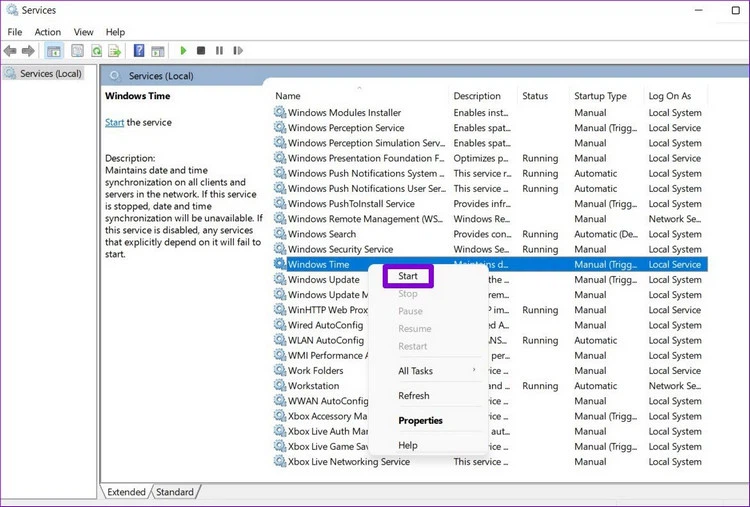
Step 1: Press Windows key + R to launch the Run command , type services.msc in the empty box and press Enter.
Step 2: In the Server window displayed, find the Windows Time service in the right pane. Right-click this service and select Start from the menu that appears. If the service isn’t running, click the Start link in the middle pane.
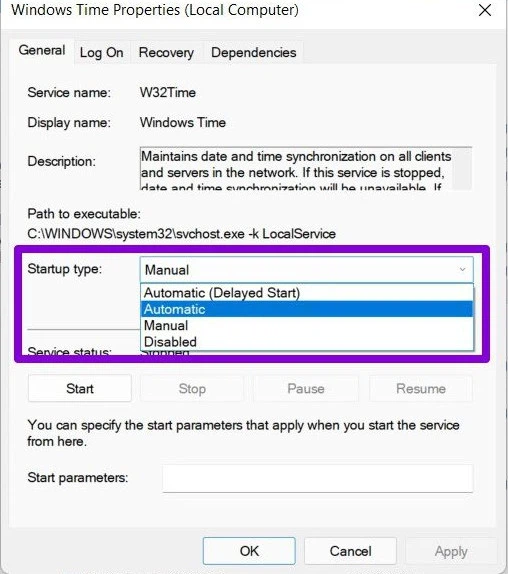
In addition, you can also configure the Windows Time service to run automatically at startup by right-clicking the Windows Time service > Properties, then selecting the General tab, to the right of the Startup type section, select Automatic > OK > Apply to apply changes.
Change time server
If the problem persists, then you might consider switching to a different time server to fix the time sync errors. Note that you will need to be logged in with an account with administrative rights to perform these cacghs.
Step 1: Press Windows key + S to access the search tool on Windows 11. Type date & time settings in the top blank box and press Enter.
Step 2: Go to a new window, observe the right pane, scroll down and click the Additional clocks option.
Step 3: In the Date and Time menu window displayed, select the Internet Time tab and then click the Change settings button.
Step 4: Use the drop-down menu to the right of the Server section to select another server and click the Update now button.
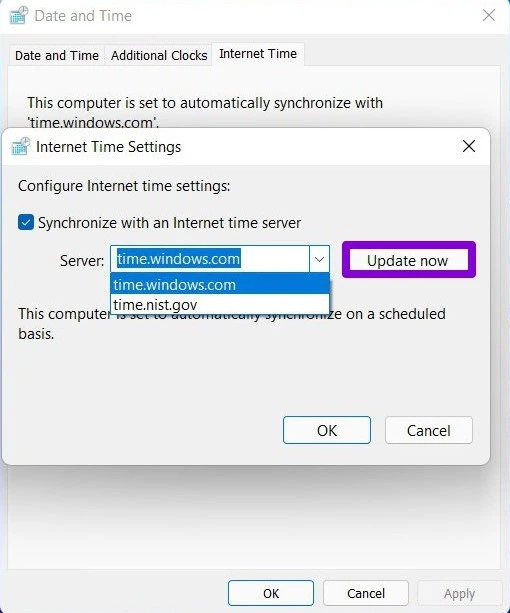
Check if the time synchronization error has been resolved.
Force sync with Command Prompt
If switching to a different server doesn’t help, you can use the command line to reset the Windows Time service configuration and force Windows to synchronize the time. Here’s how to do it.
Step 1: Press Windows key + X and select Windows Terminal (admin) option from the list.
Step 2: In the displayed command line window, run the following commands in turn, after each command press Enter to execute.
w32tm /unregister
w32tm /register
net start w32time
w32tm /resync
After running these commands, Windows can synchronize the time as usual.
Scan SFC
If Windows is missing any important system files, such problems can arise, including the possibility that time sync is stopped. In such cases, running an SFC scan (or System File Checker) will help recover missing or corrupted system files with their cached versions.
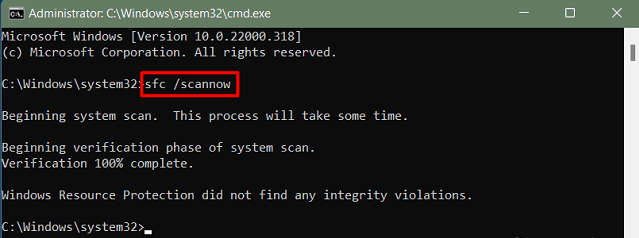
Step 1: Access the Start menu, enter cmd and click the Run as administrator option to access the command line window with administrative rights.
Step 2: In the displayed command line window, enter the command below and press Enter.
Tweak the Registry
Some users were able to fix time synchronization issues by modifying the update interval on Windows. To do this, you will have to edit the Registry Editor, but since this is where important settings for Windows and system applications are located, you should only use this method if the above doesn’t work. Also, back up the Registry files before making any changes.
Step 1: Press Windows key + R to launch the Run dialog box. Type regedit and press Enter.
Step 2: In the Registry Editor window that displays, use the address bar at the top to navigate to the following key.
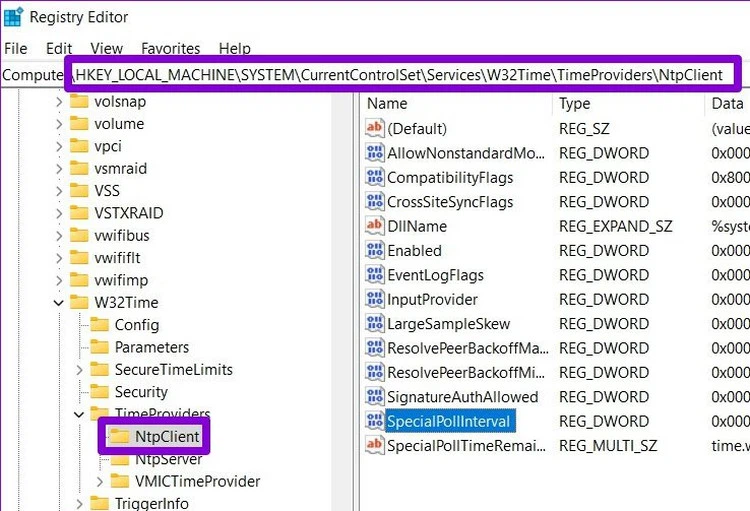
Step 3: Double-click the SpecialPollInterval key and change its value to 86400 . Click OK to save the changes.
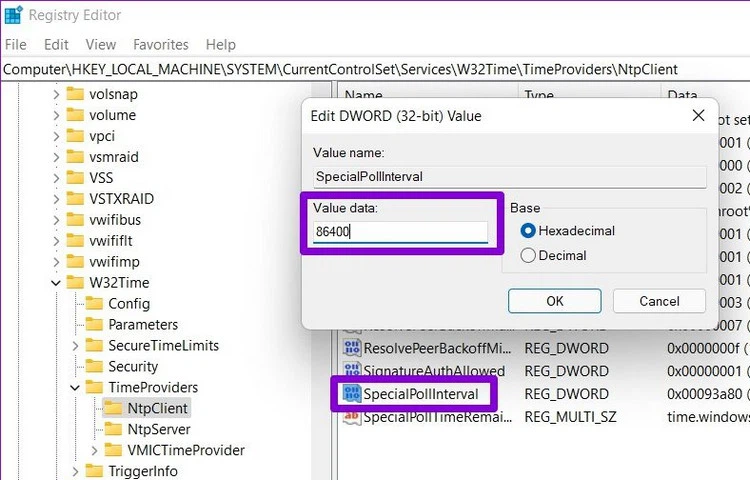
Restart the computer for the changes to take effect and see if that resolves the problem.
More time servers
Finally, if the solutions above don’t work, there might be a problem with one of the servers you’re using for time synchronization. You can add more time servers to Windows and try to connect to them to fix this problem by below way.
Step 1: Access the Registry Editor window in the above way.
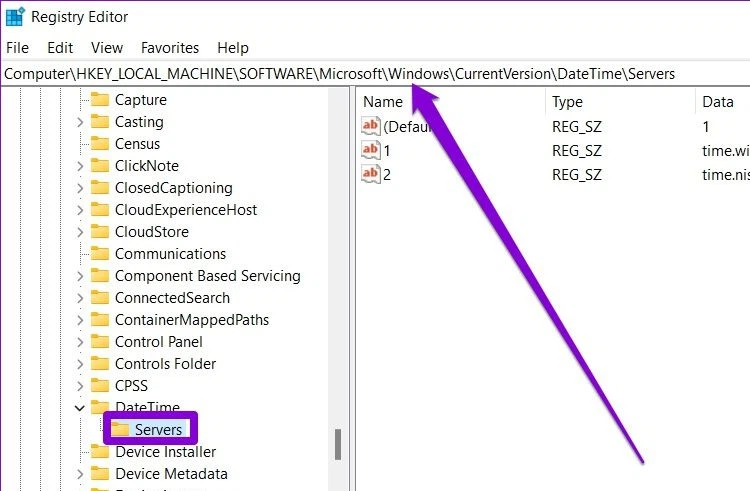
Step 2: In the Registry Editor window that displays, use the address bar at the top to navigate to the following key.
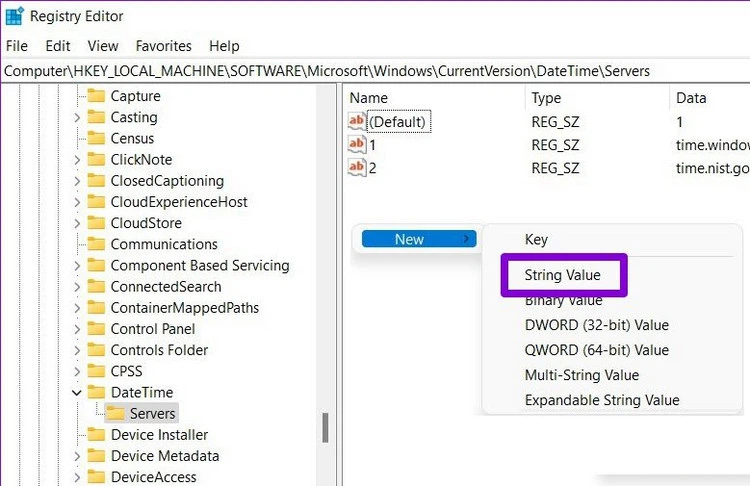
Step 3: Right-click anywhere on the empty space in the right pane, select New > String Value.
Step 4: In the Edit String dialog box displayed, in the Value data field, enter time.google.com and click OK.
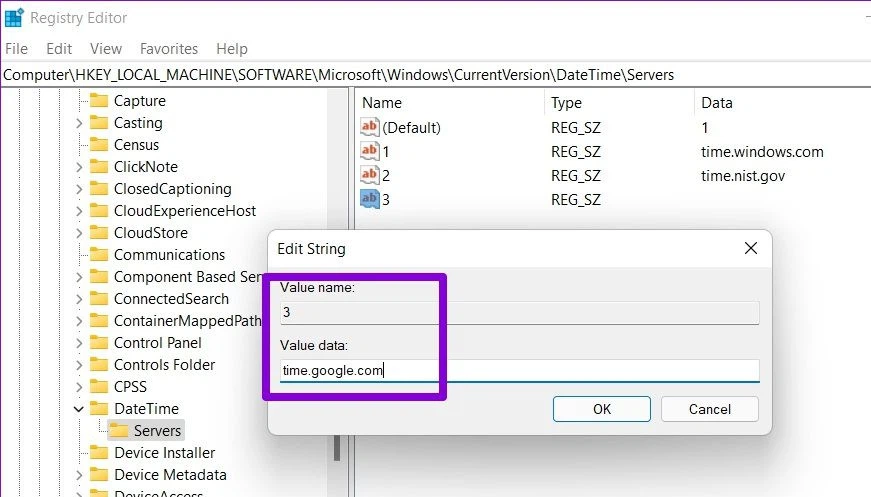
You can create more string values to add more time servers if you want. Once added, follow the mentioned steps of way 3 above to change the time server on Windows.
Ngolongtech hopes you find this article useful! Wishing you success!

