
How to fix Service Host Windows Update high CPU usage. Have you noticed your Windows 10 laptop running Very slow, unresponsive, unresponsive after a recent Windows update and checking task manager “service server local system” processes consuming a lot of CPU, memory, and disk? Let’s check what is the Service Server Process, why it takes up a large amount of CPU, Disk, or Memory on Windows 10. And how to fix High CPU Usage on Windows 10.
What is the local system of the service server?
Services host local system is a whole collection of different system processes. It works on automated services. There are many Service Host containers, such as Service Host: Local Service, Service Host: Local System, Service Host: Network Service, etc. There are many more and all of them are necessary for smooth operation. tru of Windows.
It is also a system that executes several scheduled tasks at the same time, this involves different tasks executing at the same time allowing them to use most of the laptop’s resources from the Department. memory, Internet Data and RAM.
How to fix Service Host Windows Update high CPU usage
First of all, try ending the task process ( Diagnostic Policy Service, Restricted Network, etc) and let it restart on its own. See if high CPU usage occurs during this process. If this continues, restart the machine.
Run SFC and DISM commands
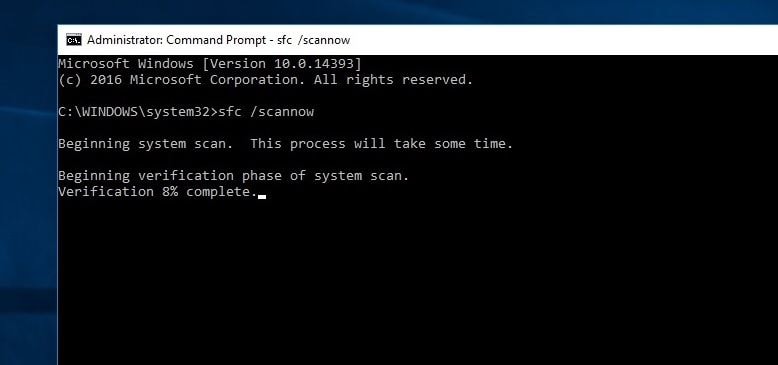
- Just open Command prompt As administrator,
- Type sfc /scannow and press enter key.
- This will scan the system for missing corrupted system files.
- If any SFC utilities are found, restore them automatically from a compressed folder located on %WinDir%System32dllcache.
Alternatively, run the command DISM DISM /Online /Cleanup-Image /RestoreHealth . Repair and prepare Windows images, including Windows Recovery Environment, Windows Setup, and Windows PE.
Create a new user account
Again if the user account profile is corrupted this can cause any service to get stuck and use a large amount of CPU, RAM. We recommend that you create a new user account by following the steps below and check if it helps.
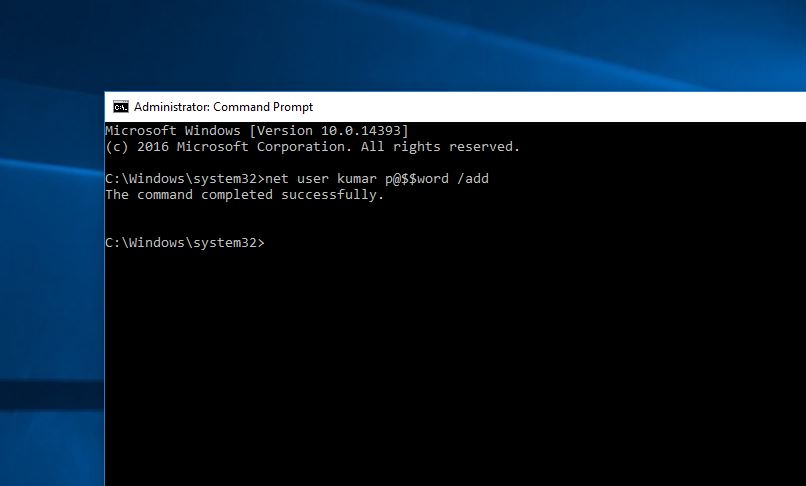
- To create a new user account, just open command prompt as administrator,
- type net user username password /add.
(Note: Substitute your own username and password)
Now log out of the current user account and log in to the newly created user account and check if the System Resource Usage is normal.
Install the latest updates
Microsoft regularly rolls out windows updates with security enhancements and bug fixes. There can be any error causing High CPU Usage issue, check and install latest windows updates to help if any error is causing this high system resource usage problem.
- Open windows settings with keyboard shortcut windows + I,
- Click Update & security then click windows update
- Now hit the check for updates button to allow download and install the latest windows updates.
- Then restart windows and check the problem of high system resource usage is resolved.
Also open Control Panel > Troubleshooting > View all . Below are the available troubleshooting packages. Click System Maintenance and run the troubleshooter.
Open Device Manager (press Windows + R, type devmgmt.msc ), check and make sure your latest drivers are installed on the system.
Disable SysMain service
- Open windows services using services.msc,
- Search for a service named Sysmain Double click on it.
- Here change the disabled startup type and stop the service next to the service status as shown below.
- Do the same with Service named BITS and Windows update service . Restart windows and check if System Resource Usage is normal.
Tweaking the Windows registry editor
- Press Windows + R, type regedit and ok to open Windows Registry Editor.
- Backup the Registry database and navigate to
- HKEY_LOCAL_MACHINE > SYSTEM > ControlSet001 > Services > Ndu.
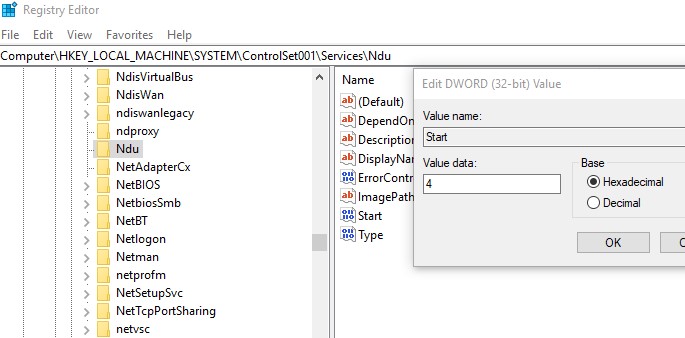
Here on the middle pane, double click on start and change its value data to 4 (This will disable the memory leak in the non-paged pool.) Click ok, close the registry editor and restart windows. Check the system resource usage has reached the normal stage.
These are some applicable solutions you can try to fix Service Host Local System High CPU Usage on Windows 10. Have any query suggestions about this post, feel free to discuss in the comments section below.


