Fix the volume does not contain a recognized file system in windows 10/8/7. While trying to mount a USB/Pen Drive, Flash Drive, or other External Storage Device, the user gets an error message stating You need to format the disk in drive E: before you can use it. Do you want to format it? In this article, Ngolongtech will introduce you to how to fix this error.
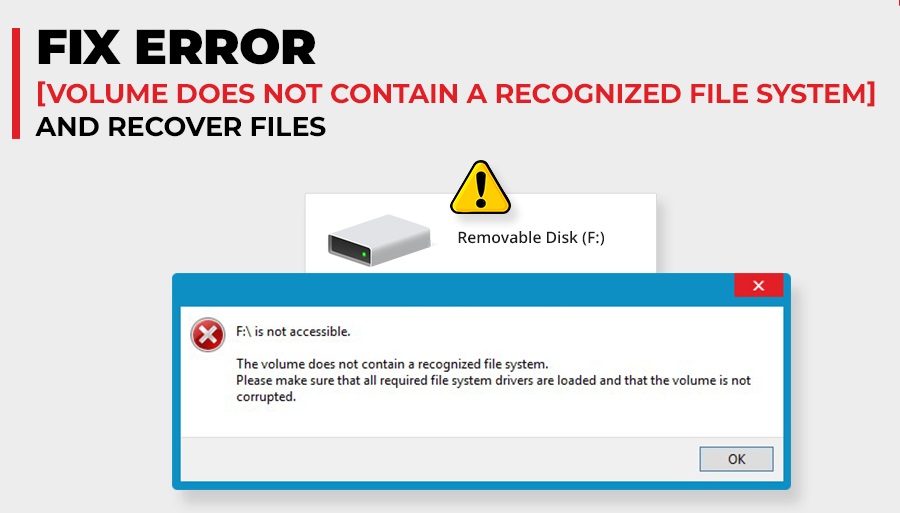
Table of Contents
Reasons to get this annoying Windows error
Problems can appear on internal or external drives. The main causes of this problem are outlined below:
- The drive is formatted incorrectly.
- Missing file system.
- The drive is faulty.
- Faulty components in the drive.
Such errors can also appear if you are forced to remove the external hard drive from your computer without selecting Safely Eject.
IMPORTANT – Before you start fixing errors on your Windows 10 PC
Whether the error message appears in an external or internal storage drive, there is a high chance that important files stored on your drive are missing. Therefore, you should keep a complete backup of all your precious files regularly. But if you don’t have the same one, don’t panic! In any case of data loss, you can use advanced file recovery tool like Stellar Data Recovery Professional to extract almost any type of data from Windows PC and devices like HDD, SSD, USB Drive External & Optical Media. Using this powerful file recovery tool, you can easily recover and save all your data before we start this troubleshooting.
Solution to Fix The Volume Does Not Contain A Recognized File System Error
Follow the workarounds listed below to fix the potential causes for this Windows problem:
Let’s start debugging. Read step-by-step instructions!
Workaround 1: Run command line SFC
SFC aka System File Checker is a built-in Windows utility that you can quickly and efficiently scan to fix all corrupt system files in one go. All but what you have to do is:
1- Go to Windows search box and find Command Prompt. Make sure you run the utility as Administrator.
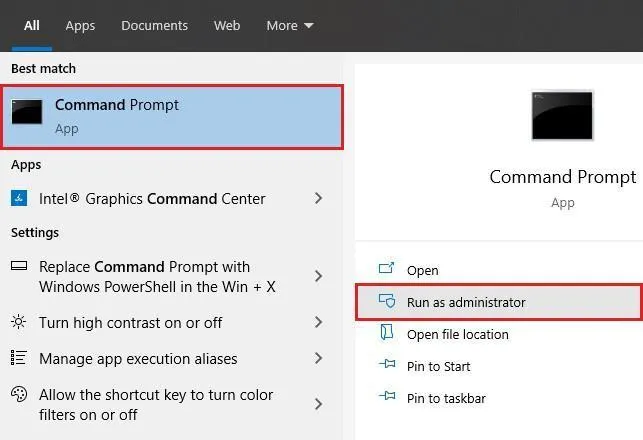
2- In CMD window, enter command line: SFC / Scannow and press Enter button to execute successfully.
3- Command line will effectively repair corrupted system files.
4- Once the process is complete, close the CMD window and restart your PC!
Hopefully, the annoying error The Volume Does Not Contain A Recognized File System will be fixed now!
Solution 2: Free up your drive for problematic errors
If it is your drive that is failing, then you should scan your entire drive to detect corrupted files & folders.
1- Launch File Explorer and navigate to This PC.
2- Now just right click on the drive where you are getting the nasty error.
(For example, we’re having a problem in E:Drive so we right click to select Properties.)
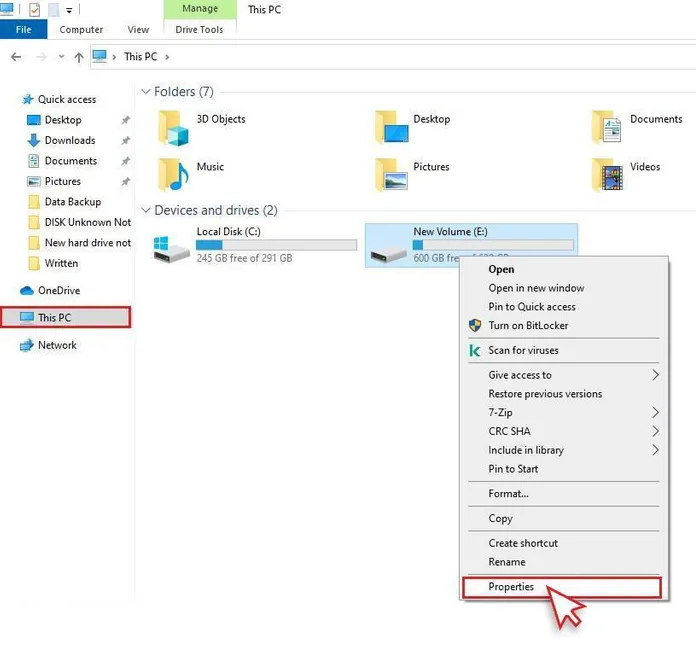
3- From the new window, navigate to the Tools section and press the Check button, under the Error Checking heading.
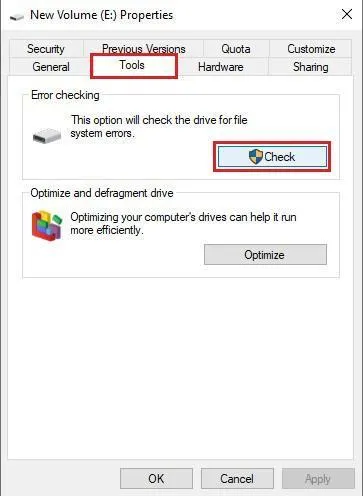
4- As soon as you click the Test button, another dialog will pop up on your screen. Just click the Scan Drive button to let Windows check for any errors or damage with the drive.
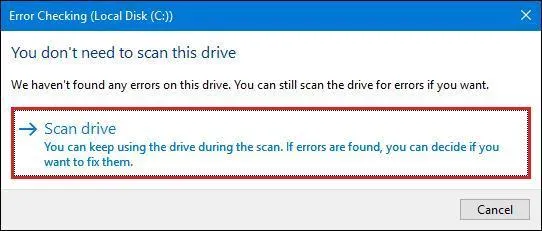
After the scan is complete, try to access the drive you just fixed the problem. Hopefully, you won’t witness The Volume Does Not Contain A Recognized File System error right away!
Workaround 3: Run command line CHKDSK
CHKDSK is a built-in command utility that helps users detect bad sectors in the drive and fix them immediately. To use this efficient utility, all you have to do is:
1- Go to Windows search box and find Command Prompt, make sure you run the utility as Administrator.

2- In the Command Prompt window, type: chkdsk f: f (Here f: is the drive letter). Press the Enter button!
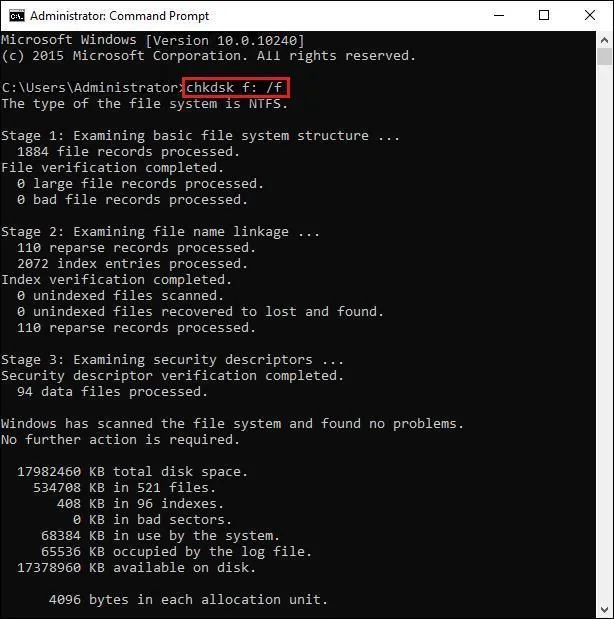
After the utility checks your drive for bad sectors, just restart your PC to make the changes!
Workaround 4: Install driver update for USB
Usually, there can be a problem with your USB port, which eventually leads to problems related to failed USB device detection. If the problem is caused by an outdated or faulty USB Driver, we strongly recommend that you update this driver to fix The Volume Does Not Contain A Recognized File System error.
There are many ways to install the latest driver updates on Windows 10.8, 7. However, the safest way to update drivers is through professional driver updater software. Follow the instructions below to start the process!
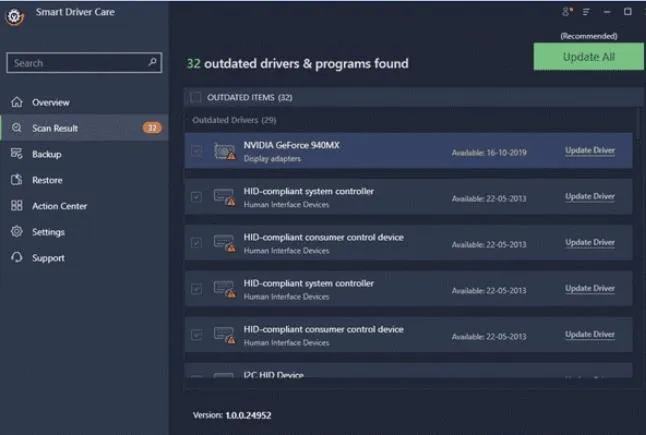
1- Install Smart Driver Care. It is a suitable choice to find faulty, damaged, missing and broken drivers on all popular versions of Windows.
2- Using the registered version, click the Start Scan Now button. A quick but thorough scan will be initiated on your system. In a short time, all problematic drivers will be listed.
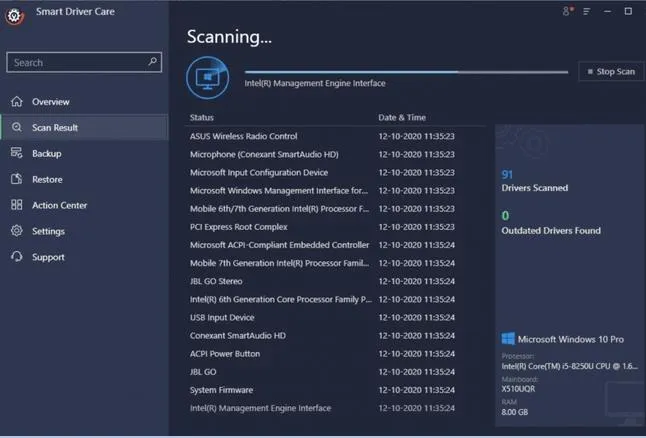
3- Go through the list and find all the drivers you want to update and install the latest drivers. Press the Update All button to begin replacing current drivers with the most compatible versions.
This is how you can easily fix the annoying Windows error The Volume Does Not Contain A Recognized File System. To avoid losing or missing any data during the repair process, it is recommended that you use professional data recovery software before proceeding. Running a file recovery scan is the ultimate way to make sure your precious data is safe!
Back up your PC with File History windows 10
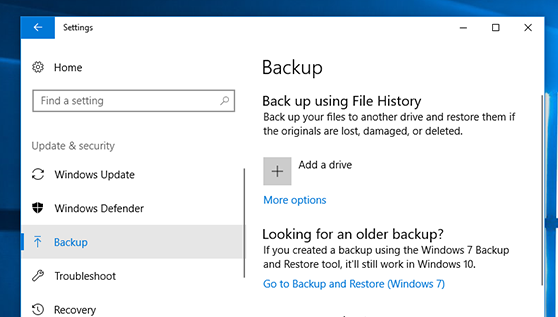
Use File History to back up to an external drive or network location. Select Start > Settings > Update & Security > Backup > Add a drive , and then choose an external drive or network location for your backups.
Restore your files with File History
If you’re missing an important file or folder that you’ve backed up, here’s how to get it back:
-
In the search box on the taskbar, type restore files, and then select Restore your files with File History.
-
Look for the file you need, then use the arrows to see all its versions.
-
When you find the version you want, select Restore to save it in its original location. To save it in a different place, right-click Restore, select Restore to, and then choose a new location.
Find your backups created on previous versions of Windows
If you used Backup and Restore to back up files or create system image backups in previous versions of Windows, your old backup is still available in Windows 10. In the search box on the taskbar, type control panel. Then select Control Panel > System and Security > Backup and Restore (Windows 7).
Restore files with File History windows 11
-
Connect the external storage device that contains your backup files.
-
In the search box on the taskbar, type Control Panel, then select it from the list of results.
-
In the search box in Control Panel, type File History. Select Save backup copies of your files with File History from the list of results.
-
Follow the instructions to restore your files.
Restore files with Backup and Restore
-
Connect the external storage device that contains your backup files.
-
In the search box on the taskbar, type Control Panel.
-
Select it from the list of results, then select Backup and Restore (Windows 7).
-
Select another backup to restore files from, select the location of your external storage device, and follow the instructions to restore your files.
frequently asked Questions
Q1. What are the best tips to keep volumes from getting unrecognized filesystem errors?
While the problem can be easily solved, to prevent this error from happening in the first place, all you have to do is:
- Safely eject/unmount the external drive.
- Protect your PC & USB Drive from viruses. Use effective anti-virus software !
- Keep your storage device in a safe location. Try not to leave it in harsh environments.
- Make sure you back up all your important files regularly.
Q2. Which is the best data recovery solution for Windows 10?
The market has a lot of file recovery tools for you to choose from. If you require our recommendations, we recommend Advanced Disk Recovery , EaseUS Data Recovery, Stellar Data Recovery Professional, and more!
Q3. How to backup data on Windows 10?
Use reliable Backup Software to save all your important files and folders in one safe location!


