How to Edit lock screen on Windows 11. If you’re bored with the default lock screen settings on your Windows 11 PC and want to change a few things here and there, this post is for you. In this post, Ngolongtech will show you how you can change the lock screen background of Windows 11, add a widget and enable/disable the Screen saver. Without learning why this is required, see how you can customize your lock screen to your own requirements.
How to Edit lock screen on Windows 11
It’s pretty easy to customize your lock screen on Windows 11. All you need is to go to Settings > Personalization and then select Lock Screen . You will find all the related settings here that you can configure. If you want a description of all the changes you can make, read the instructions below.
If you want to customize the Lock Screen on your Windows 11 PC, do the following:
1] Decide three modes for your lock screen
Windows 11 lets you choose between three modes for your lock screen. They are Windows spotlight, Picture, and Slideshow
- Windows spotlight : This is the most sought after lock screen wallpaper by many users. When this feature is enabled, the system will automatically download and set the Bing image as the default background.
- Picture : Enabling this mode will allow you to place an image on the Lock Screen. You can use existing images or click browse to select a specific image.
- Slideshow : As the name implies, you can select several images when choosing this setting. Every time you lock the screen, a new picture will appear on it. Of course, the image that will appear will be one of the images you selected earlier.
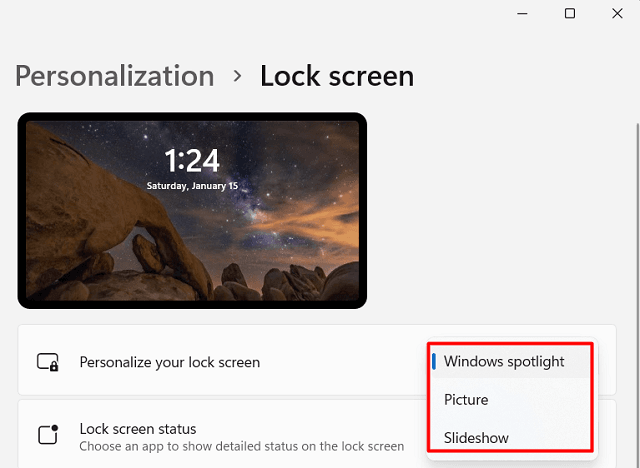
Now that you know what you want with your Lock Screen background, change it by following the instructions below. Let’s see how you can do that.
2] Select photo as default Windows 11 lock screen
To change or configure the lock screen background on Windows 11, do the following:
- Right-click anywhere on the desktop and select Personalize .
- The system will redirect you to the Personalization section in Settings.
- Scroll down and select Lock Screen .
- Use the drop-down menu next to “ Personalize your lock screen ” and choose between the available options. The options have been discussed in detail above. They are
- Windows spotlight, Picture, and Slideshow.
Since you are reviewing it, you must be curious to apply a specific image on the lock screen. If that’s the case, select Picture, then Browse photos . Go to the location where you saved the image. Select that and the lock screen background will change automatically.
- Tick the checkbox next to “Get fun facts, tips, tricks, and more on your lock screen”.
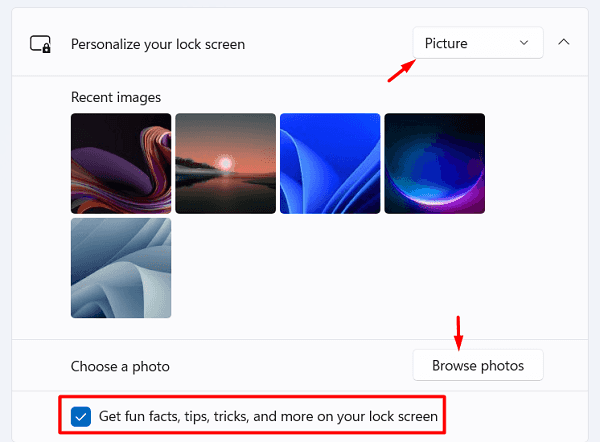
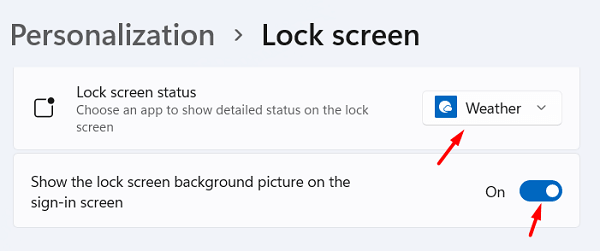
Note : If you want to see this image while on the login screen, turn on the radio button next to “Show the lock screen background picture on the sign-in screen”. However, the selected image will appear as a blurred image on the login screen.
There is another setting that you can configure on the lock screen. And here is the option to show a widget on it. You can choose one of the following: Mail, Weather, or Calendar. Exit the Settings page and the changes will be applied immediately on your device.
3] Select Slideshow as default Windows 11 lock screen
To allow viewing of multiple images on the lock screen, do the following:
- Press Win + I to launch Settings .
- Select Personalization on the left navigation and switch to the right pane.
- Use the drop-down menu and select Slideshow this time .
- Other settings will remain the same. Example: Blur image on login screen, widget selection and all.
Enabling Slideshow opens some advanced settings as well as you can configure the following:
- Includes Camera roll folders .
- Limit the use of only images that fit your display.
- Stop/Resume plays the slideshow when your device is on battery.
- Show Lock Screen instead of shutting down PC when device is in idle mode.
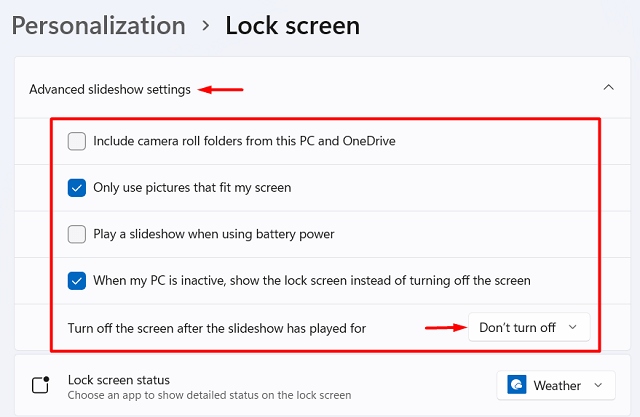
Note : You can even predefine a period of time after which the screen will turn off or just keep it on forever.
4] Select Screen Saver
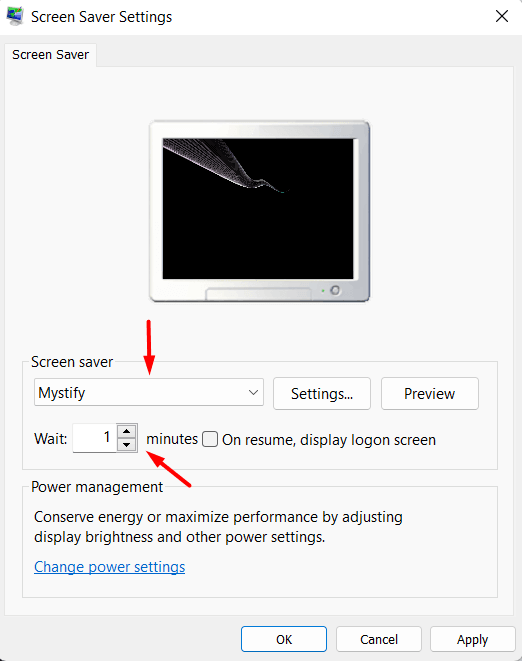
Usually when the screen is off, you will see a black screen. To re-enable it, you must press any key with your keyboard. In case you don’t want the screen to turn off, you can also use Screen Saver. Here’s how to enable the screensaver on a Windows 11 PC –
- Go to Settings > Personalization > Lock Screen first.
- Scroll to the bottom and you will find an option “ Related settings ”.
- In this section, click Screen Saver.
- The Screen saver settings window will launch next.
- Use the drop-down menu to select an option and press Apply then OK .
Hopefully the article will be useful to you. Check out more articles on the website to discover more great tech tips.

