Fix 100% disk error on the latest Windows 10 2020. The problem of 100% disk error has appeared from previous versions and the majority appears in versions of windows 8, windows 8.1 and currently the latest version is released. is windows 10.
Fix 100% disk error on the latest windows 10 2020
Table of Contents
Cause and effect
If you have a HDD I recommend the following:
Defrag the drive (don’t do this to an SSD.)
Disable background apps.
Buy a new drive.
If you have a SSD I recommend the following:
Buy a new drive.
The problems that make this situation appear are numerous, and there are a number of methods online to overcome this situation. And in fact, some of you can fix it, some of you can’t.
Because there are many causes from hardware to software, 100% successful repair is a blessing.
You can not think of how to do it and how not to do it, really depends on the machine, the status of the device you are using.
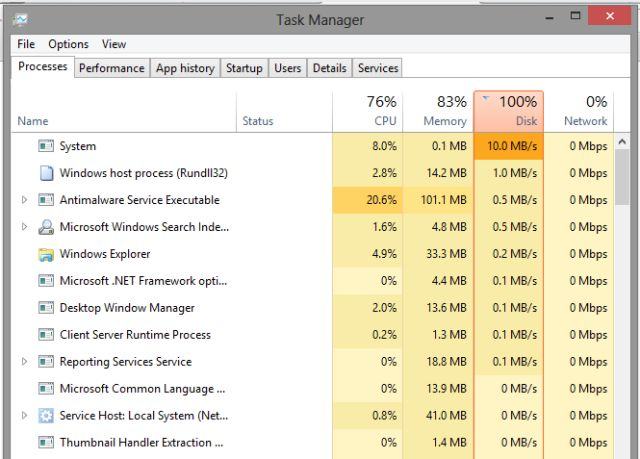
As you can see, although the process I use does not consume much disk space, the machine still reports as 100%.
And here is the main problem, I will guide you to fix 100% disk error by the following tips:
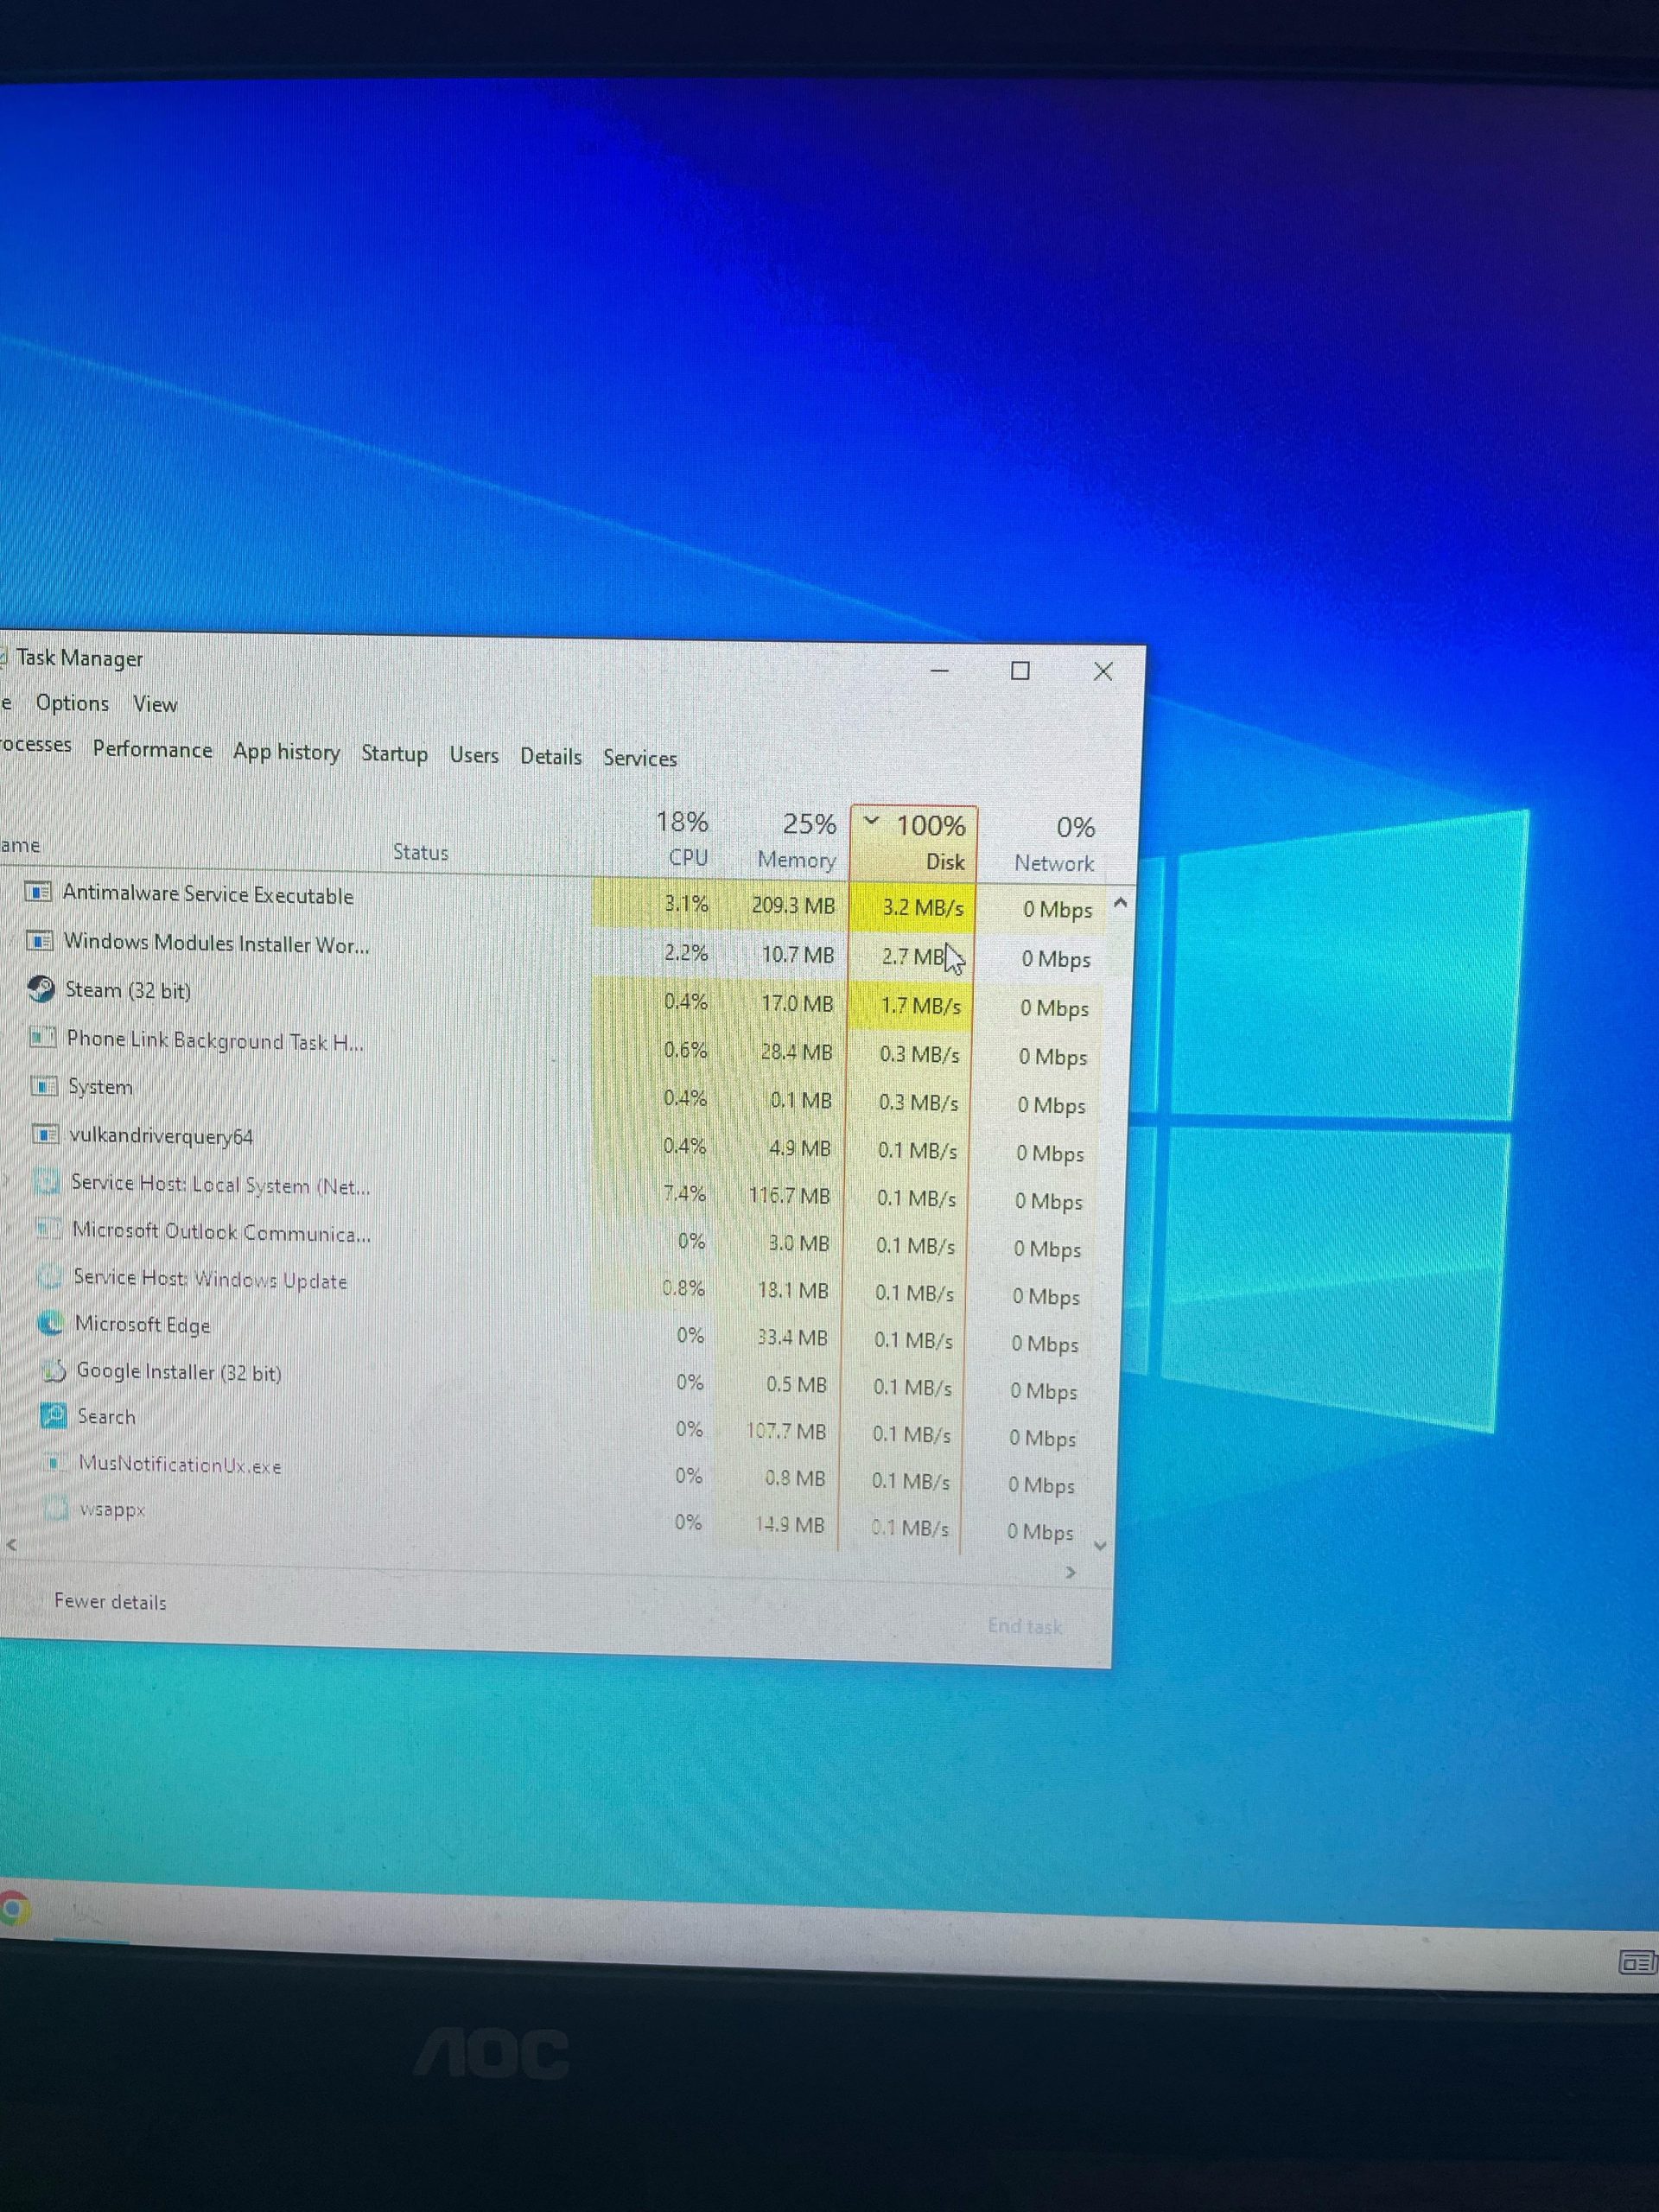
The three biggest culprits are Windows Defender (antivirus, anti malware, anti spyware), Windows Module Installer (most likely windows update but not limited) and Steam platform all running concurrently with a heavy work load. The majority of mechanical HDDs cap out at about 10 MB/s which if you total up those 3 it comes pretty close to the cap and that means your computer won’t be able to do much more until those 3 are either closed (completely and not running in the background) or they complete their task.
Hey OP as you’ve probably seen from other comments your storage is going bad. It seems from other comments that you don’t know much about computers and that’s okay!! This issue is most likely due to the fact that you have a HDD which is also known as a Hard Disk Drive.
You may be asking, “What is a hard disk drive?” A hard disk drive is considered an older way to store data for computers. The reason being how it stores Information and reads it. HDDs are also referred to as mechanical drives because of how they work. HDDs work by using magnetic disks to store information and use what’s called a spindle to record and read that information this article gives a pretty good idea of how it works.
Now to the next thing, why is your disk at 100% usage. This is likely happening because Your hard drive is getting slower. Hard drives come in different speeds. The speed is determined by how fast the metal disc inside the drive can spin hence why the speeds are labeled RPM so 3200RPM is 3200 rotations per minute. This means that the disc can only read so much. And also the speed of a hard drive can slow over time with use. Hard drives can also be damaged. The most frequent causes of damage are dropping the drive or computer, setting the computer down too hard, moving the computer or even just normal wear over time
Now to the next part, what you should do. Please read this carefully Here’s what I am recommending. First off you should get a Solid State Drive (this is also known as an SSD). If your computer has an NVME M.2 slot then you can get an nvme m.2 SSD. The easiest way to tell if your computer has this slot available is by googling your computer name and then checking it’s drive compatibility. If you want you can also comment your computer here and I can tell you. NVME drives are relatively cheap right now as you can get a 1tb nvme drive on Amazon for 50-120 dollars. You might be asking what the upsides to an NVME SDD are. In your case you would be able to transfer data faster, it would make your computer faster and you would be able to store as Much if not more data. What are the downsides? Your computer has to be compatible with the drive meaning you have to have a slot for the drive.
If you dont have a slot for an m.2 a regular SSD will be significantly faster.
You should buy one of these and then transfer your windows operating system onto that drive along with all your other data and then remove the HDD.
If you don’t feel comfortable with doing this, your local Best Buy geek squad should be able to help you. You can show them this post and they should be able to help you out. If your paying more than 150 dollars including labor for this your getting scammed. (Depending on the type of storage drive you get) lmk if you have any questions. I hope this helped
Set reasonable virtual RAM
If your computer has a relatively large amount of RAM, you do not necessarily need to rely too much on virtual RAM.
Setting up too much virtual RAM will affect your hard drive more or less.
Because virtual RAM is actually shared from your hard drive, this makes your hard drive have to read and write more, leading to hard drive failure such as bad sectors.
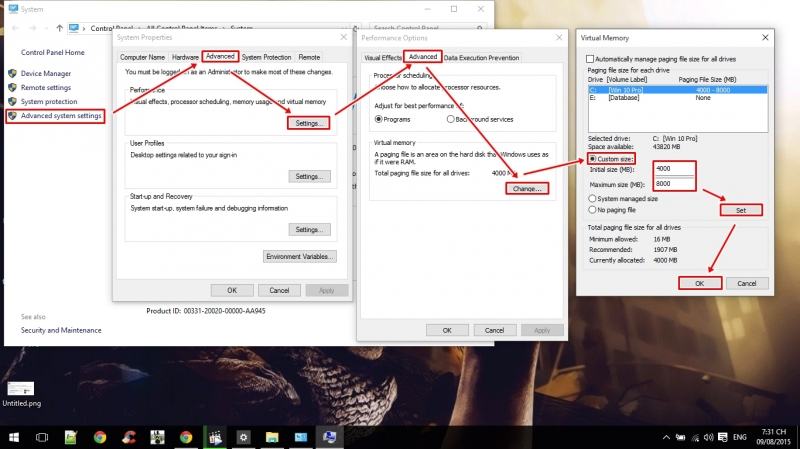
First, right-click on the Computer icon (This PC) and select Properties.
Next, select Advanced system settings, select Settings … and select Advanced, select Change …, then select Custom size.
Here you should set the Initial size (MB): 1/2 real RAM. Item Maximum size (MB): In real RAM.
Here, my RAM is 8GB, so I entered it. On the internet there are many instructions for setting with a ratio of: Real RAM and then 1.5 times of real RAM. However, in my opinion, if your real RAM is not too small, you should not abuse it to harm the hard drive as I said above.
After setup is complete, you need to reboot to see the changes.
Use the Troubleshooting feature
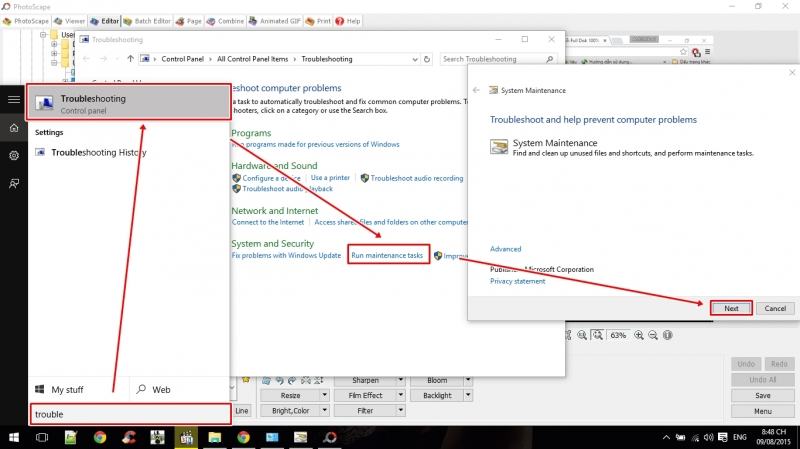
Troubleshoot problems automatically detect problems and can automatically fix problems. If it cannot be fixed, the program will issue a notice of problems and suggestions for fixing it.
Usually when wifi is limited we also use this feature, and most of it can be fixed, haha.
You go to Control Panel to go to Troubleshooting or you can find it by trouble as shown below. Next, select Maintenance tasks and keep Next, next to.
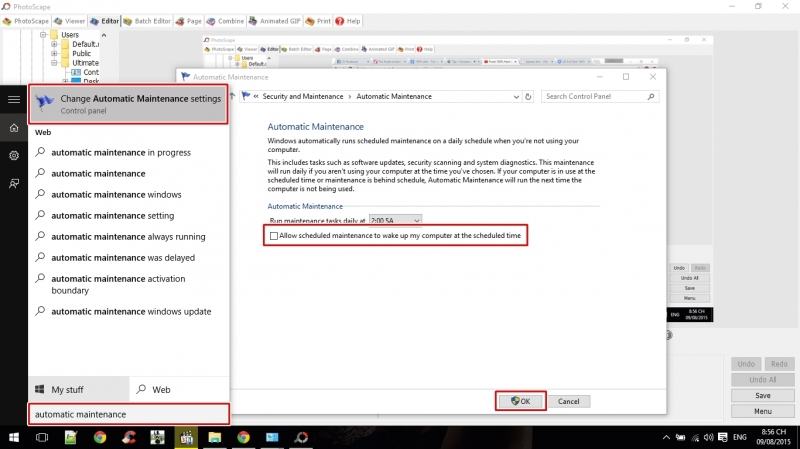
Turn off the Maintenance function
According to most online tutorials, this is also one of the causes of 100% disk error.
So you should also try to turn it off to see if the results are positive.
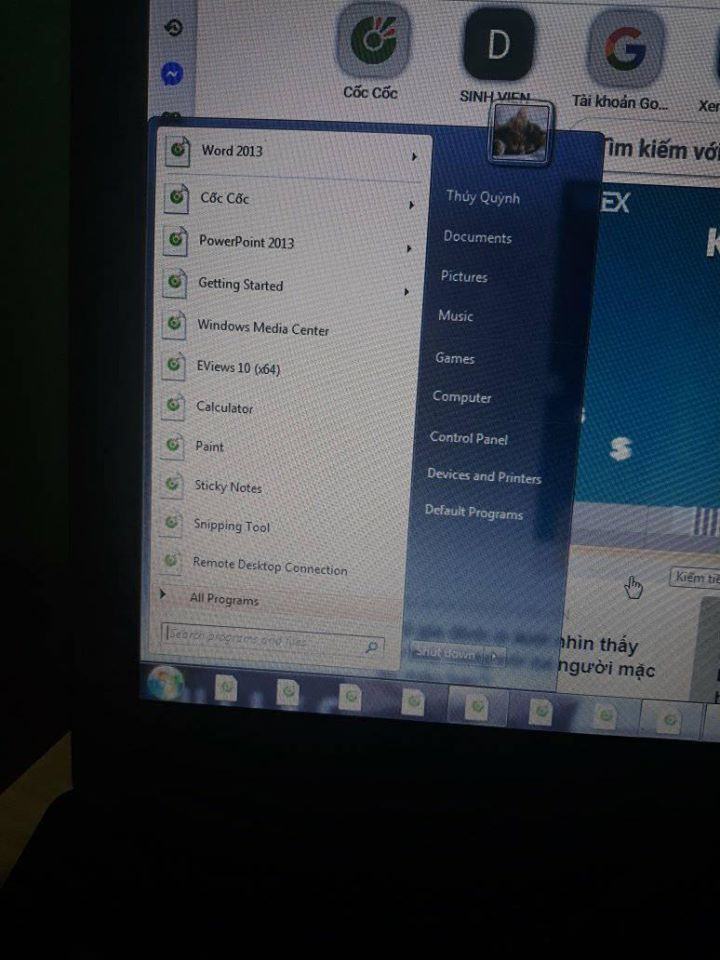
To turn off this feature, press Windows key + Q or you can right-click the Start icon (flag) and choose Search.
Then you type: automatic maintenance and choose like the following picture.
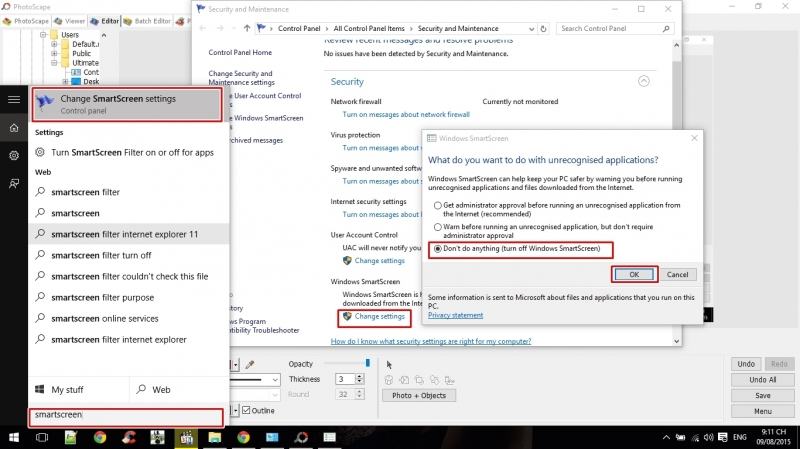
Turn off Smartscreen
SmartScreen is a new feature developed and integrated from Windows 8 onwards, it helps you avoid dangerous applications on the Internet, links that direct users to other phishing websites and prevent install software that is not properly certified by Microsoft. But if you already have a safe antivirus, this feature is not really necessary, to turn off this feature you can do the following:
Press Windows key + Q and search with the following keyword: smartscreen and do as shown below.
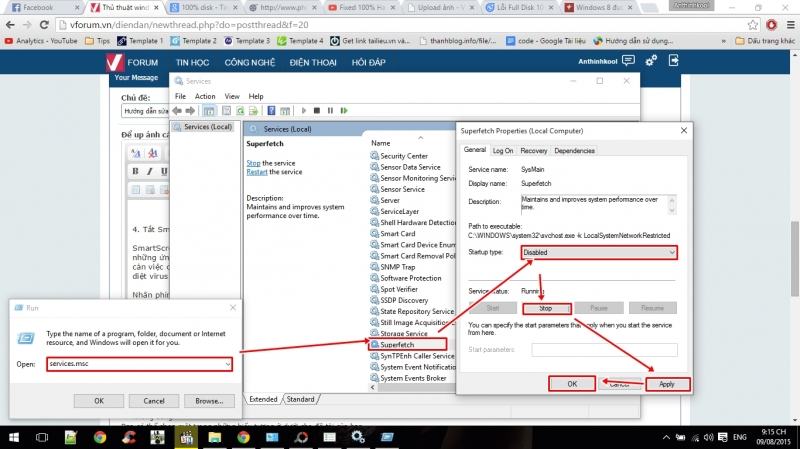
Turn off the Superfetch service
To turn off superfetch, press Windows + R to open the Command Prompt dialog box and type the following: services.msc and press enter.
Next you search for superfetch and double click, select as shown in the picture.
The above are some tips to help you fix 100% disk status, but nothing can be sure that you can completely fix it. So if you can not fix it, you should reinstall the operating system or use an SSD.