Fix “The current BIOS setting do not fully support the boot device” error in Windows 10.If you receive this error message: “Setup was unable to create a new system partition or locate an existing system partition” while installing Windows 7, 8/8.1, 10, then don’t miss the following article.
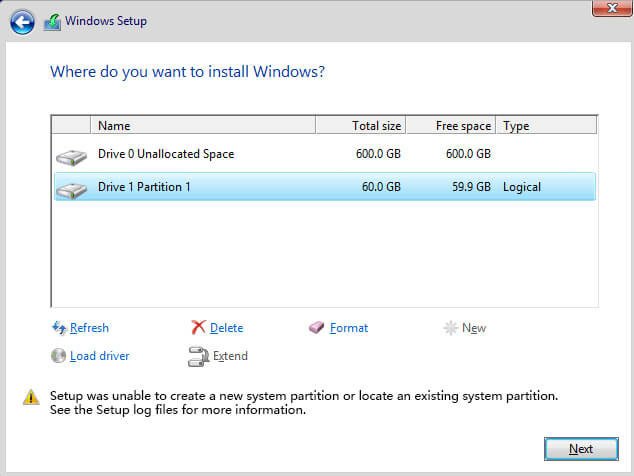
Today’s article will give you step-by-step instructions on how to fix this problem and start installing Windows 7, but the process on Windows 10/8/8.1 will be similar. Follow the steps provided below to fix this problem.
How to fix the “Setup was unable to create a new system partition or locate an existing system partition” error when installing Windows
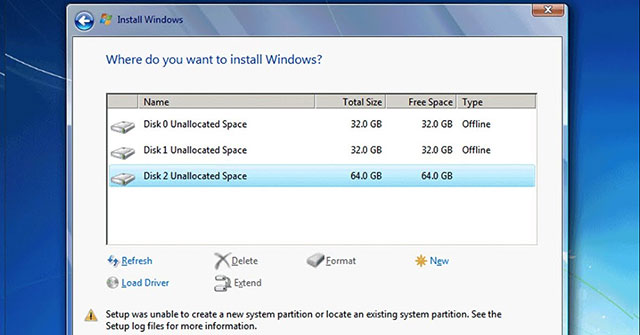
1. First, make sure that any external hard drives are unplugged from the computer. If you are installing windows via a bootable CD or USB, leave them as is.
2. Now, press Shift+F10 to open Command Prompt.
3. In the Command Prompt window, type “diskpart” and press Enter.

4. Then, type “list disk”. This step will list all the hard drives connected to this PC. For example, there is only one drive (you should also have only one drive). We will install Windows on this hard drive.
5. We need to select the hard drive by typing “select disk 0“. You can choose a different partition if you want.
6. Now type “clean” to wipe all data on the drive.
7. Once done, type “create partition primary size-10000”.
8. Now type “format fs=ntfs quick“.
9. Once done, type “assign” then press Enter key.
10. Then type “active” and press Enter.
11. Now, type “list volume” to list the partition or drive. It will show the partition you just created.
12. Now, we will copy the contents of the Windows boot CD drive to drive C.
13. Type Exit and then press Enter.
14. Go to the CD drive by typing “cd e:” and pressing Enter.
15. Now type “xcopy e:c:/e/h/k”, then press Enter. It starts copying the installation files from the CD drive to the C drive. It will take some time to copy.
16. Once done, type “exit” and press Enter. Now close all opened windows and then restart the computer once. After rebooting, the machine will start installing Windows.
17. Now you have the option to create a partition for the allocated space.
Once Windows is installed, you need to edit the boot loader. To remove this black screen from the boot process, follow the steps below.
1. To do that run Command Prompt with admin rights.
2. Type the command bcdedit and then press Enter.
3. Locate the content “Description” and “Identifier”.
4. Type “bcdedit /delete (74253dcc9-effasdrc50-3582tvple-5263tlpt-5223thpf)”, then press Enter.
5. Restart the computer. This time, you won’t get a black screen anymore.
With asus:
- Restart the kiosk. You should be brought to the “Current BIOS settings do not fully support the boot device” error screen
- Press OK, you should be brought to the main BIOS screen.
- Select SATA information. A popup screen should display, listing the drives connected to the computer. Please record what devices this list shows. Press the ‘X’ in the corner of this window.
- In the upper right hand corner, you should see an “Exit/Advanced Mode” button. Click on it, and enter Advanced mode.
- Select the “Boot” tab. Scroll down to and select the “CSM (Compatibility Support Module)” option.
- Once inside, please check to make sure the CSM settings are as follows.
- Launch CSM –> Enabled
- Boot Device Control –> UEFI and Legacy OPROM
- Boot from Network Devices –> Legacy OPROM only
- Boot from Storage Devices –> Legacy OPROM only
- Boot from PCI-E/PCI Expansion Devices –> Legacy OPROM only
- In the top right hand corner of the screen, press “Exit”
- Press “Save Changes and Reset”
If the “Current BIOS settings do not fully support the boot device” error shows up again
-
- Restart the kiosk. You should be brought to the “Current BIOS settings do not fully support the boot device” error screen
- Press OK, you should be brought to the main BIOS screen.
- In the bottom right corner, press the “Default (F5)” button.
- Press yes to confirm “Load Optimized Defaults”
- In the top right hand corner of the screen, press “Exit”
- Press “Save Changes and Reset”
- Confirm that the clock is set to the correct time
- In the upper right hand corner, you should see an “Exit/Advanced Mode” button. Click on it, and enter Advanced mode.
- Select the “Advanced” tab.
- Select the “APM” option, and set the “Restore AC Power Loss” option to “Power On”
- In the top right hand corner of the screen, press “Exit”
- Press “Save Changes and Reset”
- Ensure that the kiosk restarts correctly.


