Fixes you need permission to perform this action you need permission to perform this action windows 7, you need permission to perform this action windows 10, you need permission to perform this action mac, you need permission to perform this action but i am administrator , you need permission to perform this action delete folder, you need permission to perform this action copy file, you need permission to perform this action delete file The first and also the simplest way to fix the error you need permission to perform this action that is you proceed to check the account you are using in Windows. You need to check all three of the following account types:
- Administrator
- Standard
- Guest.
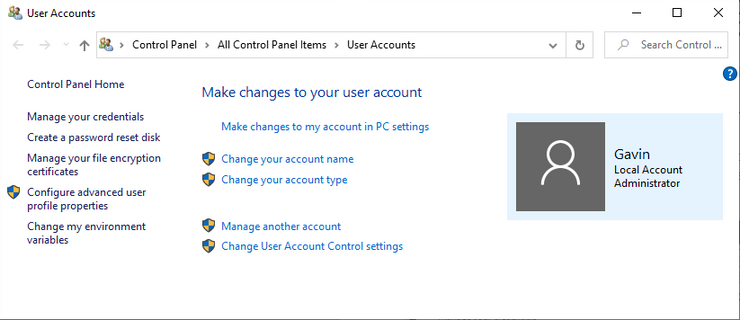
To be able to check each account type, go to Control Panel -> User Accounts. At this time, information about account types will appear in detail.
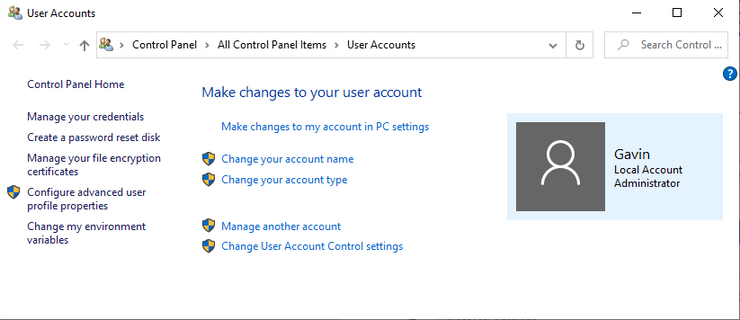
Table of Contents
Take full permission to use the desired data or folder
The second way to handle errors you need permission to perform this action that annoys users of this computer is that you give full permission to use the desired data or folder.
Step 1: You just need to click right-click on the folder or data you want to take over and select Properties.
Step 2: Next you change to Security tab and finally Advanced.
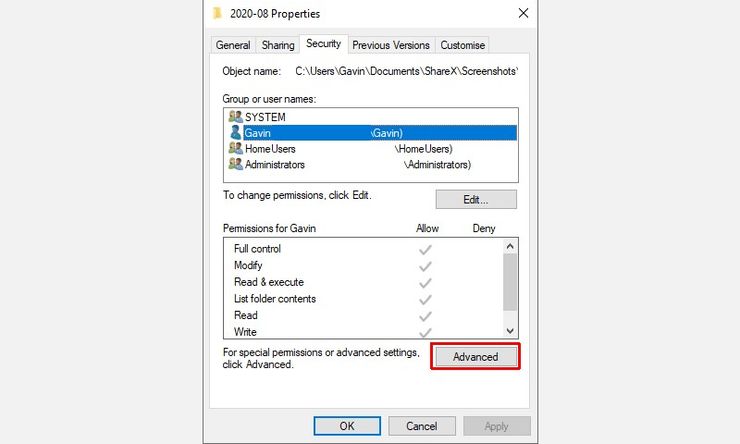
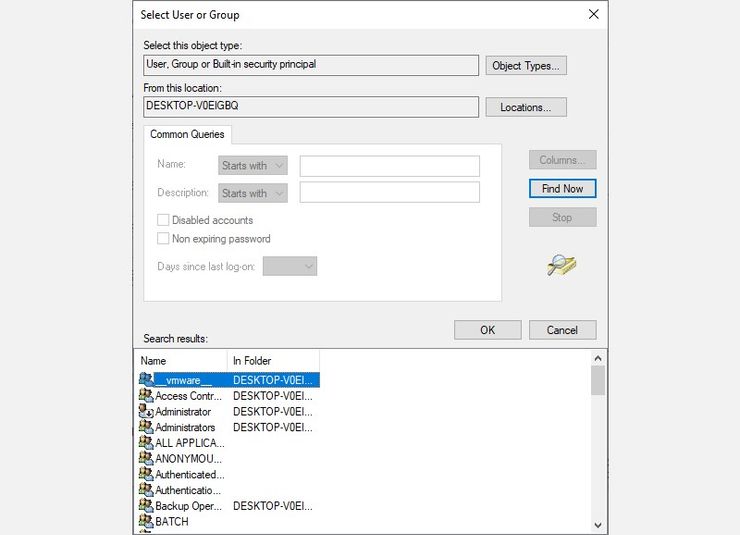
Step 3: When the Advanced Security Settings window appears, select Change to open the Select User or Group window.
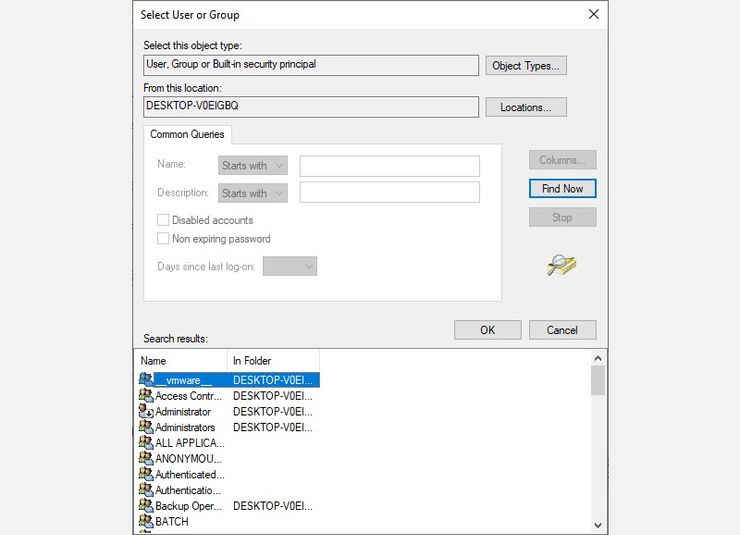
Step 4: Then you click Find Now to open the list of accounts being used on the system and find your account and then press OK.
Step 5: You go back to the Advanced Security Settings window, check the box Replace owner on subcontainers and objects and then click Apply.
Add an account to the Administrators group in Windows
Adding an account to the administrator group is also a way to fix the error you need permission to perform this action. However, if you are using Standard or Guest , this solution won’t really work. And the steps to do it include:
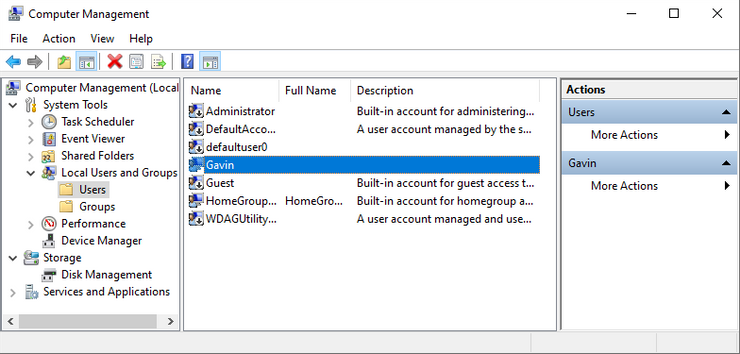
Step 1: Press the Windows + X key combination and select Computer Management.
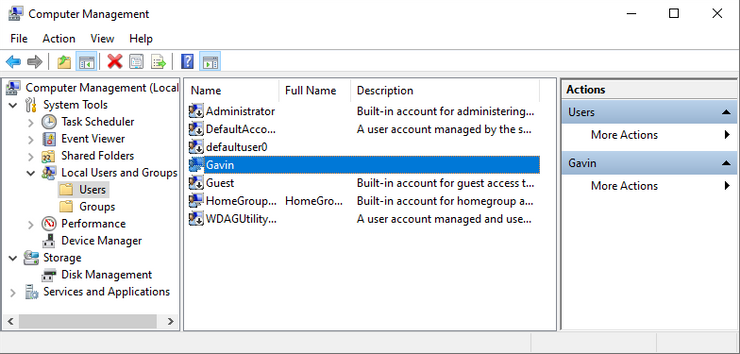
Step 2: Go to Local Users and Groups, then select Users to see a list of existing accounts.
Step 3: Right click on your account and select Properties. Next you choose Member Of.
Step 4: Click Add and enter Administrators in the Enter the object names to select section.
Step 5: Select Check Names and click OK.
Step 6: Reboot the computer for the change to take effect.
Boot into Safe mode
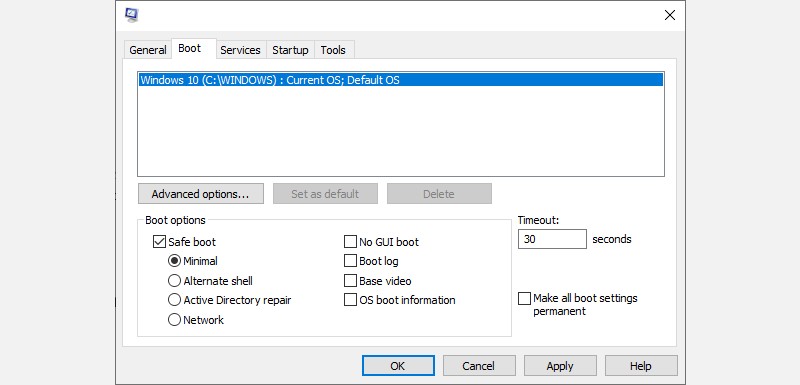
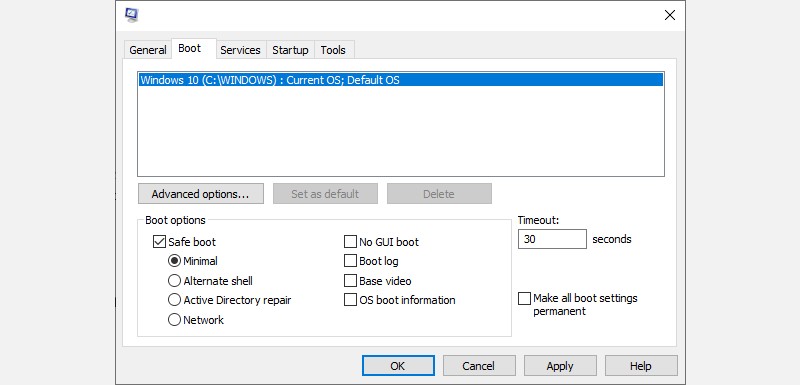
The fourth way to be able to handle the situation you need permission to perform this action is that you proceed to start Safe mode. To enter this mode, you press the key combination Windows + R. Then type msconfig and press Enter. Next, in the Boot tab, select Safe boot in the Boot options and click Apply. Finally you restart the computer and try to access the data that you were previously prevented.
Run command line SFC and CHKDSK
The final way for you to proceed fix the error you need permission to perform this action is to run the SFC and CHKDSK command lines. In which, Windows System File Check (SFC) and Check Disk (CHKDSK) are two available tools that are directly integrated into Windows. It allows you to check to see if there is something wrong with the existing data on the drive.
Hopefully with the detailed sharing above, you were able to fix the error you need permission to perform this action quickly. Surely with these 5 solutions, you will not need to worry every time the situation you need permission to perform this action appears.
Windows always requires the user to confirm the permissions granted for each executed action/command or access to the operating system’s data because such access can damage the system as a whole. . Furthermore, if the Windows account you use is not provided with the required permissions, you will not be able to access the data you need. For that reason, the error message “You Need Permission to Perform this Action” will appear.
There are 5 ways to fix this and they are all pretty simple.
Check the type of Windows account in use
One of the simplest ways to fix the above message error is to check the account you are using in Windows. There are 3 main account types: Administrator, Standard, Guest. Corresponding to each account type are different control and use rights:
Administrator: Control the entire system of Windows.
Standard: The user can use the computer and access programs, media data, etc., but cannot install new programs or remove existing programs. Standard accounts are usually limited to the permissions granted based on the settings of the Administrator account.
Guest: Accounts of this type can only use the permissions granted to a certain extent.
If you are using a Standard or Guest account, you will need some permissions to be able to access the desired data and folders.
See also: Turn off Windows Defender completely on Windows 10
To check the account type, go to Control Panel -> User Accounts. Your account details will be displayed here.
Take full permission to use the desired data or folder
An account of type Administrator can hijack other accounts. Occasionally the data permissions will fail or another user changes the data access permission and denies the usage permission of the account you are using.
Right-click on the folder or data you want to take over and select Properties, then switch to the Security tab and finally Advanced.
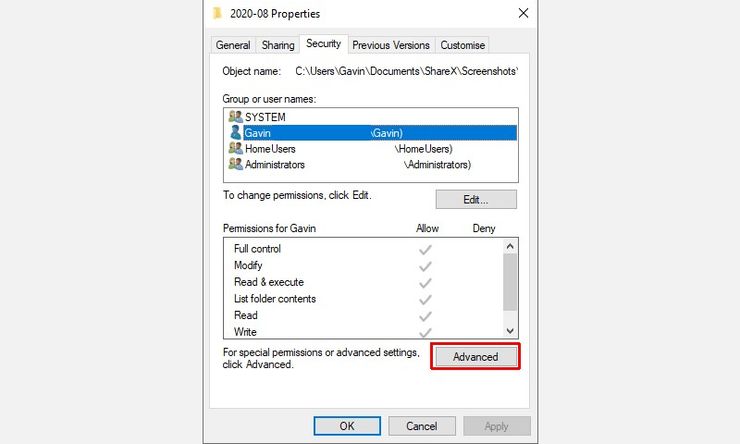
When the Advanced Security Settings window appears, select Change to open the Select User or Group window. Continue to select Find Now to open the list of accounts being used on the system, then navigate to your account and click OK.
Back in the Advanced Security Settings window, check the Replace owner on subcontainers and objects box and then click Apply.
After having full permission to use the data or folder, the error messages will no longer appear.
Add an account to the Administrators group in Windows
You can manually add your own account to the Administrators group of accounts in Windows, but this won’t work if you’re using Standard or Guest.
Follow the steps below to add an Administrator account:
Press Windows + X key combination and select Computer Management.
Go to Local Users and Groups, then open Users to see a list of existing accounts.
Right-click your account and select Properties, then select Member Of.
Click Add and enter Administrators in the Enter the object names to select field.
Select Check Names and click OK.
Please restart your computer for the change to take effect.
Khởi động chế độ Safe
Để kiểm tra xem thông báo lỗi có thật sự là lỗi hay không, bạn có thể khởi động chế độ Safe và thử truy cập vào dữ liệu bị ngăn cản trước đó.
Cách đơn giản nhất để vào chế độ Safe này là bấm phím Windows + R, nhập msconfig và bấm Enter. Ở tab Boot, chọn Safe boot trong mục Boot options. Bấm Apply và khởi động lại máy tính.
Khi hệ thống của bạn được khởi động lại, hãy thử truy cập vào dữ liệu mà bạn bị ngăn cản trước đó.
Trước khi quay lại Windows, bạn hãy mở msconfig và bỏ chọn mục Safe boot rồi bấm Apply.
Chạy dòng lệnh SFC và CHKDSK
Windows System File Check (SFC) và Check Disk (CHKDSK) là 2 công cụ có sẵn được tích hợp trực tiếp vào Windows để kiểm tra xem liệu có lỗi gì xảy ra với các dữ liệu hiện có trên ổ đĩa hay không.
Để sử dụng SFC thì chúng ta hãy làm như sau:
- Gõ Command Prompt trong thanh tìm kiếm của Start menu và khởi chạy nó bằng cách click chuột phải vào đó và chọn Run as administrator.
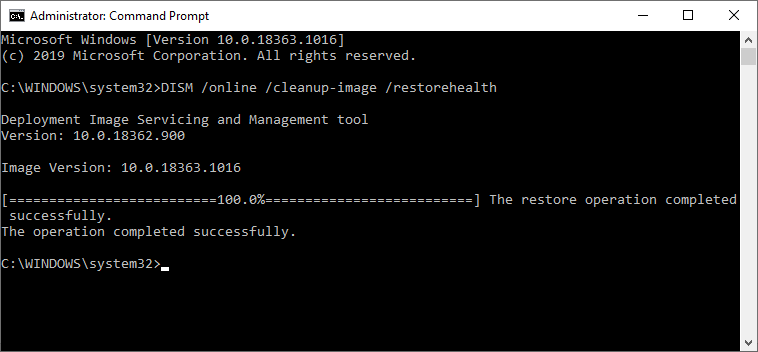
- Gõ dòng lệnh sau và nhập vào Command Prompt: DISM /online /cleanup-image /restorehealth.
- Chờ Command Prompt thực hiện xong dòng lệnh.
- Sau khi chạy xong, gõ tiếp sfc /scannow và bấm Enter.
CHKDSK khác với SFC ở chỗ là nó sẽ quét toàn bộ ổ cứng của bạn để tìm lỗi chứ không phải chỉ là một số loại dữ liệu nhất định. Các bước thực hiện tương tự như trên: gọi Command Prompt bằng quyền Admin và gõ chkdsk/r rồi bấm Enter. Windows sẽ quét ổ cứng để tìm lỗi và nếu phát hiện ra lỗi nào thì nó cũng sẽ tự động sửa ngay các lỗi đó.
