Table of Contents
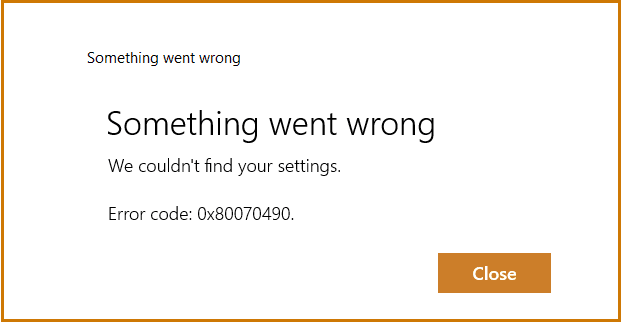
Error 0x80070490 email: How to fix
1] Reset Mail app
Running option can fix error code 0x80070490 so follow instructions ahead –
- Press – Windows + I .
- Click – Apps .
- Move to the right of the next settings page.
- Scroll down to find Mail and Calendar and select the same.
- Click – Advanced options .
- Reach to Reset segment and then click – Reset .
- To confirm your action, press again – Reset .
- Restart your PC.
2]Check Microsoft Store for updates
The Mail app receives updates via the Microsoft Store to fix existing bugs and add new features. Therefore, if you find an error, you should check if there are any pending Microsoft Store app updates to fix the problem.
- Press – Windows + S .
- In the search bar, type – store .
- Type – Enter .
- When the Microsoft Store appears, click the three-dotted icon from the top right corner.
- Select – Downloads and updates .
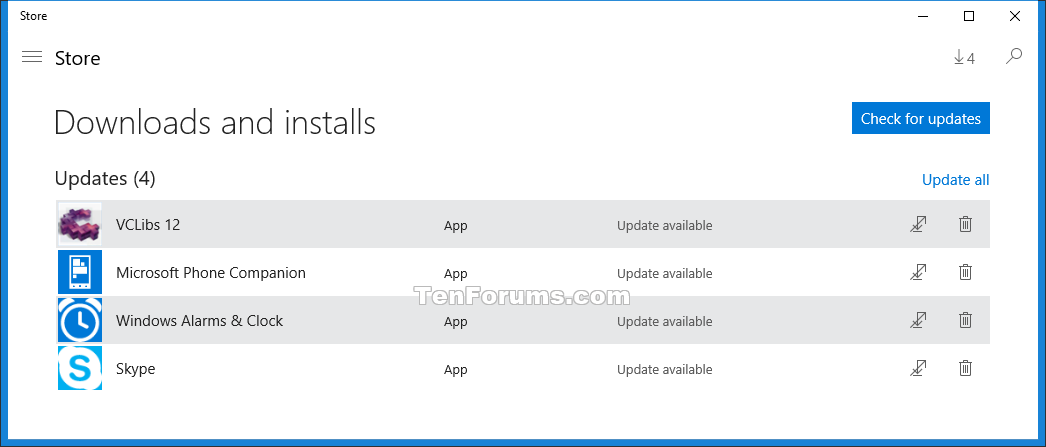
- If there are any updates to the Mail and Calendar apps, click the download button that appears next to it.
- After installing the update, restart your Windows device and check if the Mail app error 0x80070490 persists.
3] Reinstall the Mail app
Error code 0x80070490 can also occur when the Mail app is down. Reinstalling the Windows 10 email client is a good idea to fix the error as this method starts the new application without any conflicts and glitches.
- Click the search icon on the taskbar.
- Type in – PowerShell .
- Press – Ctrl + Shift + Enter .
- To enable User Account Control, click – Yes .
- When PowerShell becomes available, insert the following line there and press Enter –
Get-AppxPackage Microsoft.windowscommunicationsapps | Remove-AppxPackage

- Close PowerShell.
- Open the Microsoft Store and download Mail and Calendar again. You can also visit the app’s official website for instant download.
4]Enable the default administrator account
If the admin account is not active this is one possible reason why the error code is showing. So, before running a tool or using an alternative, activate the administrator account. You can get help from this post on this – Windows 10 Tips – Enable Administrator, Guest Account. Furthermore, follow this method –
- Press – Windows .
- Type – cmd.exe .
- Option – Run as administrator .
- To agree to User Account Control, click – Yes .
- At elevated Command Prompt, insert the following and press Enter –
net user administrator /active:yes

- Close Command Prompt and then restart Windows 10.
- Log in to the Administrator account.
- Try setting up your Gmail account again. Hopefully the Mail app error 0x80070490 won’t grow any more.
5]Gives full control over all apps
Sometimes the lack of ownership for the necessary folders and files can also be caused by mail client errors. Giving full control to all apps can help you get rid of this mail client error code.
- Press – Windows + E .
- Navigate to – C:Users .
- Right click on your PC name and select – Properties .
- Switch to Security .
- Click – Advanced .
- From the next wizard, click – Add .

- Click the link – Select a principal .
- Click – Advanced .
- Type – Find now .
- When the list shows up, select ALL APPLICATION PACKAGES from there.
- Click – OK .

- Check the Full control preset box and then click – OK .

- If a pop-up appears describing an error that has occurred, click – Continue .
- Check the Replace all child object permission entries with inheritable permission entries from this object checkbox .
- Click Apply and then OK .
- Again click OK to close the properties wizard.
6]Restart the credential manager service
Credential manager service has helped some users to solve mail app problems in Windows 10. So set it to automatic and start the service as these actions can also help you resolve the error.
- Click the Start button .
- Type in – Services.msc .
- Type – Enter .
- Search – Credential Manager Service .
- Right click on the same and select – Stop .
- Restart the PC.
- When the system powers on, open the Services window again.
- Double click – Credential Manager Service .
- Set the boot type to Automatic .
- Click – Start .

- Restart the machine for the change to take effect.
Let us know in the comments section below if this post helped you fix the error in Windows 11.

